Everyone has to deal with failed resin 3D prints, irrespective of the printer model or brand. Unlike failed 3D FDM or FFF filament prints, you can’t get rid of partially or fully cured resin quickly. So, how to get rid of failed resin 3D prints?
You can get rid of failed resin 3D prints by draining the tank, filtering the liquid, and scraping away fully or partially cured debris from the FEP. You can also use the vat or tank cleaning function or cure to release failed resin 3D prints. Then, throw them away in the trash.
Each method has its merits, but you must choose a solution based on the challenges in a given situation and what is convenient for your 3D printer setup. Nonetheless, you should dispose of resin safely. Read on to explore every way you can get rid of failed resin 3D prints.
How To Get Rid of Failed Resin 3D Prints by Filtering the Liquid
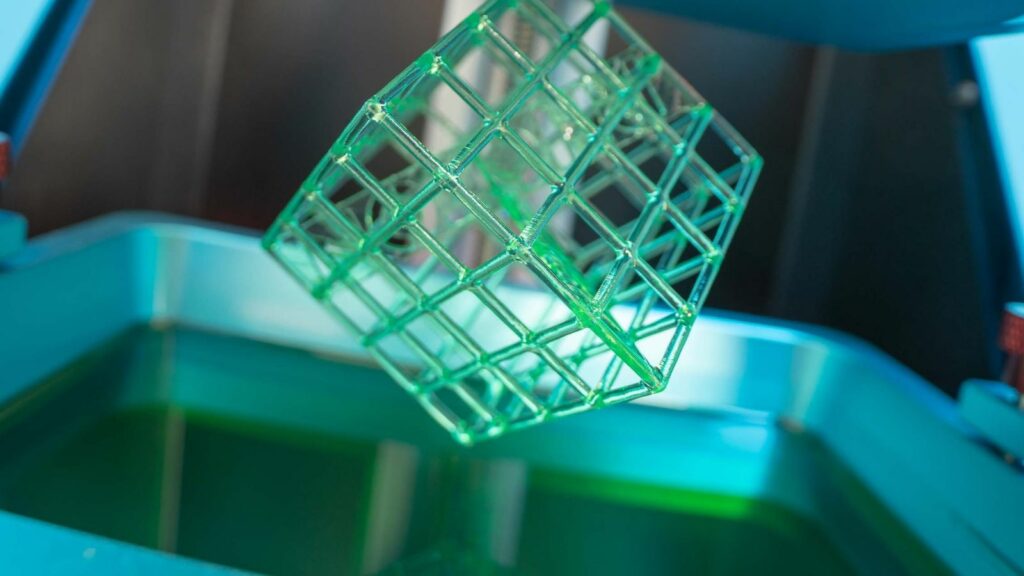
Failed resin 3D prints often end up in the vat or tank. Even if a model is attached to the build plate, the partially cured resin from the failed portions will settle on the FEP film or sheet.
Some cured resin may stick to the FEP, and you may find a bit of floating debris in a few scenarios.
All manufacturers recommend cleaning the tank to remove failed resin 3D prints before starting a new session. This rule applies to all three prevalent types of 3D resin printers:
- DLP (Digital Light Processing).
- LCD (Liquid Crystal Display).
- SLA (Stereolithography).
The most common method of removing failed resin 3D prints from the FEP and vat requires draining the tank. This process isn’t the most convenient, but it is not challenging.
Here are the steps to drain the tank or vat and strain the liquid resin into an opaque container:
- Wear nitrile gloves, a mask, and protective eyewear or safety glasses.
- Disconnect the 3D printer from its power source or turn off the switch.
- Get an oil or paint filter with 190 microns (0.19 mm) mesh size, if not finer.
- Keep an opaque plastic container ready, or use the resin’s original bottle.
- Drain and strain the tank’s resin into the filter and opaque container.
- Allow all the liquid to drip before working on the partially cured resin.
- Hold the 3D printer’s plastic spatula or a silicone scraper with round corners at a shallow angle and nudge the stuck resin.
- Gently glide the flexible edge of the spatula and scrape the failed print off the FEP.
- Don’t force the spatula onto any part of the tank or the FEP sheet; don’t poke or push the rigid resin on the FEP film to scrape it off.
- Only try to dislodge the partially cured resin so that it snaps away.
- Use isopropyl alcohol (IPA) to clean the FEP sheet and resin tank – 90% concentrated IPA will dissolve any leftover resin.
Sometimes, this method isn’t feasible, especially if you don’t want to drain the tank.
Scraping to remove failed resin 3D prints is also a tricky proposition. FEP films or sheets aren’t particularly tough. Even if you don’t break it, scraping may cause dents and scratches.
Furthermore, some partially or extensively cured but failed resin 3D prints may not always have an appropriate shape or size for using a plastic or silicone spatula to scrape the stuff off.
How To Get Rid of Failed Resin Prints Without Emptying the Tank
Suppose you find bits and pieces of failed resin 3D prints floating in the tank, or the debris is yet to settle on the FEP.
In that case, you can use a fine-tooth comb and filter to eliminate the floating resin print. Emptying the tank isn’t necessary for such circumstances.
However, you should check to ensure there’s no more floating debris or cured resin on the FEP sheet. If you find some, there are two ways to get rid of such resin without emptying the vat.
1. Use the Vat or Tank Cleaning Function in Your Resin 3D Printer
Not all brands of 3D printers have a tank cleaning feature, so you must check your printer’s specs or manual to see if it’s self-cleaning.
How To Clean the Tank on an Elegoo Mars 3D Printer
Consider the example of the Elegoo Mars 3D printers. If you have an Elegoo Mars 2 or 3, check the options in the Tool section. One of the functions in the Tool section is Tank Clean.
Before running the cleaning cycle, drop an old support structure or another failed print into the vat. This failed model or a successful support structure will act as a tool to help you to peel off the entire layer.
Once you select this function, the printer will ask you to set the exposure time. The default will likely be 45 seconds.
Depending on the resin type, you can increase or reduce the exposure time, which will dictate how fast the material will cure when exposed to UV light.
When you select the Tank Cleaning function, the 3D printer will emit UV light to cure only a thin layer of resin at the bottom.
After running this cycle, you will have a sheet of cured resin covering the entire FEP film. This sheet will include all of the clumps of partially-cured resin.
Then, you can simply take this layer out and get rid of all the smaller chunks.
I think all the latest Elegoo Pro 3D printers have this Tank Cleaning feature, although the earliest Elegoo printers may not have this function.
Here’s a video to help you can find the Tank Cleaning function on an Elegoo Mars:
How To Clean The Tank on a Phrozen 3D Printer
Like Elegoo, Phrozen also has a Vat Cleaning function.
Here’s how you can use the Vat Cleaning function of the Sonic Mighty 4K and other Phrozen 3D printers:
- Access the touch panel and tap on Tools to get the Vat Cleaning option.
- Select the Vat Cleaning function and toggle the exposure time, as required.
- The recommended exposure time is around 30 to 60 seconds for most resin.
- Tap on Next and wait for the Phrozen Sonic 3D printer to cure a thin layer.
- The cured resin layer will span the entire FEP film at the tank’s base.
- You can extract this layer with all the other failed prints stuck to the cured resin.
2. Use Detection and Full-Screen Exposure To Remove Failed Resin 3D Prints
The exposure function is the second method of removing failed resin 3D prints without emptying the tank.
Detection and full exposure functions are available on many printers, such as the Anycubic Photon Mono 4K.
The full-screen exposure feature of Anycubic isn’t called Tank or Vat Cleaning, but the effect is the same. Again, you can use a discarded model, print, or support before you start the process to peel the layer off the FEP.
The steps to complete this process may vary from printer to printer. However, the basic process is the same for any model:
- Go to the Settings or Tools menu of your 3D printer.
- Select full-screen exposure for the desired period.
- Anycubic recommends ~20 seconds of exposure.
- Let the layer cure and form before you pull it off.
- Allow all the excess liquid resin to drip into the tank.
- Don’t use a spatula to scrape off this type of layer.
3. Create a One-Layer Model To Collect Partially Cured Resin
If your 3D printer doesn’t have the full-screen exposure feature, you can design a dummy model to print only one layer on the FEP film. Don’t use the build plate.
The dummy design must have the exact dimensions of your FEP plate so that you can cover the entire sheet in one go.
Go for the standard layer height and print a thin layer to get all the stuck resin off the FEP, just like the full-screen exposure and tank cleaning functions.
Using a Tank or Vat Cleaning feature and the full-screen exposure function will waste quite a bit of resin, which may not be desirable for many users.
If you have an expensive or special type of resin, you may not want to waste it on getting rid of failed 3D prints from the FEP, tank, or vat.
In such cases, the sole option is to empty the tank to remove the cured and stuck resin.
How To Get Rid of Failed Resin 3D Prints by Curing Them
You can get rid of failed resin 3D prints after emptying the tank or vat without scraping.
The solution is to cure the stuck resin so you can snap it away from the printer with a bit of gentle flexing instead of a spatula.
Here are the steps to cure failed resin 3D prints before you can dislodge them from the FEP:
- Drain the tank following the filtering technique at the top of this article.
- Pour highly concentrated isopropyl alcohol (IPA) into the tank.
- Dissolve any partially cured and excess resin from the debris.
- Drain the IPA into a container, and don’t dispose of it just yet.
- Get a UV light source to cure the failed resin print on the FEP.
- You may use a nail curing lamp or a UV cure station for resin.
- Prioritize curing the failed resin print in contact with the FEP.
- Hold the tank and gently glide your fingers under the FEP.
- Softly roll or rub your fingers under the failed resin prints, which should snap away quickly.
You can clean the tank again with some isopropyl alcohol before replenishing the vat with resin to resume your printing session.
Here’s a YouTube video that more or less shows the process I have just described:
How To Dispose of Cured and Uncured Failed Resin 3D Prints
You should never dispose of uncured failed resin 3D prints unless you have a chemical waste stream. Since most people do not have access to direct disposal of their resin prints, the best thing you can do is cure your resin before tossing it out.
Disposing of uncured resin is very bad for the environment, as it can poison water sources and kill plants. So, curing is always best.
Once you cure your failed resin 3D prints, you can get rid of them by tossing them in the garbage.
Resin 3D prints are not recyclable, so don’t put them in your recycling bins under any circumstances. Allowing resin to move to a recycling treatment center can taint the other recycled materials, wasting a whole batch of plastics.
Ways To Reuse Failed Resin 3D Prints
If you are worried about producing waste from your resin 3D printing adventures, there are still a few ways to use your resin 3D prints instead of getting rid of them.
As I mentioned above, you can use resin 3D prints as a tool to clean out your vat, but there are several other ways to make use of them:
- Grind failed resin prints up and mix them with paint, grout, glue, plaster, or any other media to add some color and texture to your other projects.
- Use failed prints and supports as filler for larger, hollow 3D models.
- Reuse resin supports and prints as art materials for dioramas or printmaking.
- Save your one-layer prints from the full-screen exposure tank cleaning method. Then, seal each cured resin sheet together to make a colorful chunk of layered rainbow resin. This block of material is perfect for making jewelry, tabletops, trays, plant stands, picture frames, or anything else you can imagine. You can also drill some holes in it or carve it.
Final Thoughts
The primary difference among the methods I have shared in this guide is draining the tank or not emptying the vat. I suggest using the gentlest ways to eliminate failed resin 3D prints from an FEP film. Tank or vat cleaning and full-screen exposure are effective even though they may waste a bit of your resin.
- Written by:
- Ben
- Last updated:
- 11/23/2023
About Ben
I started 3D printing since 2013 and have learned a lot since then. Because of this I want to share my knowledge of what I have learned in the past years with the community. Currently I own 2 Bambulab X1 Carbon, Prusa SL1S and a Prusa MK3S+. Hope you learn something from my blog after my years of experience in 3D printing.