You should always cure your resin 3D prints. If you don’t, you shouldn’t handle the object since it’s toxic. However, other downsides make it harder to finish the project as well.
When you don’t cure resin prints, they remain soft, leaving them in a fragile state. They won’t be suitable for painting, either. You should always cure your resin prints if you want your work to last. Doing so makes them stronger and more stable.
There are plenty of reasons to cure your resin prints permanently. I’ll be covering everything on why you should let them cure in this article. If you want to learn about what can happen to your uncured prints, make sure to keep reading!
Consequences of Not Curing Resin Prints
Curing is an essential step you should do every time you decide to work with resin. Here’s what could happen if you don’t cure your resin prints:
Prints Will Be Soft, Sticky, and Unstable
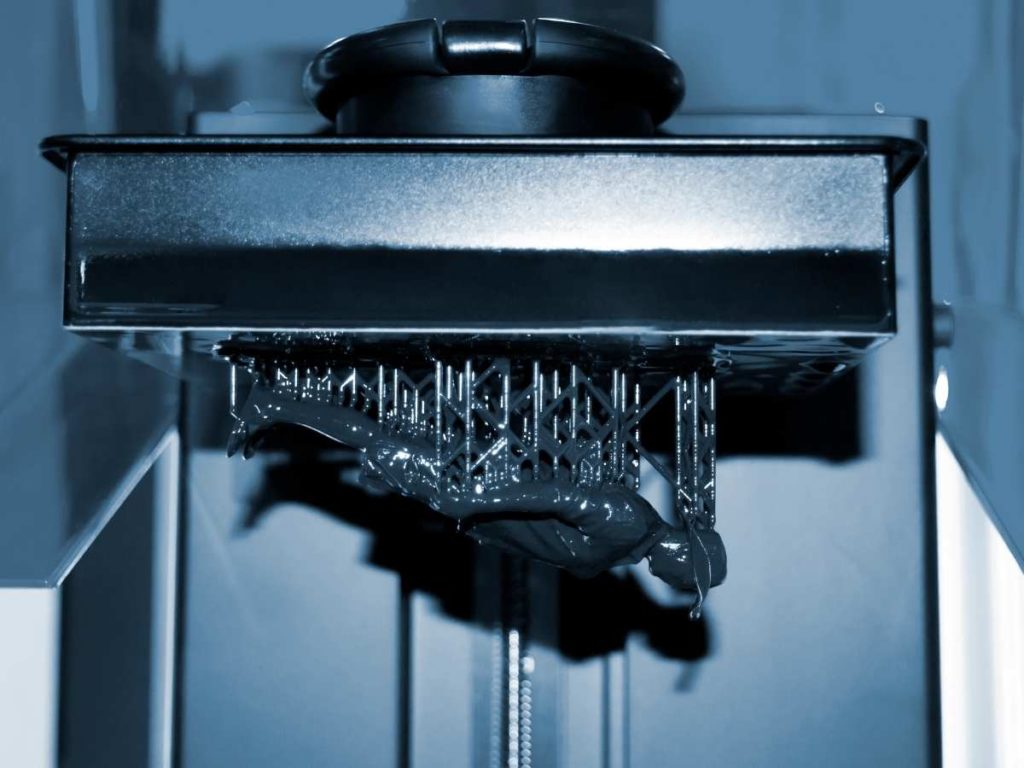
Resin comes out of the printer as a liquid. If you skip the curing process, your work won’t have time to harden, which can leave it sticky. It also won’t have the strength to stay together, making it unstable.
Prints Won’t Form Properly
The UV exposure also makes the resin layers bond together, forming a single structure. If you skip curing, your piece won’t form correctly and will stay in several separate layers- instead of one solid piece.
Prints Can’t Be Finished
If you need to sand the object down, you won’t be able to until you’ve gone through the curing process. The piece won’t be strong enough to handle sanding until it’s fully cured and hard. Otherwise, you’ll destroy all of your hard work.
Overall, curing your work gives it the structure it needs for sanding, painting, and being handled in other ways. While it does take a while, curing gives your piece a finished and more professional look.
Uncured Resin Is Toxic
You must know that uncured resin is toxic! You won’t want to handle it directly and should always take safety precautions. Not wearing gloves can irritate your skin, so it’s essential to wash your hands afterward.
All resin has different toxicity levels depending on its type and brand. You can find a Material Safety Data Sheet with your order, and all brands should be able to provide them if you need to request one.
3D printed resin isn’t toxic anymore after curing because it hardens the entire way through the object. This state makes it impossible for chemicals to leach out of the object onto your skin, making it safe to handle with your bare hands.
Overall, you must cure your resin to remove the toxicity from it. Resin is very safe to handle after you have fully cured it.
How To Safely Handle Resin
If you’re handling 3D printed resin, be sure always to do so safely. Once you’ve cured it, you won’t need to be as cautious with how you work with it.
Here are some tips for how to handle uncured resin safely:
- Wear safety goggles
- Wear gloves
- Always work in a well-ventilated room
- Don’t wear open-toed footwear
- Throw resin out in a bin, not down the drain
- Wear eye protection when using UV lamps
It’s important to ensure that anybody using your 3D printer follows the same precautions. Consider setting up reminders and having discussions with them about how to use the machine properly. It’s well worth it!
How To Efficiently Cure Resin 3D Prints

Now that you know how important it is to cure your 3D resin prints permanently, you’ll want to know the best method to get the job done. Luckily it only takes three steps, as follows:
- Clean the print with isopropyl alcohol. You must always clean the project before you begin to cure it. Isopropyl alcohol is perfect for removing any uncured resin, which is still toxic. After cleaning it, the project should no longer be sticky, making it much easier to handle.
- Remove the supports.
- Cure with any source of UV. The UV light source you use will impact how long it takes to cure the project entirely. For example, you can use natural sunlight, but it’ll take a lot longer than using a dedicated UV lamp.
If you’re looking for a high-quality UV lamp on a budget, I recommend the Comgrow UV Resin Curing Light (available on Amazon.com). The lamp includes six powerful UV LEDs, which quickly cure your prints. Plus, the rotating table helps you get an even cure across your entire object.
Avoid Over-Curing the Print
While you want to make sure you cure the resin print, you also don’t want to over-cure it. If you do, the resin can become extremely brittle, and pieces will snap off. Plus, it becomes porous, and areas can separate from each other. Finally, the project can warp, leaving you with an unusable object.
You should check how long the manufacturer recommends to cure their resin. On average, it should only take two to five minutes for a piece to cure fully. However, larger prints can take several hours.
You’ll also want to rotate your print often while it cures. If you don’t, one side of it is likely to become over-cured, while the other side remains sticky and wet. Some curing tables rotate automatically, so be sure to make use of this feature if you have it.
In short, while it’s important to cure your resin prints, over-curing them can do a lot of damage. You’ll need to find a nice balance between the two to get the best results for your figures.
Final Thoughts
In short, curing is an essential step in finishing your resin 3D prints. If you skip it, your work won’t fully form into a single piece, making it likely to break. Plus, you won’t be able to sand it for a finished appearance.
You should consider curing as one of the most critical steps in the printing process when working with resin. This process also changes the material from toxic to non-toxic, making it much safer to handle. Overall, it’s not a step that you want to skip!
- Written by:
- Ben
- Last updated:
- 11/22/2023
About Ben
I started 3D printing since 2013 and have learned a lot since then. Because of this I want to share my knowledge of what I have learned in the past years with the community. Currently I own 2 Bambulab X1 Carbon, Prusa SL1S and a Prusa MK3S+. Hope you learn something from my blog after my years of experience in 3D printing.