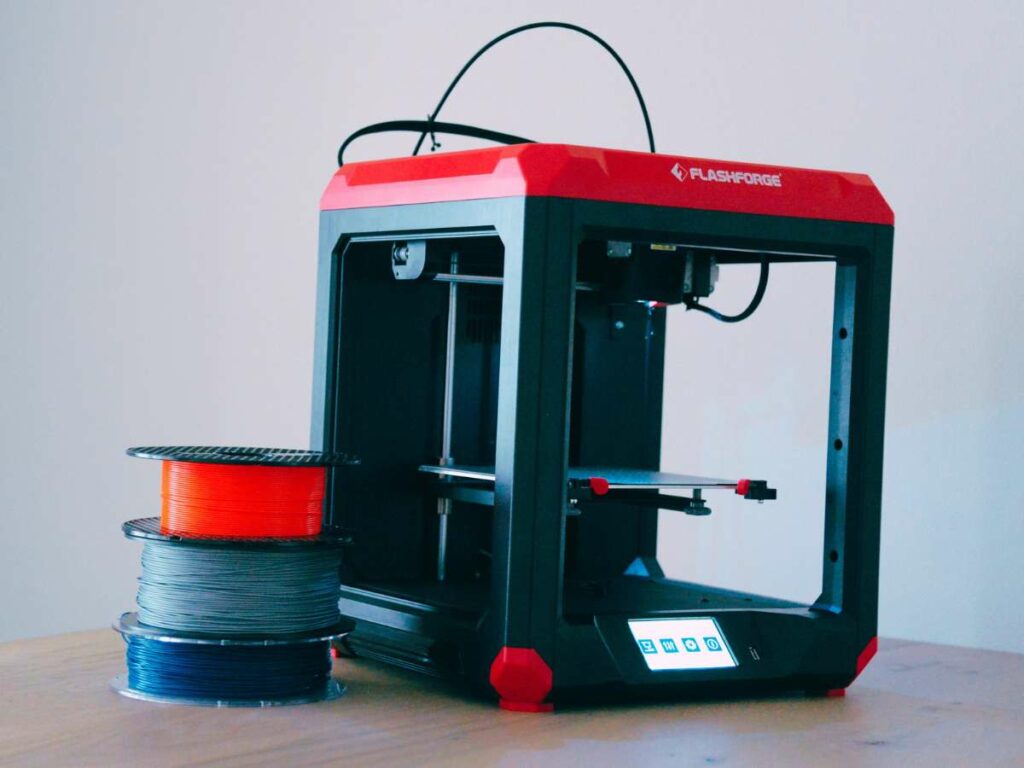
The Flashforge Finder 3 is a significant upgrade from its two predecessors, so technically, it isn’t exactly an entry-level 3D printer. However, its user-friendly interface and unique features make it popular among beginners and intermediate 3D printing hobbyists alike.
The Flashforge Finder 3 is a good beginner printer, but there are better options for those looking to upgrade from entry-level models. The Flashforge Finder 3 comes fully assembled at a moderate price and is more user-friendly than most beginner 3D printers.
| Overall Rating | 8.75/10 |
| Ease of Assembly | 9/10 |
| Ease of 3D Printing | 9/10 |
| Affordability | 8/10 |
| Sensors and Tech | 9/10 |
The Flashforge Finder 3 Pros and Cons
Before I talk about the primary features and specifications of the Finder 3, it is necessary to point out a caution upfront.
The Flashforge Finder 3 has a voltage switch at its base. This switch toggles between 115V and 230V. Don’t turn on this 3D printer with the wrong voltage selected. If you have a 110V to 120V circuit, set the switch to 115V. For 220V to 240V, switch to 230V before you turn on the power.
Pros of the Flashforge Finder 3
That said, here are the most important pros of the Flashforge Finder 3:
- Comes fully assembled. Beginners will find this turnkey setup more convenient than kits that require extensive assembly or installation.
- It is moderately priced. It’s not the cheapest entry-level 3D printer, but the Finder 3 is affordable compared to Prusa and Ultimaker printers of the same size and specs.
- Wide range of compatible filaments: The Finder 3 is compatible with PLA, ABS, TPU, PETG, and HIPS.
- Direct drive extruder. Bowden tubes can be excellent in some cases but are prone to filament-feeding issues. The direct drive eliminates any potential for clogs and jams.
- Larger build volume. The Finder 3 includes an extruder lamp and a larger build volume than the older Finders.
- Smart technology. The Finder 3 has a filament detection sensor, power loss recovery to resume printing and thermal protection.
- Two heated bed options. The printer has a glass bed and a flex PEI bed plate, both easily removable.
- Assisted bed leveling. The calibration and leveling process are not fully automated, but the steps are pretty simple for beginners.
- Connectivity options. You can communicate with this printer via USB cable, stick or thumb drive, PolarCloud, and Wi-Fi.
- Essentials in the box. The Finder 3 comes with spare parts and various tools to simplify troubleshooting.
- Quiet 3D printing. The Finder 3 generates only ~50 dB of noise due to its moving parts.
Cons of the Flashforge Finder 3

The Flashforge Finder 3 has a few shortcomings, but these drawbacks may be a deal-breaker for some buyers.
Here are the most significant disadvantages of the Finder 3:
- It only works better with Flashforge-branded filaments.
- The build space or volume could be more impressive.
- It costs more than Adventurers and older Finders.
Is the Flashforge Finder 3 a Good 3D Printer for Beginners?
The Flashforge Finder 3 is a good 3D printer for beginners since it comes pre-assembled, has some innovative and convenient features like a filament detector, and is average in terms of pricing.
So, let’s look at why you might want to choose a Flashforge Finder 3:
Why the Flashforge Finder 3 Might Be Worth It
The Flashforge Finder 3 is larger and smarter than the previous Finders. The upgrade isn’t just about the build volume – even the touchscreen is better and larger.
In addition, the Finder 3 is a much better printer than the Adventurer 3, which costs only a bit less, despite inferior specs.
Moderately Priced, Fully Assembled 3D Printer
The most compelling reason for beginners to consider the Flashforge Finder 3 is the combo of a fully assembled 3D printer and a moderate price.
The fully assembled Finder 3 comes in a large box with more than sufficient padding inside. You will be able to unpack and get started with this 3D printer in a few minutes if you already have a design sliced and ready.
Here’s all you need to do to get started with your Flashforge Finder 3:
- You need to remove all the clips, tags, wraps, and zip ties, many of which are on and within the build space.
- You must verify if the voltage switch is selected for the circuit you plug into.
- You will have to slide in the spool holder behind the Finder 3 and load some filament.
- Route the filament into the direct drive extruder and run an extrusion test to confirm.
- Use the assisted bed leveling feature to align the build plate perfectly.
None of these steps is even remotely as complicated as assembling an entire FDM 3D printer.
Also, if you want a fully assembled 3D printer, most brands or their models cost a lot more than a Finder 3. Of course, many expensive models also have a few better features.
Two Build Surfaces With a Heated Print Bed
The Flashforge Finder 3 has one build platform with an interchangeable print bed surface. These two build surfaces are:
- Glass, which is ideal for 3D prints that should desirably have a smooth base finish or foundation.
- PEI, which is a flexible polyetherimide plate that makes it easy to pop finished 3D models off the build surface.
The standard build surface already installed on the Flashforge Finder 3 is glass. You will find the PEI sheet atop the printer inside the box. This PEI sheet uses a magnetic plate with adhesive on the other side, as is standard.
The glass and PEI build surfaces are removable, and you can use the heated print bed with both. The previous Finders didn’t have a heated print bed, and many users wanted this handy feature. A heated print bed is a significant upgrade, which also explains the price jump for the Finder 3.
You can heat the Flashforge Finder 3’s print bed to 110 °C (230 °F), which is warm enough to print with any of the printer’s compatible filaments.
Direct Drive Extruder for Flexible Filaments
The Flashforge Finder 3 has a direct drive extruder, not a Bowden tube. A direct drive extruder offers the following advantages to beginners and hobbyists with some experience:
- Fewer moving parts, such as gears and motors, than in Bowden tube extruders.
- Less noise because fewer mechanical parts are involved in extrusion and printing.
- TPU and other flexible filaments are easier to print with a direct drive extruder.
- Deliver better prints and surface finishes unless a model has a complex design.
3D printers with direct drive systems have better control over their extrusion. Retractions are more precise with direct drive extruders and hotends than Bowden tubes.
Filament Detection and Power Loss Recovery
The Flashforge Finder 3 has a filament detection sensor, which is quite a handy feature!
The other helpful feature is its power loss recovery mode that allows the Finder 3 to resume printing after a power outage.
These features can help you avoid failed prints and keep your print jobs running as smoothly as possible.
Thermal Protection To Ensure Safe 3D Printing
The thermal protection feature of the Flashforge Finder 3 prevents the 3D printer from operating if the printing temperature is too high. Such abrupt stops may lead to failed prints, but the safety feature might be helpful for beginners, especially those not monitoring their Finder 3 in action.
Assisted Leveling and Software Compatibility
The assisted bed leveling feature is a cakewalk for hobbyists.
Software compatibility of the Flashforge Finder 3 isn’t a unique selling point. Most printers nowadays can use third-party 3D slicing software, irrespective of brand and model or firmware. The Finder 3 uses the Flashforge slicer known as FlashPrint. You may also use the following:
- Slicer: Cura, Simplify3D, etc.
- Input: 3mf, jpg, jpeg, png, obj, stl, etc.
- Output: g, g-code, gx files, etc.
USB Cable, Stick, Wi-Fi, and Cloud-Enabled
The Flashforge Finder 3 has an 8 GB USB stick in the box to load and feed sliced files of one or more 3D designs. You may also use a USB connection to interact with the printer through your desktop or laptop. Besides, every Finder 3 can communicate with your other devices via Wi-Fi and PolarCloud.
Essentials, Spares, and Tools Are in the Box
The Flashforge Finder 3 has an extruder lamp to light up the build plate for you to see a print in the box-like printer enclosure.
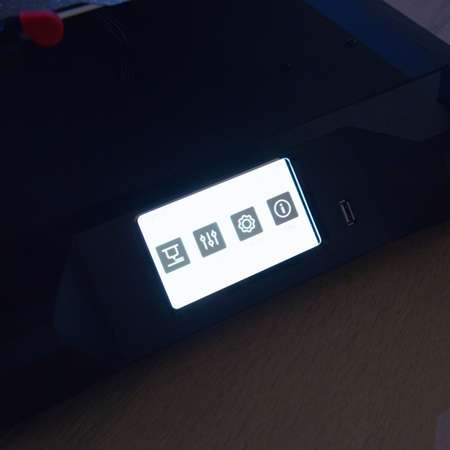
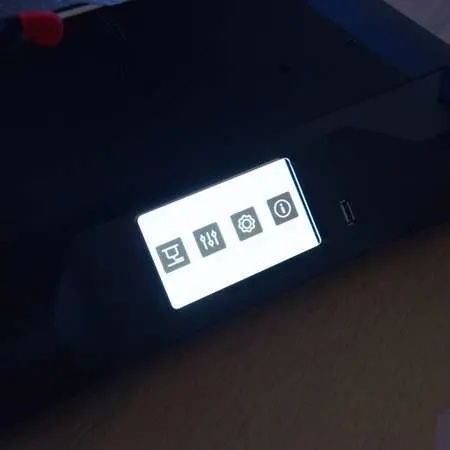
The 4.3 inches (~11 cm) touchscreen is larger than the 2.8 inches (7.1 cm) of the Flashforge Adventurer 3. Many Prusa 3D printers have smaller screens than the Finder 3.
Plus, the box contains many essentials, including spares and tools, such as the following:
- 50 g (1.76 oz) PLA filament
- Allen or hex key set
- Filament spool holder
- Flat head screwdriver
- Glue stick
- Grease
- Needle
- Philips screwdriver
- Power cable
- PTFE tubes
- Spare nozzle
- Spare leveling knob
- Spatula
- User manual
- Wrenches
Why the Flashforge Finder 3 Might Not Be Not Worth It
The Flashforge Finder 3 is a superb 3D printer for beginners but not for all hobbyists looking for a moderately priced upgrade from their current setups.
The following drawbacks aren’t what you may consider shortcomings unless they are fundamental to your 3D printing requirements.
The Maximum Extruder or Printing Temperature Is Low
The maximum extruder or printing temperature of the Flashforge Finder 3 is 260°C (500°F). So, you cannot use advanced filaments like polycarbonate with the Finder 3.
However, it does work well with all the most common filaments like PLA, and it can also print with TPU, so there’s room for you to grow and learn how to use new filaments with the Finder 3.
The Finder 3’s Extruder Isn’t Under Warranty
Also, ABS can have extrusion issues with the Finder 3’s direct drive, which may be challenging for beginners to fix.
The Flashforge warranty doesn’t cover extruder clogging, whether you use Flashforge filaments or third-party materials. Thus, if you only want to print with ABS, the Flashforge Finder 3 is not worth it.
The Build Space or Volume Is Not Among the Largest
The build space or volume of the Finder 3 is 190 mm wide x 195 mm deep x 200 mm high (7.5 inches x 7.8 inches x 7.9 inches), which is more significant than its preceding models in the series and the other 3D printers of Flashforge, like the Adventurer 3.
However, the Finder 3’s build volume is still pretty small. It’s just a bit larger than the Prusa MINI+ printer.
Still, the pre-assembled Finder 3 is generally the same price as the MINI+, so it’s about average in terms of cost per square centimeter of build volume.
The Flashforge Finder 3 Is Not the Cheapest Option
The first and second Finder printers were much cheaper than the third version, and Flashforge has more affordable 3D printers in the Adventurer series.
So, while the Finder 3 is about average in terms of cost for a printer of its caliber, if you are looking for the best bargain, you may want to shop from Flashforge’s other 3D printers.
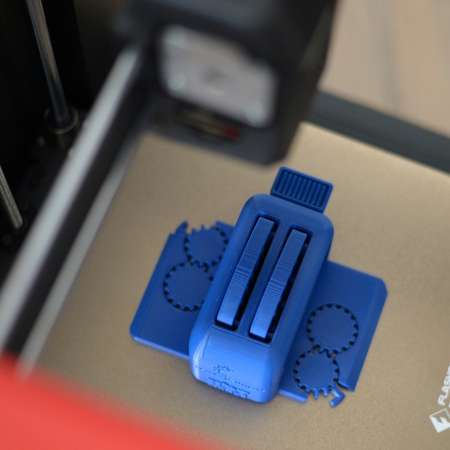
Flashforge Finder 3 Setup and Test Print
Beginners and hobbyists with experience will unlikely encounter issues setting up the Flashforge Finder 3 and printing a 3DBenchy.
Here’s a video for you to get a fair idea of what to expect if you buy, set up, and run a test print with a Flashforge Finder 3:
Final Thoughts
The Flashforge Finder 3 offers more than a decent bang for your buck. The printer is very user-friendly and average in terms of price, which makes it an excellent 3D printer for beginners.
However, the Finder 3 isn’t for hobbyists with extensive 3D printing needs, and certainly not for any and every filament.
- Written by:
- Ben
- Last updated:
- 11/19/2023
About Ben
I started 3D printing since 2013 and have learned a lot since then. Because of this I want to share my knowledge of what I have learned in the past years with the community. Currently I own 2 Bambulab X1 Carbon, Prusa SL1S and a Prusa MK3S+. Hope you learn something from my blog after my years of experience in 3D printing.