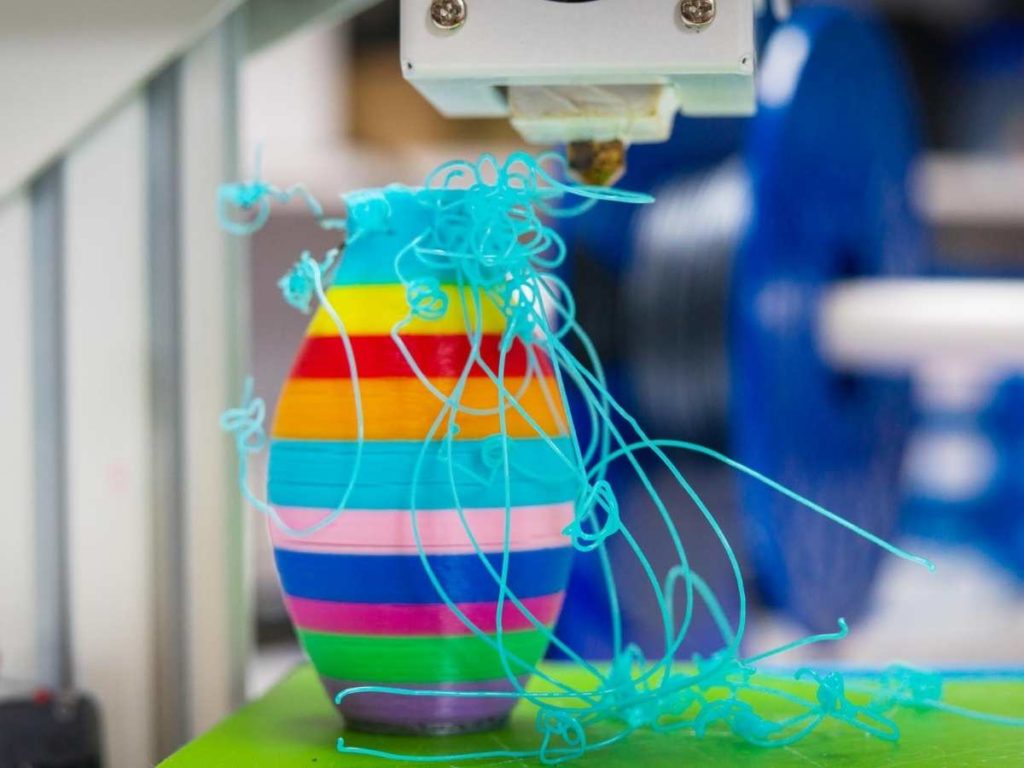
If you’re a 3D printing enthusiast, you’re probably aware of the imperfections that come with this technology. One of the most common frustrating issues is when your prints come out with artifacts, unsightly layer lines, and stringing that makes your model look just like spaghetti.
Here are 8 reasons why your 3D prints are turning into spaghetti:
- The nozzle height is too low.
- The temperature is too low or too high.
- There is an error with the G-code of the 3D model.
- There is a problem with the bed adhesion.
- The print surface is unclean.
- The printer uses more filament than required.
- The printer extrudes less filament than it should.
- The filament is snagging.
In the rest of this article, I’ll go through these problems and probable solutions for dealing with them. Let’s get started and de-noodle-ify your 3D prints together.
1. The Nozzle Height Is Too Low
Your 3D prints can turn into spaghetti if the nozzle is too close to the bed.
If you’ve set the print bed only a few meters from the nozzle opening, there’s a chance the melted filament has little or no room to escape, which will cause “puddling” or lumps in your print.
Even when your prints don’t turn into spaghetti, they’ll probably be missing their first layers and won’t stick during extrusion.
To fix this problem, you can increase the height of your nozzle. Most 3D printers are pre-installed with a setting to allow you to offset the Z-axis. Increasing the offset of the Z-axis to a positive value will automatically raise the level of the nozzle.
Here’s a YouTube video on how to adjust the Z-Offset:
You can also manually lower your print bed if your machine allows it. Hover, this requires more physical effort as you’ll need to recalibrate your printer and level the bed to get even prints. Remember, increasing the offset value too much can result in a different printer problem. So, make small, gradual increases and test the printer as you go to solve the problem.
2. The Temperature Is Too Low or Too High
If you’re printing with ABS or Nylon, there’s a high chance you’ll end up with a spaghetti mess if the temperature is too high or too low.
One of the best ways to troubleshoot this problem is to use a heated bed and maintain the temperature recommended by the material manufacturer. Study it for 5 minutes at this temperature without forcing the filament through.
If setting it to the manufacturer’s recommended temperature doesn’t solve the problem, try increasing it to 240º F (115º C).
Also, if the temperature is too high, you should reduce it to 180º F (82º C) for PLA and 140º F (60º C) for ABS and Nylon, respectively. Watch it for 5 minutes and check the results.
3. There Is an Error With the G-Code of the 3D Model
If you use a download design without confirming whether it’s printable or without checking the model, you may end up with spaghetti prints.
As a result, it’s best to check the G-code of the design and confirm that it’s printable by previewing it in the slicer software.
If you find errors like gaps or lousy geometry, you may choose to find an alternative design or repair the object yourself.
4. There Is a Problem With the Bed Adhesion
Bed adhesion problems are another common reason why 3D prints turn into spaghetti. Also, even if your model doesn’t turn out looking like noodles, there’s little chance that you’ll get a successful print without something to keep your object on the bed.
So, you should ensure that you follow the correct bed adhesion procedure every time you use your 3D printer.
The first troubleshooting step in bed adhesion problems is leveling the bed. You can do this manually or automatically if your printer has the feature.
Some printer models have a sophisticated auto-leveling system, while others provide you with a step-by-step guide on how you can adjust it manually.
If your model doesn’t come with one, you can install an auto bed leveling sensor to help avoid spaghetti prints and other related problems.
These sensors measure the microns between the print bed and nozzle to properly position the nozzle during printing. So, they automatically make adjustments to ensure the bed is at an optimal level throughout the print.
You can also use an adhesive like a glue stick, hairspray, blue tape, or a specific adhesion product to keep your print in place during printing. However, keeping the bed level is the most crucial component of ensuring printing success.
5. The Print Surface Is Unclean
It’s always a good idea to clean your printing surface, especially if it’s a material like glass.
If you’re applying glue before printing and never wipe it off, it can leave deposits that affect the stickiness of the print surface.
Also, if you’re working with other people, they may touch the surface and leave oils and other materials on it. Residues from your previous prints may also pollute the bed and result in spaghetti prints.
There are several cleaning solutions for the print bed. Isopropyl alcohol (available on amazon.com) is a good solution, but it’s better to check with your manufacturer on the best choice.
6. The Printer Uses More Filament Than Required
This phenomenon is known as over-extrusion. It occurs when the amount of material your printer extrudes is more than necessary. The result is a print with excess material or spaghetti-jumble on its outside.
This problem is mainly caused by a higher-than-normal flow setting or extrusion multiplier.
Troubleshooting this problem involves changing the Extrusion multiplier setting in your slicer software. Select the correct value or decrease the value in the Flow setting if it doesn’t solve the problem.
7. The Printer Extrudes Less Filament Than It Should
When your printer doesn’t produce enough filament, it may leave you with a spaghetti mess. This interruption is known as under-extrusion, and it has several possible causes.
One of the leading causes of under-extrusion is when the filament diameter doesn’t match the one you set in your slicing software.
Another reason is when you have a poor slicer software setting. It may also occur if dirt or a clog in the nozzle restricts the filament flow path through the extruder.
The best way to fix this problem is to set the filament diameter the same as in the slicing software and clean your print nozzle.
8. The Filament Is Snagging
Your 3D prints will only come out well if the filaments are correctly fed to the extruder. So, if the filament spool isn’t rotating smoothly or it gets tangled, your print may look strange or fail altogether.
Spaghetti prints may also occur if there’s too much friction on the spool mount, putting some strain on the extruder and causing it to slip.
Ensure the filaments aren’t tangled and check that the spool rotates smoothly to fix this problem. Lubricating the spool may also resolve this issue.
- Written by:
- Ben
- Last updated:
- 11/23/2023
About Ben
I started 3D printing since 2013 and have learned a lot since then. Because of this I want to share my knowledge of what I have learned in the past years with the community. Currently I own 2 Bambulab X1 Carbon, Prusa SL1S and a Prusa MK3S+. Hope you learn something from my blog after my years of experience in 3D printing.