When your 3D printing results in crumbling items or the nozzle fails to extrude, the cold pull method can fix your problem.
Cold pulling in 3D printing is a way to clean a clogged nozzle. The technique inserts a fresh nylon filament, increases the temperature to melt the nylon, and decreases the temperature until the plastic freezes. You push down during this process and yank the filament with the debris at the end.
If you want to learn all about what a cold pull is, why you want to do it, and how to do it, then here is the background information you need.
What is a Cold Pull
The cold pull method is a way to clean a clogged nozzle. It uses a filament, usually nylon, and extreme heat at one point to a much lower temperature, “cold,” at another. The heat melts the nylon to fill the nozzle, and the cold contracts it. It allows the plastic to go from the molten state that can fully attach to its surroundings.
It then returns to a frozen state while you push against the nozzle. With the right amount of pressure and shift from hot to cold, the contraction of the nylon will grab debris in the nozzle. The freezing pulls in whatever can get snagged from the printer parts.
Then you finally pull the filament out. When you do, you are pulling out what the filament pulled in. Some debris will be in the filament, and it is not just what is visible on the external surface.
You repeat this approach several times as needed depending on how dirty your printer’s nozzle is. After each pulling on the filament, you can snip off the dirty tip and repeat the pressure and temperature steps with the filament in the nozzle.
With each successive pulling, the less debris you will see on the filament’s tip after pulling it. That tells you how close to clean the nozzle has gotten.
Also known as the atomic method, cold pulling is an option to try before cleaning the nozzle by dismantling the head.
Dismantling takes more time, risks injury and incorrect reassembly. Sparing that hassle is why the cold pull method is popular. Replacing the nozzle also consumes time and money, and it can complicate calibration of the build plate and mess with the wiring.
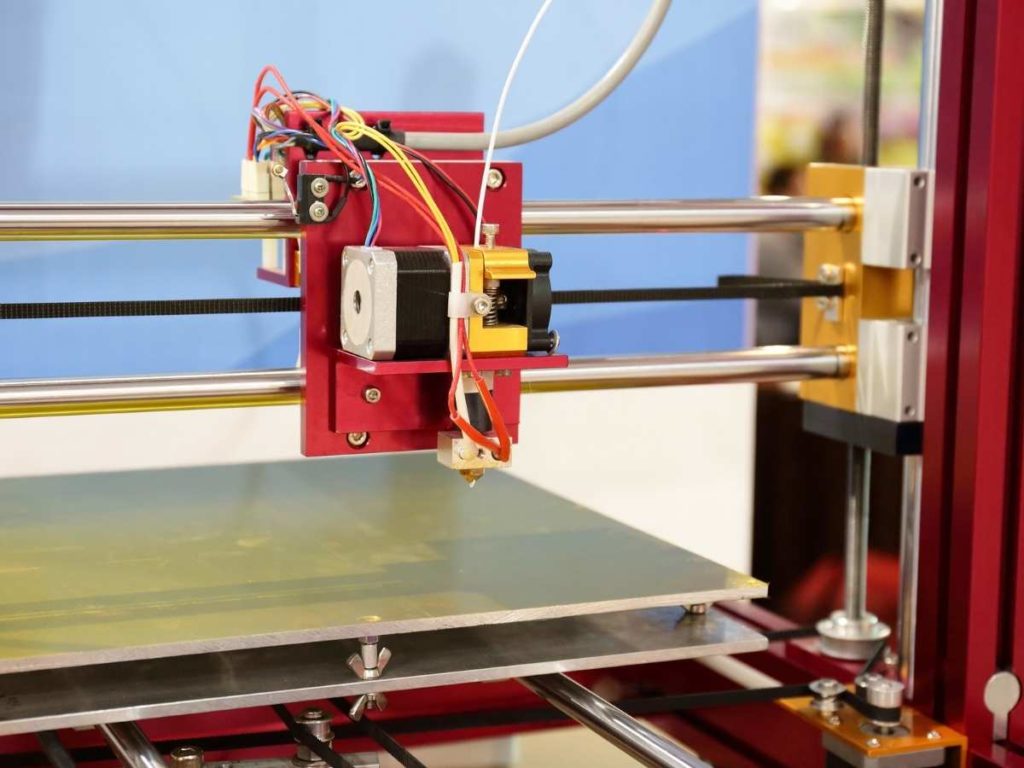
How a 3D Printer Nozzle Gets Clogged
3D printers work by melting plastic filaments in tubes, and the plastic comes out of the nozzle. If you use your printer regularly, the nozzle will keep itself clean for the most part.
But the odds of it getting clogged increase the longer you do not use the printer or the more you switch out filaments. Clogging happens particularly for interchanging brands that do not melt well with the previous or following brands, and the less molten plastic will harden. Desktop printers are also more susceptible to complications with parts.
Further, debris will automatically develop at some point in filament-based plastic extrusion 3D printers.
These printers can overheat and burn the tips of filaments. Those singed parts are what partially or entirely block the nozzle. Filaments can also split where they attach to the extruder, and the split pieces can become plugs.
Sometimes particulates get into the nozzle during the manufacturing of the printer. Also, dust and random debris can fall into the tubes leading to the nozzle.
To directly see if the nozzle is clogged, you can disconnect the extruder gear lever to access the filament and manually push it down. The filament will pass with difficulty, with curling, or not at all if there is clogging.
The filament needs to be clean and properly sealed to prevent debris from lodging into the nozzle. A filament dust filter may be a good investment. Your highest risk of introducing gunk into the tube is when you transition between different parts and materials.
In any case, you may find cold pulling a helpful and time-saving approach.
Signs a 3D Printer Nozzle Has Gotten Clogged
3D printers work by taking rolls of plastic and pulling them through various parts before getting to the funnel of the nozzle. The heat turns the plastic into a molten state so the nylon can fit into minuscule holes. That pathway leaves plenty of places for issues, and any problems aggregate at the nozzle.
Whether partially or fully clogged, you will see complications with the printer and the final product.
Partial clogging causes gears to skip around, digging deeper or printing more shallow than usual, producing a structure with lots of inconsistencies. The clog will cling to the filament at the nozzle when more of the filament should flow freely.
Full clogging is apparent when no filament can extrude from the nozzle. Even if you push down on the tubing, nothing comes out.
Plastics used in 3D printing take an unfortunate state when they are formed by a dirty nozzle.
Prints from a clogged nozzle can be inconsistent and not filled in. They will crumble like cookies. Others may have a poor infill, and so the lack of layer adhesion leads to flimsy, spaced-out construction that behaves like a crinkly food seal.
It depends on the type of plastic. If you try different filaments and get poor results regardless of material type, then you probably have some clogging.
Besides noting how your prints turn out, you can also watch the extruder and see how little plastic comes out compared to your past experiences. If you see things getting pushed along and the filament spool still rotates, then there might be blockage behind the nozzle.
Why Use a Cold Pull?
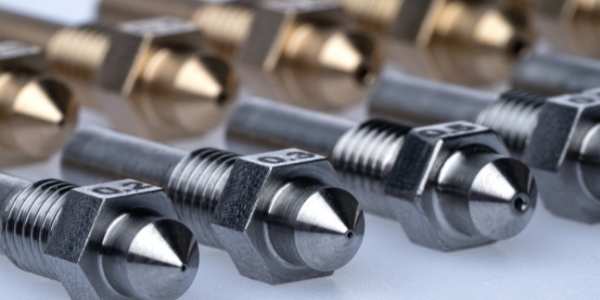
The tube leading to the nozzle has a wide diameter of around 1.75 mm that narrows into a cone shape where it connects to the nozzle, which is often 0.4 mm wide. Therefore, some gunk that can fit into the tube cannot fit into the nozzle.
A cold pull lets you clean the cone part of the cavity with fewer complications than other methods. Plastic will likely not dislodge if you only take the nozzle out and shake or scrape. Digging out the particles can lead you to damage the shape and size of the nozzle hole. And any deformities or gunk pushed forward from the nozzle will compromise the printer’s effectiveness.
Consider all those complications compared to the cold pull method, which lets changes in temperature and downward pressure on the nozzle with the tube do the cleaning. The main risk will be the nylon filament snapping during the final pull motion.
What to Try Before Doing a Cold Pull
One thing you can try before trying a cold pull is a hot pull. It is easier on the 3D printer than the cold pulling method. But if the hot pulling fails, then the cold pulling technique is your next step.
Here are the eight steps on how to do a hot pull:
- Remove excess gear to gain access to the hot end.
- Heat the nozzle to 190 degrees at first, especially for PLA-only printers. PLA is more sensitive.
- Increase the nozzle heat to between 200 degrees C and 220 degrees C.
- Insert a light-colored or white filament, ideally nylon. The color helps you see how much dirt you grab from the pulling.
The cleaning filament should also be the same diameter as the printing filament you typically use.
- Push the filament down into the nozzle for 5 to 15 seconds or until the current filament exits before starting Step 6. This process should also remove any remnants from a previous filament.
- Pull the filament out.
- Check to see if any debris clings to the end. The gunk will look like dark flakes and chips or even like ash.
- Snip off the dirty end and repeat the process from Step 4 to Step 8 until the filament remains clean after the steps.
It might take 5 to 20 repetitions to fully remove particulates from the nozzle.
- Test your efforts. Remove the nylon you have been using for cleaning and insert a new printing filament.
- Run the print and see if your filament now extrudes properly.
If this process is not enough, or the number of repetitions starts to look like they will be on the high end, a cold pull will be worth your time. The purpose of the hot pull method is to spare the printer the strain of switching hot to cold and cold to hot several times. But the temperature shift is more effective for removing more stubborn debris in the nozzle.
Material for a Cold Pull
Nylon is the most common filament used for a cold pull. After being heated to its melting point and then cooled down, it has a suction effect. It will pull away from the walls of the tube on its own, and that action helps mold to the debris while you apply pressure to the nozzle during the cooling phase. Then when you pull it out, nylon is the least likely filament to snap.
How to Do a Cold Pull
If you have debris thoroughly hardened and lodged into the nozzle, you will need to do the cold pull method.
Here are the twelve steps in the cold pull method. It starts as the hot pull method in Steps 1 to 5 but begins their differences at Step 6:
- Remove excess gear to gain access to the hot end.
- Heat the nozzle to 190 degrees at first, especially for PLA-only printers. PLA is more sensitive.
- Increase the nozzle heat to between 240 degrees C and 260 degrees C. If you have only used PLA filaments, heat to 220 degrees C.
- Insert a light-colored or white filament, ideally nylon. The color helps you see how much dirt you grab from the pulling.
The cleaning filament should also be the same diameter as the printing filament you typically use.
- Push the filament down into the nozzle for 5 to 15 seconds or until the current filament exits before starting Step 6. This process should also remove any remnants from a previous filament.
However, continue pushing down on the filament for the next several steps. The ongoing pressure helps it mold to the contours and debris.
- Turn off the heat.
- Let the temperature fall to 90 degrees C for PLA printers and 160 degrees C for ABS printers. Some recommendations say 60 degrees C.
- Once at the temperature for Step 7, pull the filament fast and hard out of the hot end. Nylon can tolerate this best, while PLA is more brittle.
With the hot pull method, you could pull more gently because the heat was high enough for the filament up against the nozzle to be loose. But with the cold pull method, the plastic freezes against the nozzle. So it needs a yank to come out.
- Check to see if any debris clings to the end. The gunk will look like dark flakes and chips or even like ash.
- Snip off the dirty end and repeat the process from Step 3 to Step 10 until the filament remains clean after the steps.
Besides being more of a drain on the printer than the hot pull method, repeating the hot to cold and cold to hot process is more time-consuming. Still, it is more efficient than non-pull methods.
- Test your efforts. Remove the nylon you have been using for cleaning and insert a new printing filament.
- Run the print and see if your filament now extrudes properly.
The Cold Pull Method in 3D Printing: Final Thoughts
The cold pull method in 3D printing can do wonders for a clogged nozzle. It has you insert a cleaning nylon filament, heat the nylon to its melting point, and then cool the nylon until its freezing point. You apply pressure throughout the process until the freezing and then pull the filament with the debris.
You know it is time to unclog your nozzle once your printing results in brittle and crinkly items or no filament extrudes from the nozzle. There are other methods, but the cold pull is one of the most effective.
- Written by:
- Ben
- Last updated:
- 11/23/2023
About Ben
I started 3D printing since 2013 and have learned a lot since then. Because of this I want to share my knowledge of what I have learned in the past years with the community. Currently I own 2 Bambulab X1 Carbon, Prusa SL1S and a Prusa MK3S+. Hope you learn something from my blog after my years of experience in 3D printing.