Designing a 3D model from scratch can be challenging, especially if you want your final object to having a specific size, amount of detail, and shape. Scanning physical objects allows you to ensure that your print is detailed and scaled, which comes in handy for tons of projects.
Here are 5 ways to scan and digitally copy a physical part to 3D print:
- 3D Scanning with a 3D Scanner
- 3D Scanning with a Smartphone App
- 2D Scanning with a Paper Scanner
- 3D Scanning with any Digital Camera
- Outsource Your Part
Let’s get into the details and discuss how to scan physical objects to print with your 3D printer. I’ll walk you through several of the best ways to copy your things and print them, and I’ll also give you some pro tips along the way. So, let’s get scanning!
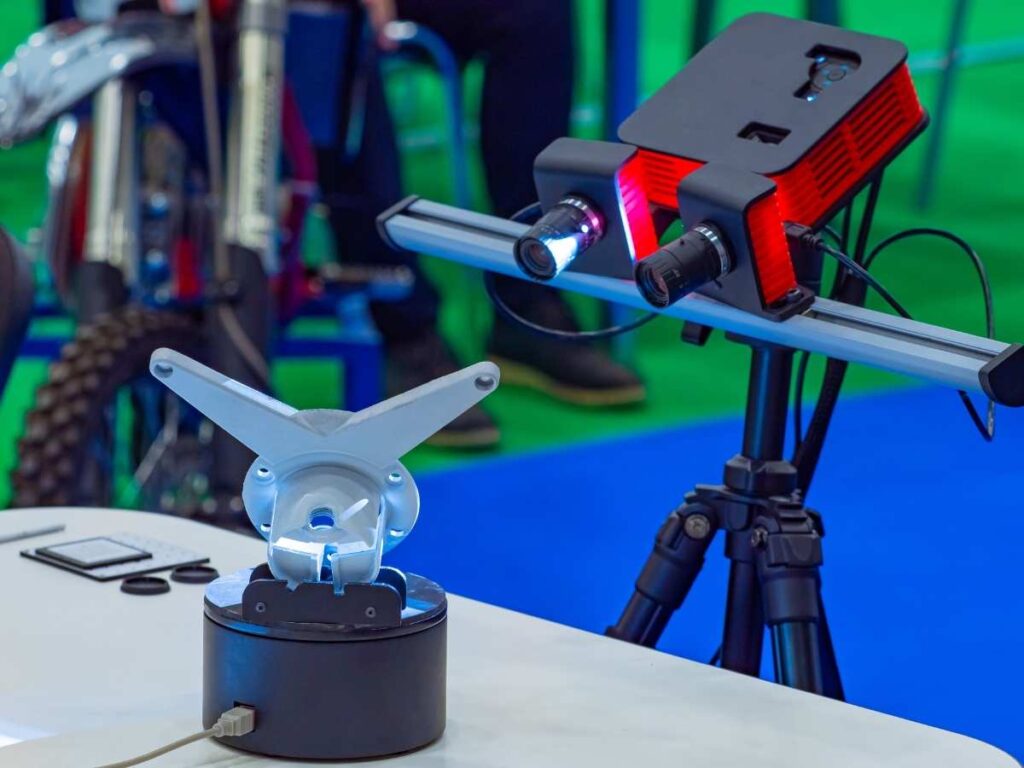
1. 3D Scanning With a 3D Scanner
The most obvious way to scan an object for 3D replication is to use a 3D scanner. 3D scanners usually make printing an object simple, and they capture the most detail from your physical item.
However, 3D scanners can be expensive, and not everyone has access to one. That said, if you have a 3D scanner or want to outsource your project to a professional scanner, you can expect your print to be perfect and the scanning process to be simple.
If you have a 3D scanner, you likely own the software that came with it, which will make scanning your object easy.
Here’s what you need to do to scan your part and convert it to a printable 3D file:
- Set up. To start, start up your camera and software. Then, put your object in the scanner, centering it as much as possible.
- Mattify your object. 3D printing scanners often have difficulty scanning shiny or reflective parts since a scanner uses light to determine the object’s boundaries. So, for the best results, coat your piece in flour, cornstarch, chalk, or a matte acrylic spray like this Rust-Oleum Matte Paint (available on Amazon.com). This will keep your object from reflecting too much light and make scanning the part easier for your scanner.
- Scan. After you’ve centered your object on the scanner, use your scanner and software to scan the part.
- Manipulate the image. After scanning, you will want to remove noise and mesh the scan together to make a flawless printable file. It would be best if you also used your software to fill holes or make it watertight, which will ensure that you get a smooth, solid surface on your print.
For a quick example of how one 3D scanner, the Matter and Form Scanner, turns one object into a printable file, check out this quick YouTube walkthrough from Beauty and the Bolt:
2. 3D Scanning With a Smartphone App
Smartphones are fantastic tools, and they also can help you 3D print almost anything. Using their cameras and an app that produces 3D printable files, you can capture nearly anything in a model, whether it’s a piece of equipment, a household object, or yourself!
You’ll need a smartphone with a camera that you can download apps onto to use this method.
Smartphones with face recognition front-facing cameras are perfect for making 3D models since the camera uses infrared sensors to scan your face in 3D. For phones with face recognition, EM3D is my favorite phone app.
This app:
- Makes fantastic scans
- Meshes the images well
- It makes it easy to export files to your computer
However, this app only works with more advanced phones, so it is not an option for everyone.
For older phones that don’t have built-in facial scanners, you can use an app like TRNIO 3D Scanner to take multiple (around 80) photos with your phone. The TRNIO app will mesh together your images to make a printable and editable file. This app works well with most smartphones, so you can usually use this app no matter what phone model you have.
There are several other apps available that can scan 3D objects and turn them into files, so if the apps I mentioned are not available for you, feel free to look around. These apps are my personal go-to’s, and they also come highly recommended by numerous professionals. However, they won’t necessarily work best for everyone, so feel free to search for an app that is right for your needs.
Scanning with your phone is extremely simple. All you have to do is open the app and follow the directions to scan your object.
The app will then offer to convert your scan into an exportable file which you can send to your computer via Airdrop, a cloud service, or email.
Keep in mind that, with any scanning process, it is crucial to keep the object you scan matte so that your camera can pick up on all of the details on your part. As mentioned above, make sure to apply baby powder, flour, cornstarch, or a matte spray to anything you scan so that the app can mesh the photos together accurately.
You should also ensure that you scan your object in an area with plenty of bright, indirect light against a contrasting background. That way, you can easily capture details while allowing your scanning app to differentiate the object you want to replicate from everything else.
After exporting your file and uploading it to your 3D modeling software, you should also remove noise and reduce the number of polygons by making the model solid and watertight. Then, after the image is clean, you can print it!
For an example of how you can use this app to make 3D prints and printable files from your phone, check out this YouTube tutorial from cosplay-designer Kamui Cosplay:
3. 2D Scanning With a Paper Scanner
If you have a simple part to copy, you can use something as simple (and easily accessible) as a paper scanner to get the dimensions of your print right.
While using a paper scanner isn’t perfect for every 3D project, it can work for simple parts and small items without much detail that you want to duplicate. Objects such as clips, small tools, and other things that only have details on one side are ideal for this technique.
To make a template for your 3D model, you can use any paper scanner, such as a copy machine, printer, or external scanner, to scan one dimension of your part. Once this is done, the next step is to import the file to create a model.
To scan, model, and print an object with your paper scanner:
- Place your part on your paper scanner.
- Place a piece of paper over your object.
- Import your scan into your computer.
- Remove the background from your scan with a photo imaging program such as GIMP (available for free) or Photoshop.
- Import your background-less .png image into your 3D modeling software.
- Convert your image into a .svg file to add the third dimension to it.
- Next, scale your image to fit the size of your physical part.
- Edit your model until it is a perfect size, then convert it into a file that your 3D printer can use.
- Print your model.
If you don’t know how to convert your .png files to .svg files, I’ve got you covered. You can use a web converter like this one to change file formats for free, and you can also edit the image in the process to get the best results every time.
For a helpful video walkthrough of this process, check out this YouTube tutorial from 3D printing guru CHEP:
4. 3D Scanning With Any Digital Camera
Scanning your image with a standard camera (also called photogrammetry) is a fantastic option, especially since most people who have a 3D printer also have a camera.
To use photogrammetry, you will need some software that allows you to mesh images together. I use AliceVision’s Meshroom, a free software built for making 3D replicas of physical objects.
You will also need a camera to capture your images. Using a high-resolution SLR camera will give you the best results. That said, you can also use a phone camera, small digital camera, or anything else with which you can take images.
However, keep in mind that your model might not be as detailed if you don’t go with an SLR.
To scan, model, and print an object with a camera:
- Set up your object. Before you start, you will need to put your part somewhere that is well-lit that doesn’t have much going on in the background. You can set up your item in an empty closet, outdoor area, or room with blank walls. Put your object on a textured background, using something like a piece of colorful paper, a baking sheet, a bit of fabric, or anything else you have lying around to create contrast.
- Scan. To scan your physical object, use your camera to take a photo of your part from at least every 10 degrees around it, paying particular attention to the top and the shadowed areas. You can walk around the object, taking a picture at every angle, or you can use something like a lazy susan or rotating platform to capture your photographs.
- Import your photos. Next, you can upload the images you took to your modeling software and use the software to mesh the scan together. This computation can take a while, so prepare for several hours of processing time.
- Clean Up the Model. After you have meshed the image together, you can clean it up. Remove the pixels that appear like tiny dots or surfaces around your model and ensure you only have the object you want to print.
- Solidify and Simplify the Design. In addition, you may want to change your model to a low-poly, texturized, solid model in this step so that you have fewer polygons to print since too many polygons in a mesh design could be rough on your printer. Most software offers these adjustments at the click of a button, so always remember to edit your model before printing.
- Scale Your Model. When you mesh your image, the scale will usually go wonky. So, before you can print, you should check the size of your model and scale it to the desired size. Usually, you will only need to resize one dimension of your model since the software will preserve the aspect ratio of your object.
- Check everything twice and add supports. Before printing, you might want to add supports or a raft to keep the model from having extraneous components or a hole at the bottom. Be sure to double-check for noise and inaccuracies and fix them now before you export the file.
- Export and Print. Once your model looks good, it’s time to print! Export your file, then send it over to your 3D printer. Hopefully, your print comes out perfectly!
The more photos you have in photogrammetry, the more detailed your rendering will be, so go wild with the photography. That said, some 3D modeling software has photo limits, so be sure to check with your favorite software to see how many you can upload. For example, Autodesk ReCap has a limit of 250 images.
To see a simple walkthrough of how to use the Meshroom software for photogrammetry, take a look at this detailed YouTube tutorial from Prusa 3D from Josef Prusa:
5. Outsource Your Print
If you find that your project is too challenging or if you don’t have the equipment you need to make your digital copy, you can always outsource your 3D print.
There are plenty of businesses specializing in making 3D models of people, objects, and anything else you send their way. This means that finding someone else to copy your part and either send you a scaled printable file or the finished 3D print is always an option.
Final Thoughts
There are many ways to replicate physical objects to digital files that you can print later with a 3D printer.
To make your 3D models from parts you already have, you can use a 3D scanner, phone, paper scanner, or camera.
- Written by:
- Ben
- Last updated:
- 11/23/2023
About Ben
I started 3D printing since 2013 and have learned a lot since then. Because of this I want to share my knowledge of what I have learned in the past years with the community. Currently I own 2 Bambulab X1 Carbon, Prusa SL1S and a Prusa MK3S+. Hope you learn something from my blog after my years of experience in 3D printing.