If you have a 3D printer, you’ve likely experienced an extruder jam or skipped steps. In some cases, the extruder motors may move in the wrong direction, resulting in frustrating “air prints.” It can be difficult to diagnose the issue if you don’t know what’s causing it.
Here are a few ways to reverse the direction of an extruder motor:
- Reverse the wiring.
- Reverse the plug.
- Calibrate the extrusion.
- Change the Esteps to a negative number.
- Replace your stepper motor.
Keep reading for more details on each method of reversing your stepper motor’s direction.
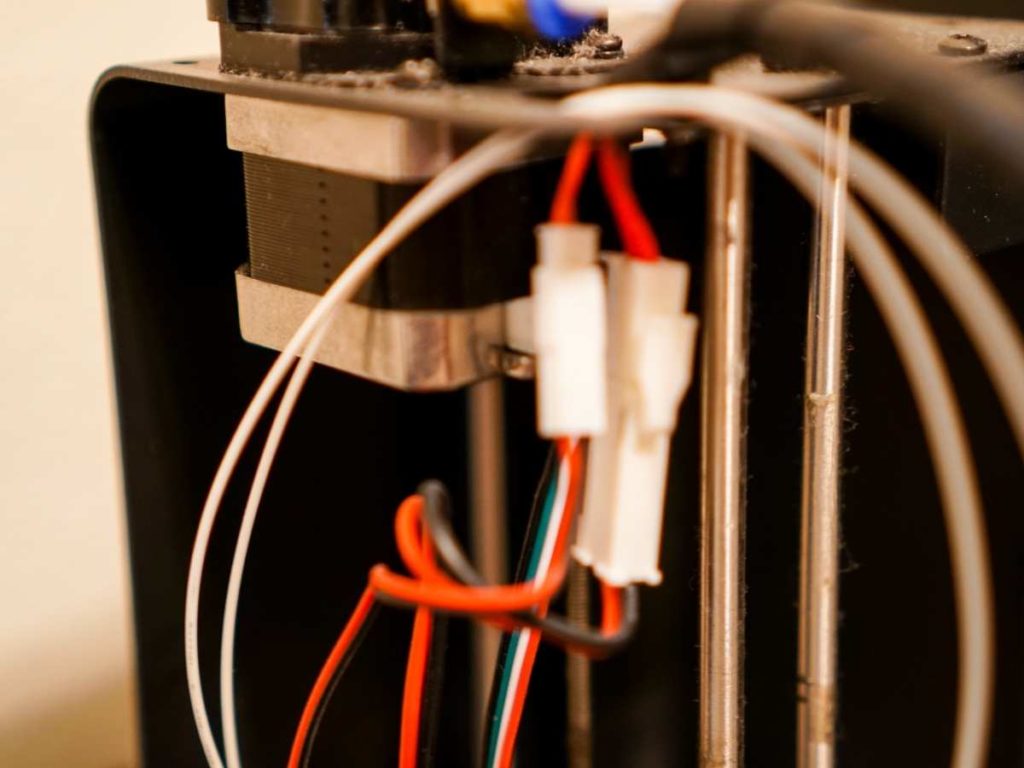
1. Reverse the Wiring
One of the most common reasons an extruder motor moves in the wrong direction is that one or more of its standard wires have been reversed. If this is the case, you’ll need to ensure that all of your motor wires are connected properly.
To reverse the wiring on a typical stepper motor, do the following:
- Unplug the stepper motor.
- Switch the red wire with the blue wire.
- Switch the green wire with the yellow wire.
- Re-connect your printer.
- Insert filament into your extruder.
Here’s a video demo of these steps:
Your stepper motor should now be moving in the right direction, meaning that you’ve successfully reversed its wiring!
Note: You can skip either step 2 or 3 in most cases. Ensure you do at least one of them, though.
2. Reverse the Plug
Another common reason your extruder motors may be moving in the wrong direction is that your stepper motors just have their plugs switched.
When the plug on your stepper motor is plugged in backward, it’ll move your extruder in the opposite direction. To resolve this issue, you can switch the plug at both ends of the wire for either end of your printer’s cord or power supply. This way, any other issues that could cause movement in the wrong direction will be resolved as well.
3. Calibrate the Extrusion
Sometimes, your stepper motor may move in the wrong direction due to extruding too much or little filament. The latter problem can result from several factors, such as incorrect settings in Cura or Simplify 3D, a problem with your hotend, or simply because you previously printed something slightly larger in volume than the part you’re trying to print now.
If this is the case and you need to calibrate your extrusion, follow these steps:
- Load your printer with the filament you need to use.
- Measure the filament that is being extruded out of your hotend.
- If your printer is extruding an inadequate amount, then either turn your E-steps down or calibrate Simplify3D or Cura by turning your feed rate down until you get a more appropriate amount of filament extruded.
- If your filament is extruding too much, then either turn your E-steps up or calibrate Simplify3D by turning your feed rate up until you get the right amount of filament extrusion.
- Repeat steps 1-4 until you have the correct amount of filament being extruded from your hotend.
If none of these suggestions resolves your issue, then something may be wrong with your hotend or extruder, and it may be a good idea to replace your stepper motor. More on that later.
4. Change the E-steps to a Negative Number
One of the benefits of setting up Simplify3D or Cura is that you can change all of your extruder’s settings from within these programs.
A useful option in either program allows you to set the extruder’s steps per unit to a negative value. This way, if you set your extruder’s steps per mm to -1, your nozzle will move forward one millimeter for every millimeter of filament retracted.
Here’s how to change the extruder Esteps using Simplify3D:
- Click on your model to select it.
- On the bottom of your screen, click Simple Mode.
- Once you are in simple mode, click on Utilities > Advanced > Modify Start G-Code.
- In the textbox for Basic settings, find M92 Exxx.xxx and change this number to a negative number.
- Click Apply and then go to the G-Code settings in a new window and click Apply again.
Your extruder will now move in the opposite direction. However, if you need a primer on G-code commands, I recommend reading this tutorial by Simplify 3D before trying the steps above.
Here’s how to change the extruder E-steps using Cura:
- Go to the Machine tab and click Move Axis.
- Scroll down to select the axis you want to reverse, then under the More Options section, change its direction accordingly.
5. Replace Your Stepper Motor
If none of the previous suggestions resolved your issue, then you may need to replace your motor with a sturdier one. Notably, your extruder moving in the wrong direction could also be the result of a weak motor. Stepper motors don’t perform well when there’s too much friction or resistance, such as during up and down movements.
In such a case, you may need to replace your old stepper motor with a sturdier one that can handle more complex tasks, adapt better to changes in temperature and movement, and is less likely to lose power when put under heavy loads.
If you’re in the market for one, I recommend this Twotrees Nema17 Stepper Motor from Amazon.com. It’s affordable, sturdy, and suitable for high-torque applications, thanks to its stainless steel material.
Pro Tip: Remember that different printers have different specifications. You’ll need to do some research on your printer’s model to determine which stepper motor can best suit its needs.
Conclusion
In conclusion, there are multiple ways to reverse the direction of an extruder motor. You can simply reverse the wiring or plug. Moreover, you can calibrate your extrusion in Simplify3D or Cura by changing your E-steps to a negative number. Finally, if none of these solutions resolves your issue, you may need to replace your extruder motor with a sturdier stepper model.
- Written by:
- Ben
- Last updated:
- 03/16/2022
About Ben
I started 3D printing since 2013 and have learned a lot since then. Because of this I want to share my knowledge of what I have learned in the past years with the community. Currently I own 2 Bambulab X1 Carbon, Prusa SL1S and a Prusa MK3S+. Hope you learn something from my blog after my years of experience in 3D printing.