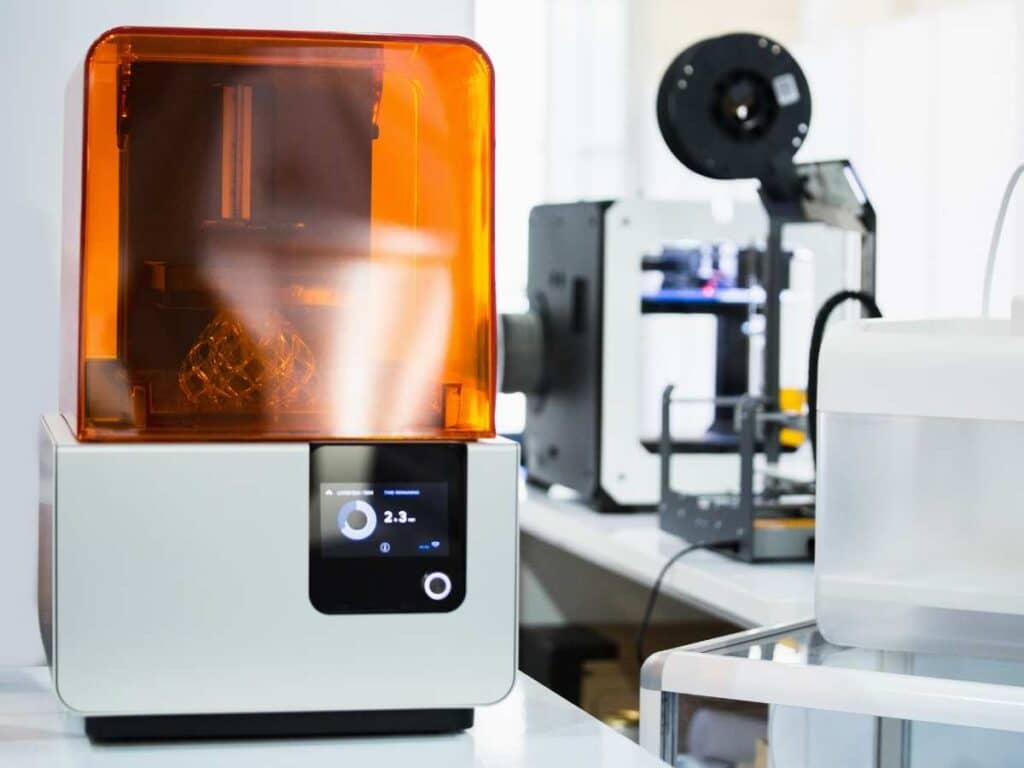
Resin 3D prints warp for several reasons, including printer settings, setup issues, external influences, model flaws, and slicer software glitches. Reassess everything associated with your 3D resin printer to detect the specific causal problem and choose an appropriate solution.
Here are 6 preventive solutions to stop resin 3D prints from warping:
- Review the 3D model design.
- Note the 3D printing prerequisites.
- Control the 3D printer’s environment.
- Prepare the 3D resin printer.
- Optimize the 3D slicer software settings.
- Preempt post-curing warping of resin 3D prints.
You may have standard, flexible, rigid, castable, or another kind of resin. 3D resin prints may warp differently depending on the material type and printer you use. This guide discusses every practical solution to stop resin 3D prints from warping.
1. Review the 3D Model Design
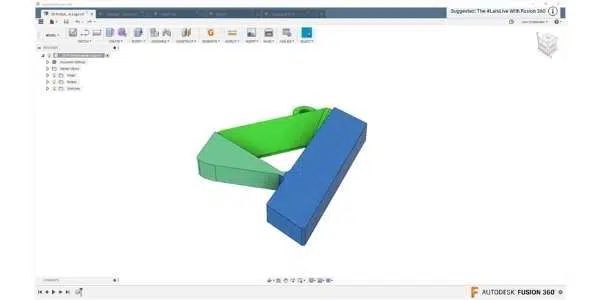
Resin 3D prints often warp due to a design flaw. A 3D model viable in some designing software may not be sustainable during SLA, DLP, or LCD printing. Hence, your design must conform to the abilities and challenges of a resin 3D printer.

Dimensions
Avoid all sorts of extremes. Don’t have immensely thick or impractically thin walls, large and heavy overhangs, and quaint contours for any layer that are likely to deform during the curing stage.
Review the dimension of every part of a 3D model in isolation. Supported and unsupported walls cannot have the same thickness. Bridges and overhangs are not identical features and thus require distinct designing approaches.
Supports
Supports are integral to resin 3D printing. In FDM, you may use supports only for overhangs and special features. However, you must use them for even the core design in SLA, DLP, and LCD printers.
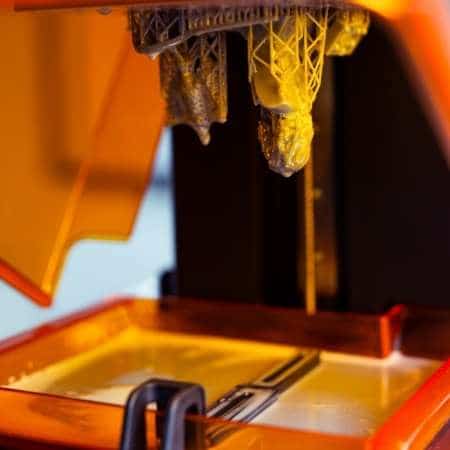
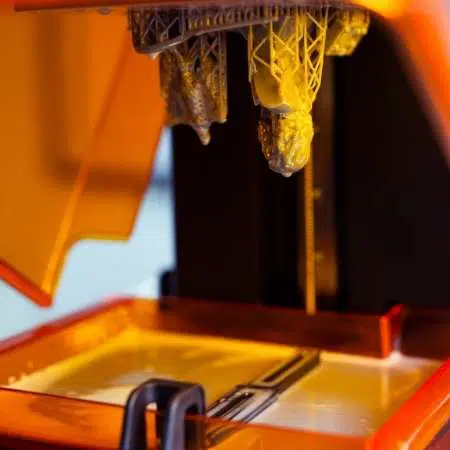
Hardened resin forming a new layer of your 3D model peels off the liquid in the tank or vat. Your resin 3D print will warp if the newly added layer does not have an adequate foundation and the photopolymerization process is not flawless.
Here is a fantastic guide to designing resin 3D printing supports from Amera Labs.
Orientation
Orientation is another fundamental reason why supports are unavoidable in resin 3D printing. A 3D resin model should have an optimum z-axis cross-sectional exposure.
If you use a vertical or 90° orientation, the broad first or base layer will be exposed entirely along the z-axis. This exposure provides a large surface area in contact with the build plate and the resin tank.
Thus, you have more photopolymerized and curing resin at risk of warping.
The simple solution is building or printing at an angle. The complicated part is the need to use several supports, which also account for some material wastage.
Consider these best orientation practices recommended by Formlabs.
Brim, Raft, and More
Use a brim or raft on the build plate to prevent the warping of the main model. Both options are useful depending on the size and weight of the design, especially the expanse of the base or first layer.
A brim is a single layer base that you will remove from the printed model after curing. A raft, on the other hand, is more like a grid, thicker and broader than a brim. You may need a raft for larger and complicated designs.
2. Note the 3D Printing Prerequisites
All 3D resin printers have standard operating mechanisms. However, every unique design has some particular printing prerequisites. You must address these specificities.
First Layer
You may use a model’s base, a brim, or a raft as the first layer. Tweak the first layer’s dimensions and density or thickness, particularly for a selected orientation. First layer warping is a common problem in resin 3D prints.
The edges of the first layer may warp, shrink, or deform. A design may demand most supports to be fused to the base layer. A flawless first layer prevents the immediate subsequent layers from warping due to foundational issues.
Resin Density
Prioritize two types of density. The first relates to viscosity, which depends on the resin type you have. The second is the material density in your designed model, which is mainly about the thickness of every part, including each layer.
Fragility
Printed, cured, and finished resin models are sturdy and durable. Liquid, partly cured, or uncured resin is fragile. Hence, check the specific elements in a design for chances of warping due to fragility.
Two common fragilities are hollowing and cupping. Hollowing occurs when a model does not have any resin filling its interior space. The walls and supports of such a structure need to be thick and sturdy. Otherwise, you may encounter warping, some parts may deform, and the print may fail at any stage.
Cupping generally occurs inside a hollow model. A design needs appropriately placed drain holes to allow the uncured resin to drop down into the tank. According to Protolabs, you must have at least one drain hole for every hollow section, and it must have a minimum 3.5 mm (0.13 in) diameter.
Special Features
All special features in a design increase the chances of warping. The common examples are overhangs, bridges, connections, holes, and engraved & embossed details.
Tiny holes may close. Large holes or ports may deform if the adjoining layers exert a strong pull while curing. Protruding and recessed features may warp if they are not feasible in a given design. Here again, material density, part dimensions, supports, and orientation play a vital role.
3. Control the 3D Printer’s Environment
A resin 3D printer has plenty of variables at play throughout the printing cycle.
You don’t have much control over the photopolymerization process of a given resin type and quality, the efficiency and efficacy of the elevator or motor controlling the z-axis, build plate, tank, and the UV light.
However, you can control the immediate surroundings of your 3D printer.
Enclosure
Many 3D resin printers have enclosures. Ensure there is no defect in this enclosure. Buy or make an enclosure if your printer didn’t come with one. You won’t be able to control the immediate environment without a proper enclosure covering all the sides of the 3D printer.
Heating/Cooling
Regulate heating and cooling. Resin curing needs the temperature to drop. However, a drastic drop inside the enclosed chamber’s temperature may cause warping.
Concurrently, malfunctioning fans will fail to cool the resin. Thus, any uncured or partly cured resin may warp.
Airflow
Like temperature, airflow can impair the resin curing process. A sudden gush of breeze can cause warping. If your 3D resin printer doesn’t have an enclosure, the ambient airflow in your room may influence the parts during printing and curing.
3D Printer Setup Issues
Warping may occur due if one or more integral parts of the 3D printer malfunction. Take the resin tank, for example. Some 3D resin printers tilt, shake, or move the resin tank after printing a layer. A flawed motion may affect the new layer’s peeling off and immediate curing.
4. Prepare the 3D Resin Printer
You should detect and resolve all 3D printer setup issues during preparation. Ideally, you must prepare the 3D resin printer for every session to reduce the chances of warping.
Clean the Resin and the Tank
Many SLA, DLP, and LCD 3D printers require a particular quantity of resin in the tank for every session. Ideally, you must clean the resin and the tank before a new print cycle.
The tank or vat may have partially cured or uncured resin. Some resin buildup is expected, whether in the tank or on the FEP film. Any such residual traces may interfere with and ruin the new print.
Level the 3D Printer
The 3D print bed or build plate should be leveled at all times. You must also check if the resin tank, the z-axis, and the enclosure are properly aligned. Some contemporary resin 3D printers have an auto-leveling feature. You can manually check alignments if your models are warping despite auto-leveling.
Heat the Build Plate
3D resin printers circulate hot air to increase the temperature inside the enclosure. The circulating hot air may be insufficient for some resins and a particular design, especially for the first layer.
Consider heating the build plate so the first or base layer is perfectly formed and cured.
Consider an Adhesive
Normally, the first resin layer should stick to the build plate if all the settings and processes are appropriate. Consider using an adhesive if the first layer is not sticking properly and the part is warping as a result.
The resin may not stick to the build plate if:
- The first layer is not sufficiently thick.
- The print speed is faster than required.
- The curing time is insufficient for the layer.
The poorly attached first layer will warp. Subsequently, the core design, the supports, and several parts may warp. The entire print may fail in many cases.
5. Optimize the 3D Slicer Software Settings
Like 3D resin printers, the slicer software has distinct features and customizable settings. Change the settings per the design requirements.
Also, slicer software applications are not identical. Free, paid, native, or third-party software has specific strengths, weaknesses, and compatibility elements.
Print/Laser Speed
Some slicer software applications don’t let users change the laser or print speed. Resin’s exposure to UV light and the time a new layer remains submerged in the tank have a consequential impact on photopolymerization and the chance of warping.
Check the print speed for every model and resin type.
Curing Time
The resin begins to cure immediately after a new layer is formed. However, a new layer is optimally cured after it is withdrawn from the resin tank. The interim curing time depends on how soon the new layer is lowered and submerged into the resin tank again.
Your resin 3D printed model will warp if a new layer is not optimally cured before being dipped into the tank again.
Also, new layers will not fuse appropriately if the already printed resin has cured excessively and is thus too hard to form a bond with polymerizing resin.
As a result, your model or parts will warp.
Layer Height/Thickness
Each layer’s height or thickness should suit the model if you want the design to be viable while printing. Inappropriately thicker and thinner layers both have higher chances of warping.
Thicker or denser layers have more material, so the shrinkage and adjoining traction may lead to deformation.
Thinner or lighter layers may not fuse to form a potent bond during polymerization, which is particularly significant when printing the base.
Design-Specific Customizations
Standard designs or simpler models don’t demand much customization. Complex design elements, parts that are tricky to print due to quaintness or their sheer physical form, and other details typically merit extensive customization of the slicer software settings.
Consider customizing the slicer software settings for a design’s:
- Support size and density.
- Adaptive layer thickness.
- Orientation and layout.
- Hollow sections and drain holes.
- Connections and threaded ports.
- Other features.
Some software may recommend or automate a few settings. Review these specific settings to ensure they are appropriate for a specific design.
6. Preempt Post-Curing Warping of Resin 3D Prints
Resins take time to cure completely. The interim curing during a print cycle is not holistic. The hardened resin remains vulnerable to warping, deformation, and negligible shrinkage.
Within the 3D Printer Enclosure
Fast print speeds, low curing time, and unviable design elements or parts cause warping inside the 3D resin printer enclosure. A partially cured base layer may warp even when the printer is working on the tenth layer.
Sometimes, a portion of the base layer detaches from the build plate due to warping. This detachment usually happens:
- If the first layer is not firmly glued to the build plate.
- If the remaining parts are too heavy for the base size and thickness.
- If the curing time is insufficient for adequate hardening.
During the Post-Print Curing Process
UV, IPA, and sunlight curing are standard processing methods for resin 3D prints. Exposure to water or solvents, unnecessary heat, and chemicals can cause partly cured or curing resin to warp.
Post-printed 3D resin models don’t shrink as much as thermoplastic filaments used in FDM printers. However, the resin can deform during post-production steps if the material hasn’t hardened completely.
When Removing Supports & Finishing
Removing supports is easier when the resin is not completely cured and hardened. This convenience poses a challenge. Improper removal techniques and errors in the finishing touches can deform resin models if a portion is too soft.
In Post-Curing Production
You may use different tools and materials for the post-curing processing of your resin 3D prints. Wholly cured and hardened resin models don’t warp. However, the cured resin is sensitive to some chemicals.
Here is a list of chemicals and their effects on cured 3D printed resin parts.
Final Thought
Resin 3D printers offer unmatched resolution and finish quality. However, large and complex designs are more vulnerable to warping. The best approach is to split a design into several parts. Print these parts separately and assemble them after post-curing processing.
- Written by:
- Ben
- Last updated:
- 11/19/2023
About Ben
I started 3D printing since 2013 and have learned a lot since then. Because of this I want to share my knowledge of what I have learned in the past years with the community. Currently I own 2 Bambulab X1 Carbon, Prusa SL1S and a Prusa MK3S+. Hope you learn something from my blog after my years of experience in 3D printing.