Sanding 3D printed parts is vital in ensuring that they reach the desired, smooth consistency that you are looking for. However, it can be challenging to figure out how to go about sanding those prints that are so small you can’t possibly hold onto them while sanding. So, let’s talk about how you can finish your small objects effectively.
To sand small 3D printed parts, you can use fine-grit sandpaper strips, a Dremel, or small files. Cleaning the print and using a filling primer and polish can also help smooth the print’s surface.
In the following sections, I’ll walk you through the sanding process for small 3D-printed parts and offer shortcuts and pro tips. While sanding 3D prints can be annoying, there are many ways to make the process quicker and easier.
1. Choose Your Sanding Tools
Depending on how small your printed parts are, you may be able to use sandpaper. Sandpaper is standard for many 3D printing projects, but it may not be manageable if the pieces are too small.
On the other hand, Dremels with small mini-sanding bits can be excellent for detailed figurines and mechanical parts since they allow you to get into small crevices to create and preserve textured surfaces. However, it’s easy to take too much material off when using these power tools.
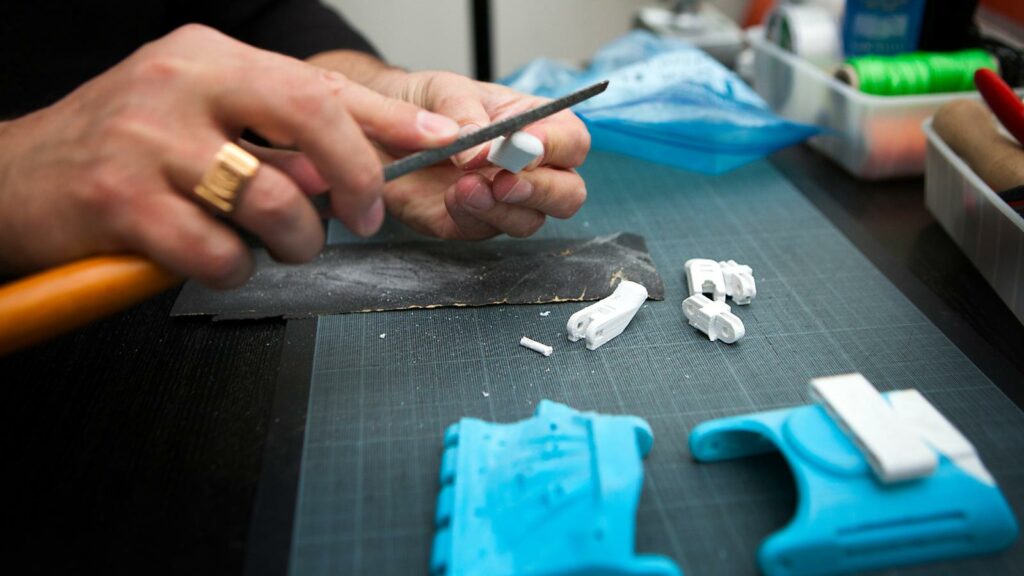
Then, there are always sanding files, which take more time to use and may be bulky. However, they can take off layer lines and other bumps without damaging your print.
Sandpaper
Sandpaper is an excellent option for those whose printed parts are large enough to hold while sanding. However, we have other options for those who aren’t so fortunate.
If you prefer to sand by hand, you may want to cut down your sandpaper into small strips to ensure that there isn’t too much extra material. Breaking down your paper can help you sand more accurately.
However, sanding your prints with sandpaper can be tedious, and it can be challenging to see your progress when working with miniatures. So, it isn’t for everyone.
To get the right finish on your 3D-printed parts, you’ll need to use sandpaper with the proper grit.
If your grit is too fine, you’ll have to work much harder to smooth your layer lines. However, if the sandpaper is too coarse, you might end up breaking or causing more damage to your print.
So, let’s discuss when each grit of sandpaper is best and figure out which one is ideal for small 3D-printed parts:
Fine
It would be best to use fine sandpaper for gentle touch ups and finishing a complete figure. Fine sandpaper will work well for you if the area is already pretty smooth but needs a buff to remove stuck-on clumps or light scratches.
In most cases, you should use fine-grit sandpaper first when sanding small parts. Fine grit sandpaper is much gentler than the other grits, which will help you prevent breaking your tiny models.
Medium
Medium grit is another option for small parts that provide more coarseness without risking too much harm to the figure.
Medium grit allows you to quickly smooth out the part and remove layer lines and artifacts. While this is safer than coarse grit, you should still be careful when using it, as too much medium grit can harm the figure.
Coarse
Coarse sandpaper is the toughest you can get. It would be best if you only used it on small printed parts when the other grits aren’t cutting it, but you must be extremely careful handling it.
Coarse grit removes material quickly. So, you can easily destroy your figure if you aren’t careful.
Dremel Handheld Sander
Sometimes, using sandpaper by hand won’t allow you to get into all those tricky small spots on your prints.
In cases like these, you should turn to a Dremel. This power tool allows you to use bits of different grits. The smaller bits also will enable you to reach areas that may be too difficult to get to with regular sandpaper.
To help you quickly and efficiently sand those smaller prints, I recommend the Dremel Cordless Rotary Tool Kit available on Amazon, which I always use for post-processing. This kit allows you the freedom to use the sander without being connected to a cord, meaning you have a lot more mobility.
The great thing about a handheld sander like this one is that it does most of the work for you. So, there will be no more back-and-forth sanding! With this tool, you can quickly grind small objects without much effort.
The only downside to using a Dremel is that you will need to hold the part securely when drilling while ensuring you don’t allow the drill to come in contact with your skin. I recommend using some small clamps or, at the very least, some pliers to hold your prints in place while you work on them.
Sanding Files
Using the handheld sander to get those hard-to-reach spots in your printed parts is a great way to perfect figures, even those with strange shapes.
However, working with a tiny, round drill bit isn’t practical when your small 3D-printed part is flat.
If this is the case, I recommend a sanding file. A sanding file is a more sturdy option than sandpaper and allows you to cover the area more efficiently. When finding a suitable sanding file, plenty of options are available.
However, I’ll share one of my favorite tricks with you. Believe it or not, sanding files are glorified nail files, and you can get nail files much more cheaply than sanding files for craft projects.
I recommend starting with a set like this Schwertkrone Sapphire Nail Files Set (on Amazon), which comes with four durable metal files of different sizes and a buffer.
These files do wonders for small prints, and I find them particularly useful for reaching into small crannies for parts like Warhammer miniatures, small threaded parts, and gears.
If money or time is a problem, you can make files with sandpaper, glue, and a stick or ruler. To do this, cut some sandpaper and glue it to whatever surface you want.
I often glue sandpaper to kitchen skewers and toothpicks to make small circular files for little arms, holes, etc.
2. Clip Off Supports and Artifacts
If you don’t remove supports properly or neglect to remove strings and other artifacts, you’ll have to work much harder when sanding your prints. So, before you pull out your Dremel and sandpaper, remove as many unwanted components from your part as possible.
Snippers like flush cutters and basic scissors can remove pieces of your print much faster than any abrasive material, so take advantage of that and do everything you can before sanding.
3. Use a Filler Primer or Wood Filler
While sanding your part itself might be feasible in some cases, using some sort of filler before you sand will make your life much easier.
When using a filler, you can fill the layer lines and gaps and then sand down the filler to smooth it out.
This approach is much easier than removing and filing away every layer line from tiny prints. It will also strengthen your miniatures, helping you avoid cracking or breaking them as you sand.
In most cases, the best way to fill in layer lines is with a filler primer. Filler primers are just like average primers, but they have a consistency that makes them perfect for filling in and smoothing out bumps, gaps, and rough edges.
They are usually self-leveling, giving you the best chances of achieving a smooth, even surface on your small 3D prints. Plus, they are typically transparent, allowing you to better preserve your print’s color.
Filling primers are pretty cheap. For example, my go-to filler primer is Rust-Oleum Automotive 2-in-1 Filler & Sandable Primer (available on Amazon) isn’t any more expensive than any average can of spray paint.
These primers are incredibly easy to apply and can make the sanding process much more seamless.
However, if you plan to paint your print, you could also use wood filler. This filler usually turns yellow to cream in color when it dries, so it’s not very pretty, but it does the job just as well as a filling primer.
4. Sand The 3D Printed Parts
When sanding small parts, you must be careful not to take off too much material or apply too much pressure. Otherwise, you may break the print.
In addition, working in a well-ventilated, bright place goes a long way in helping you sand the part. You may even want to use reading glasses to magnify your work – a tip that I’ve found very handy.
As you sand, I recommend using a stiff brush, like a toothbrush, to dust away your filament or resin shrapnel. Keeping the surface clean as you go will give you the best visibility, allowing you to target all the roughest spots.
3. Clean the 3D Printed Part
After sanding, you will need to clean the part before doing anything else. Cleaning is a vital part of sanding because there are going to be many particles left behind when you finish. These sticky particles can impact the coating of paint or primer.
So, let’s talk about how to clean small 3D-printed parts.
There are a few options you can choose from to get the job done, and each choice will work better with different shapes and sizes.
First, consider using a clean cloth for a fair amount of dust. A light brush with a rag should be enough to remove the larger clumps of debris that may have collected on your freshly sanded part.
Alternatively, you can also use a tack cloth to remove the dust from your figure better. Tack cloth is a standard tool used for removing dust quickly, as it is sticky.
So, you wouldn’t just be wiping the dust away with a tack cloth. Instead, you are picking up the dust with a sticky surface. This stickiness provides a much more thorough removal of the dust that formed during sanding.
As a shortcut, you might also be able to use lint-removing sheets or masking tape as a substitute for tack cloth.
If the other two cloth options aren’t suitable for your 3D printed part, I recommend a dust brush to finish removing the dust. As I mentioned, an old, stiff toothbrush works wonders for this.
4. Polish the Parts
If you want your 3D-printed parts to stand out, you may want to polish them. Polishing works well with sanding because it will also help eliminate lumps and bumps left over from your coat of filling primer.
Sanding is essential for polishing because it allows the polish to stick to the printed parts without running or wearing off quickly. So, even if you don’t need to sand to smooth out your prints, you should still sand before polishing to allow it to stick correctly.
When choosing the best polish, many people choose metal polish. Metal polish is tough enough to stick to your 3D prints, whether filament or resin and allows you to coat them evenly and quickly.
If you’re looking for a quality brand of polish, we recommend Brasso Multi-Purpose Metal Polish on Amazon. The best part about this polish is that you can use it on just about any surface around your home.
Brasso polish is easy to use. Use a clean cloth to apply the polish to your print, then use another clean cloth to buff out the remaining polish.
Check out this video to get smooth 3d prints:
Final Thoughts
Sanding any 3D-printed part takes some time and elbow grease, but finding a tool that fits just right can be tricky when post-processing miniatures and other small models.
Sandpaper, a Dremel, and files can help you get into all those nooks and crannies, regardless of the part’s shape. Finishing off with a good clean, a coat of filling primer, and some polish can hide any mistakes, scratches, or leftover lumps.
- Written by:
- Ben
- Last updated:
- 11/22/2023
About Ben
I started 3D printing since 2013 and have learned a lot since then. Because of this I want to share my knowledge of what I have learned in the past years with the community. Currently I own 2 Bambulab X1 Carbon, Prusa SL1S and a Prusa MK3S+. Hope you learn something from my blog after my years of experience in 3D printing.