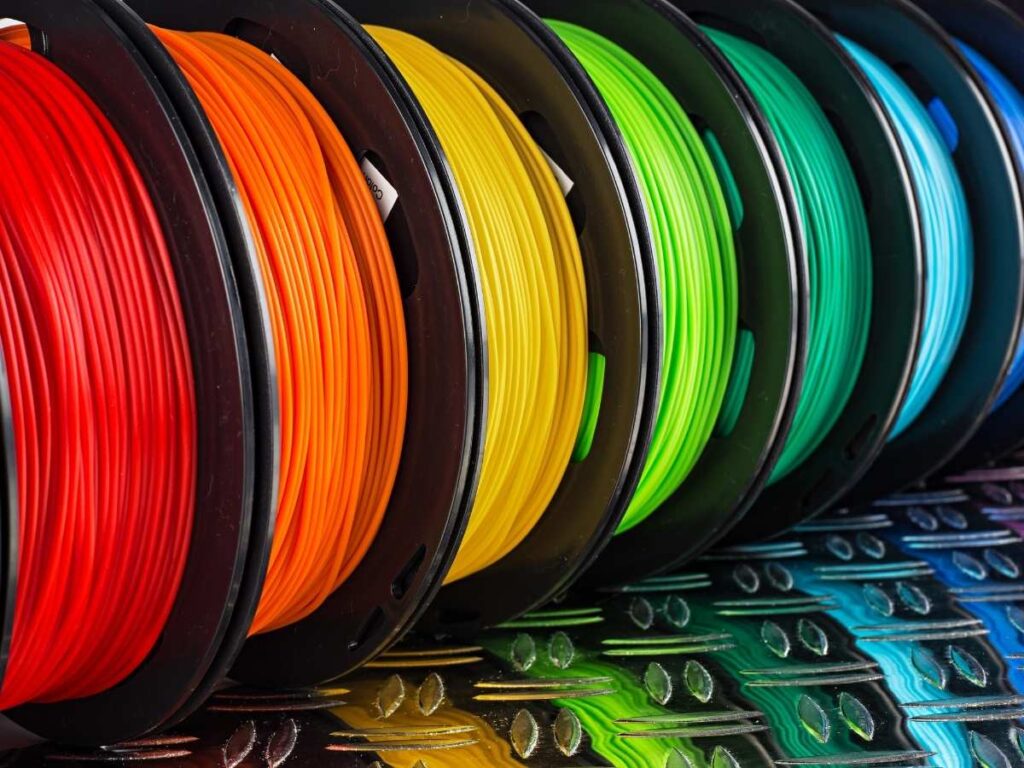
Polyethylene terephthalate glycol, or PETG, is an incredibly durable 3D printing filament, making it perfect for structural pieces and heavy-duty models. However, since it’s so durable, it can quickly get stuck in your extruder nozzle, causing print fails and jammed equipment.
Here’s how you can keep PETG filament from sticking to the nozzle:
- Use the proper printer nozzle.
- Use the correct print temperatures.
- Dehydrate your filament.
- Increase your fan speed.
- Increase the distance between the nozzle and the bed.
- Slow your pinter down.
- Do a test run to fine-tune your settings.
So, let’s discuss the tips and tricks to printing PETG models without experiencing a sticky, filament-caked nozzle. I’ll teach you the requirements of PETG printing and help you understand why following these guidelines can help you get perfect prints every time.
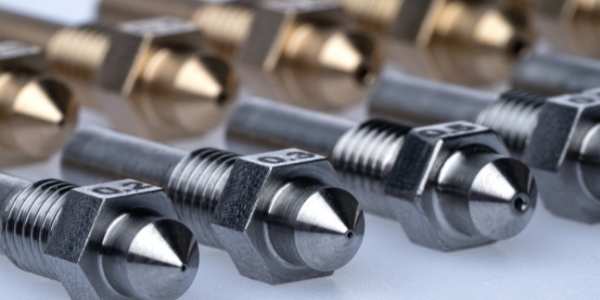
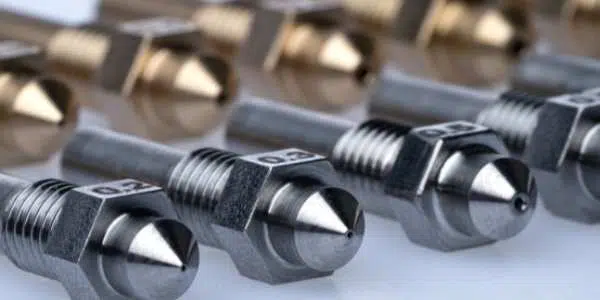
1. Use the Proper Printer Nozzle
When printing with PETG, you need an all-metal hot end.
Printers with a Teflon (PTFE) lined hot end are perfect for printing materials such as PLA or ABS filaments. This plastic lining helps your filament slide through the nozzle quickly, helping to avoid print failures.
However, PTFE lining is not compatible with PETG printing. That’s because the coating starts to degrade when it’s heated at temps above 473º F (245º C). For the best results, you’ll need a hot end that is made entirely of metal since these heads can usually withstand temperatures of up to 572º F (300º C).
2. Use the Correct Print Temperatures
Most PETG filaments require higher print temperatures than others, with the melt temperature falling between 220º and 265 °C (428º to 509º F). However, there’s still a bit of variation among different brands. So, it’s crucial to ensure that you read about the ideal print temperature for each PETG filament spool you have.
That said, even if you follow the instructions on your filament spool, you may need to make adjustments for your specific printer. Some printers cool down or heat up faster than others, and some have difficulty maintaining a constant, regulated temp.
To figure out what temp you should set your printer to, start with the temperature recommendations for your filament. If the PETG sticks to your nozzle and creates beads of sticky goop around it, your temp may be too high. If the printer makes a knocking sound or starts stringing, your temp is too low.
As you print, adjust your temperature by about 41º F (5º C) until the filament comes out smoothly without creating any stringing or gaps.
3. Dehydrate Your Filament
Like almost any other filament, PETG needs to be dry for the most durable, seamless finish.
That’s because polyesters like PETG can’t bond well if they are damp. When you use filament that has been exposed to a humid environment, even for just a couple of weeks, you’ll start to see more opacity, more visible seam lines, and more skips in the final print.
Damp filament is also a no-go when it comes to your nozzle. Steam from moist filament can get trapped in your hot end, damaging the printer and causing bubbles and stringing in your print.
When this happens, you also have a higher chance of getting PETG stuck to your nozzle. So, dehydrating your filament is always a crucial step in the printing process.
To dehydrate PETG, you can leave it in a plastic bag with a desiccant such as silica gel for around 24 hours before printing. You can also put it in your oven at 140º F (60º C) for about 6 hours.
4. Increase Your Fan Speed
Since PETG tends to stick to itself in liquid form, cooling down your print will help the filament adhere to your model, reducing the chances of stringing and nozzle-sticking.
Generally, turning your fan onto a medium or high setting of anywhere between 40% and 100% will help keep your print cool without affecting the hot end. That way, as the filament comes out of the nozzle, it’ll solidify before it has the chance to get carried away.
5. Increase the Distance Between the Nozzle and the Bed
PETG is a sticky, glue-like material that can quickly build up around your print nozzle or get stuck to itself, causing a clog. As your printer extrudes the PETG, it’ll need plenty of room to allow the material to attach itself to the print bed or your model, so a higher Z offset is crucial.
To prevent your nozzle from getting clogged up as it distributes PETG, you can raise your nozzle from the print bed a bit. That way, the nozzle is less likely to drag along freshly printed PETG, and gravity can help the printer drop layers of PETG onto the print bed.
Most pros recommend incrementally raising your nozzle by 2 mm (0.079 inches) on a test print to figure out what height works best for you. Once you find the perfect lift, make a note of it to help you adjust your printer for future PETG prints.
6. Slow Your Printer Down
Fast printing works fine with filaments such as PLA and ABS, but a high speed won’t cut it when using a PETG filament. PETG is sticky and durable, which means that it needs more time to settle and cool on your print than other materials.
For the best results, you’ll need to lower the speed of your printer. Usually, a rate of 55mm/s (2.17 inch/s) will do the trick, but you may need to print your model even slower to reduce the chances of a gooey nozzle.
7. Do a Test Run To Fine-Tune Your Settings
As is the case in all of these steps, practice makes perfect, so prepare to do a bit of troubleshooting before making your first successful PETG print.
There are tons of adjustments to make when you choose to use PETG, such as:
- Adjusting the temperature
- Raising your nozzle
- Adjusting your fan speed
- Slowing down your printer
Regrettably, there is no set rule for what will work since all printers and PETG filaments are different.
So, you might want to start with a simple test print and play around with your printer’s settings. You can make something small like a cube to see what works and looks the best. Then, make sure to take note of the ideal settings for you and your printer so that you can always expect a perfect print.
Final Thoughts
3D printing with PETG usually results in a stunning, durable model, but only if this sticky filament doesn’t clog up your nozzle. You can make many adjustments to prevent sticking, such as adjusting your temperature, using a metal hot end, increasing fan speeds and the height of your nozzle, slowing down print speeds, and dehydrating your filament.
After a few test runs and adjustments, you can expect only the best from this filament!
- Written by:
- Ben
- Last updated:
- 11/23/2023
About Ben
I started 3D printing since 2013 and have learned a lot since then. Because of this I want to share my knowledge of what I have learned in the past years with the community. Currently I own 2 Bambulab X1 Carbon, Prusa SL1S and a Prusa MK3S+. Hope you learn something from my blog after my years of experience in 3D printing.