3D printers can only print particular objects at a fixed speed with certain filaments. However, if you want to speed up the production process and make molds with your 3D printer, doing so is simple, fun, and affordable.
Here’s how to easily 3D print a resin mold:
- Choose your mold design and prep your filament.
- Design your mold in a CAD program.
- Slice your mold.
- Print the mold.
- Prepare your mold for casting.
- Get some epoxy resin.
- Mix and pour your resin.
- Allow for full curing.
- Remove your object from the mold.
- Post-process your cast.
So, let’s go through the steps together and talk about the easiest ways to make resin molds. I’ll give you some pro tips and suggestions along the way so that you can make molds for any design with almost any 3D printer.
1. Choose Your Mold Design and Prep Your Filament
Before you jump right in and start designing, you will need to plan out what kind of mold you want to make.
When you make a mold, there needs to be that is flexible enough to release your cast from the mold. Resin in itself is rigid and unforgiving, so you will need either a flexible casting material or a flexible mold to make this work.
When 3D printing, you can either make a flexible mold from your filament that you can cast resin into or make a resin mold that you can cast flexible silicone or plastics into.
Usually, your printer can make this decision for you. If you have a standard FDM printer, you will need to make a flexible mold to pour the resin into. So, to make a mold durable and bendable enough to withstand the epoxy, you will need to use a filament such as a flexible TPU.
I use this Overture TPU Filament (available on Amazon.com) to make my resin molds for pen turning, jewelry making, and model making, and it has held up after many uses. I highly recommend it for anyone who isn’t sure what filaments will hold up best.
If you have a resin 3D printer, you can make a resin mold to pour plastics such as polypropylene, polyethylene, and TPE into.
For this tutorial, I’ll walk you through making a flexible mold for casting resin. That said, if you only have a 3D resin printer, I highly recommend trying out injection mold printing. With the injection mold technique, the molds usually last much longer and can make very intricate designs without too much post-processing.
For an entertaining and helpful tutorial on how to create an injection mold with a resin 3D printer, check out this video from The CrafsMan Steady Crafting on Youtube, which will walk you through the entire process:
2. Design Your Mold in a CAD Program
Once you know what you want to make and have the filament you need, it’s time to open up your favorite CAD program and get designing.
You can either make a two-part injection mold or an open-faced mold when you design your mold. Open-faced molds are best for objects that sit on a flat base, while injection molds are better for castings that need to have details across all sides.
To start, design a solid block with 100% infill to keep the mold strong. Then, create the object you want to make the hollow part of the mold with and set it to 0% infill to make a negative model.
Combine the rectangle and your object, ensuring that the rectangle is wide and tall enough to encompass it.
If you’re making an open-faced mold, cut down the edges, leaving only a thin wall between the hollow mold and outside your model. Trimming down thick edges will make it easier to pop the cured resin out of the mold later.
If you are making an injection mold, make sure to add a fill hole so that you can add your resin to it after printing.
One of the most important processes you need to do when designing your model on your CAD software is to make the mold watertight. Failing to solidify the 3D print will cause the resin to fuse with the TPU, destroying the mold and your casting. So, don’t forget to make it watertight!
To help keep your mold watertight and minimize layer lines, you may want to print your mold in as high a resolution as possible. That way, you will have less post-processing, and your finished cast will have more delicate details.
3. Slice Your Mold
Once you have designed your mold, it’s slicing time. Slicing will help you ensure that your mold is as detailed as possible and allow you to cut your mold into segments for certain types of casting.
Process your 3D print through a slicer and cut your mold in half if making an injection mold. If you aren’t making an injection mold, your model should be ready to send over to the printer for processing!
4. Print the Mold
During printing, there are some extra steps you can take to ensure that the mold comes out just right:
- Turn up the temperature by 5º C (9º F) to help with adhesion
- Turn up the flow rate a bit to melt the layers together, reducing layer lines.
Following these tips won’t ensure a foolproof print, and you may still have to monitor your printer to ensure that these adjustments work for you and your filament, but they do usually result in a more seamless and durable mold.
Once your print is finished, please remove it from the print bed and inspect it for holes and failed spots. If you see any mistakes in the interior of the casting surface, you may have to reprint the mold.
If there are visible layer lines, you can either leave them or lightly sand them out with fine-grit sandpaper. However, you can always sand out the lines on your finished cast, which may be easier if you have a detailed or complex mold.
5. Prepare Your Mold
Epoxy resin is sticky, durable, and hard when cured, which is why it is crucial to use a mold-release material such as this PVA Mold-Release Spray (available on Amazon.com). This mold-release spray is gentle enough to use on TPU, while other demolding agents could damage the mold or not work at all on the filament.
TPU is durable and flexible enough to ensure you get a clean casting, but only if you use a mold-releasing agent. If you don’t, you could risk ripping your mold when removing your cured resin, obliterating the TPU.
If you’re in a pinch, you can use some common household items such as canola cooking spray or vaseline to prime your mold. However, these demolding agents never work quite as well as the real thing, and they could add extra bubbles or an uneven surface to your resin.
Whatever you use, do not be sparing with the releasing agent. Coat your mold until it looks like it could drip, and be sure to apply plenty into every nook and cranny, where the resin will probably grab onto your mold during the curing process.
In addition, if you are using an injection mold or split mold, now is the time to clamp your mold together. You can use two pieces of wood, metal plates, books, cardboard, or anything else you have lying around to serve as a stiff back for your mold. Then, you can clamp the pieces together.
6. Get Some Epoxy Resin
Not all resins are made equally, which is something I’ve learned from experience. Generally, cheap resins have curing problems, yellow quickly, or have insanely large bubbles that are challenging to get rid of. So, you will want some epoxy that you can be sure will cure well.
Some of my favorite resins to work with when making professional-grade casts (which are all available on Amazon.com) are:
These are all resins I rely on for my castings, and they have worked the best for my TPU molds. That said, there are plenty of others out there, so feel free to look for the one that will work best for you.
7. Mix and Pour Your Resin
It is almost time for casting, but before you go wild with the pouring, there are some things you should know about pouring epoxy resin.
Resin is not food-safe (unless otherwise specified), and it is a highly toxic substance. Once it is fully cured, it bonds to itself, creating a shell between you and the poisonous plastics, but in liquid form, it emits harmful lung-damaging vapors and can burn your hands when you touch it.
All this to say – you need protection when working with resin. Always wear:
- Gloves
- Goggles
- A safety mask or respirator
- Long-sleeve clothes
It is best to work in an area with plenty of ventilation when pouring and to mix the resin. To keep air moving and push away the toxic fumes of the epoxy, open your windows and turn on some fans.
Make sure to cover the surface you are working on with something you don’t mind messing up.
I use this Hosonsen Vinyl Tablecloth (available on Amazon.com) for all of my resin work, and it’s so durable that it’s lasted me for years through all of my crafting and DIY adventures. Resin won’t soak through this tablecloth, ensuring that anything underneath will be protected from those inevitable drops of epoxy that fall during pouring.
Now, it’s mixing time! Mix your epoxy resin using the instructions on the label, and be careful to get the measurements right. If you don’t mix it properly, you could end up with par-cured resin that still emits toxic vapors and has a sticky surface, or you could end up with cracks and unsightly bubbles. Then, you can add any colorants or additives to the resin.
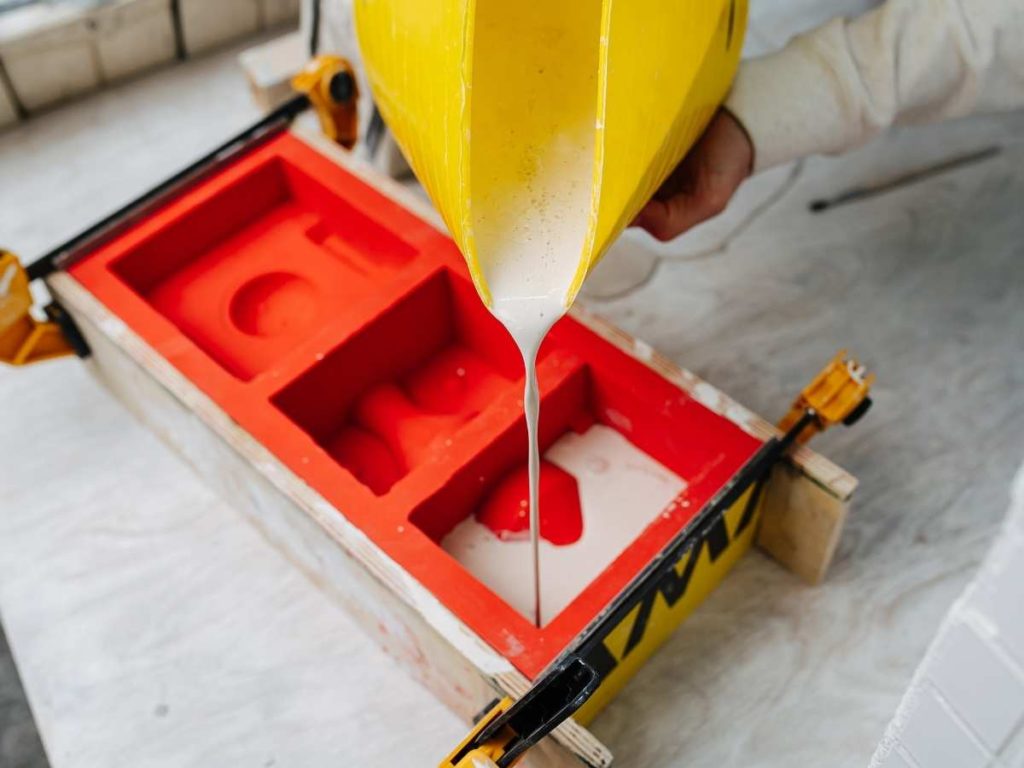
When you are ready, pour your resin into the mold slowly, trying not to create additional bubbles.
Optionally, you can use a heat gun on its lowest setting to pop some of the bubbles in the resin. However, it would be best to do so sparingly – the TPU might warp or melt under too much heat.
8. Allow for Full Curing
Now, you will have to wait for your resin to cure. Most resins cure within 24 hours, but it is usually best to wait a bit longer, especially if your cast is large or has a solid interior.
I usually recommend waiting an additional 24 hours (remember, patience is a virtue) on top of the time that your resin label indicates, just in case things are still wet. If you remove your cast before it is fully hardened, you will probably ruin it, forcing you to repour and waste materials (and money).
9. Remove Your Object From the Mold
Once your resin is fully cured, carefully remove it from the mold, slowly peeling the cast off. If you go too quickly, you risk ripping the mold that you spent so long designing and printing, so be careful.
Once your resin is de-molded, you should clean the mold, removing any debris or crispy resin bits left behind. You can use a dish detergent and a cloth or sponge to clean the TPU out. However, make sure to be gentle, and never use your usual dish sponge to clean something with resin on it.
10. Post-Process Your Cast
You might notice that your casting has layer lines or other flaws in it, which is typical for 3D printed molds. To remove these defects and ridges, all you have to do is sand them out.
Before sanding, make sure to wear your safety gear. Resin dust is just as toxic as liquid resin, and inhaling it could permanently damage your lungs.
To sand your resin:
- Wet your resin object.
- Use coarse to medium grit wet/dry sandpaper to buff off the edges.
- Repeat the process with medium-grit sandpaper and then again with fine-grit sandpaper.
- Buff your resin with a damp buffing cloth or microfiber cloth until it shines.
- If you want to polish, you can use a resin polishing compound and your buffing cloth to finish your piece.
For an example of how to sand out your resin and some fantastic tips, check out this tutorial from ResinObsession:
Final Thoughts
From start to finish, 3D printing a reusable TPU mold for casting resin is no more challenging than making any other model with CAD software. While using the mold does take some extra steps and know-how, you’ll never go back to buying silicone molds once you get the hang of it. With 3D printing, you have the power to cast anything you could ever want!
- Written by:
- Ben
- Last updated:
- 11/23/2023
About Ben
I started 3D printing since 2013 and have learned a lot since then. Because of this I want to share my knowledge of what I have learned in the past years with the community. Currently I own 2 Bambulab X1 Carbon, Prusa SL1S and a Prusa MK3S+. Hope you learn something from my blog after my years of experience in 3D printing.