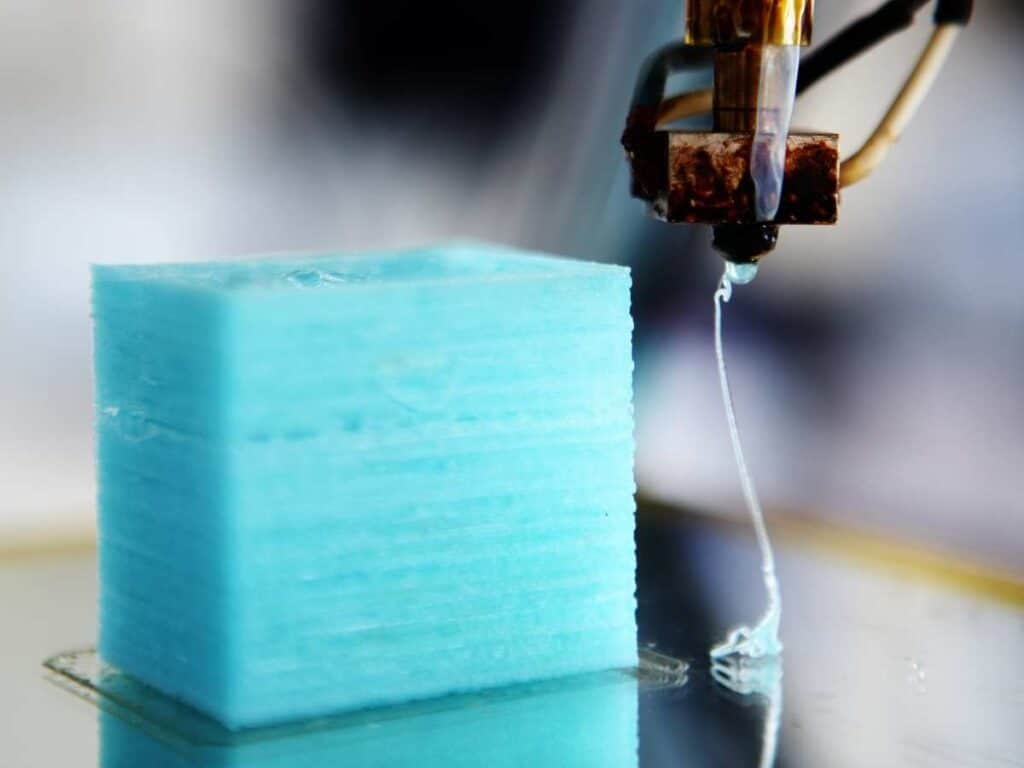
A common issue when 3D printing custom objects is stringing. Unsightly cobweb-like filaments are left behind as the extruder moves across the build plate. Thankfully, this is an easy error to fix.
Here are 10 ways to clean up stringing on a 3D print:
- Keep filaments dry.
- Clean or replace the nozzle.
- Shorten the Bowden tube.
- Use the proper print temperature.
- Enable and calibrate filament retraction.
- Adjust the print speed.
- Disable Z-hop.
- Apply hot air with a heat gun or hairdryer.
- Perform manual cleaning.
- Wipe away with acetone.
This article explores how to clean up stringing while 3D printing. I’ll also explain why stringing occurs and how to prevent it.
1. Keep Filaments Dry
PLA, and to a lesser extent, other filament materials like ABS and PVC, are somewhat hydrophilic, meaning they can absorb water. If the filament is stored in open ambient air, it will gradually absorb moisture from the air.
When the moist filament is heated, microscopic pockets of water boil into steam and pop. The popping breaks up the surface of the plastic. The plastic ends up sticking to the nozzle.
3D printing filament should be stored in a sealed water-tight container or plastic bag, ideally with a desiccant agent inside said container or bag. A desiccant agent is an object or substance that absorbs moisture from the ambient air. A common example of a desiccant agent is a silica gel pack included in many consumer goods.
Silica gel packs are available in bulk from Amazon for pennies per gram. But please do not eat them. You will not “escape the matrix”; you will get extremely sick or die.
Moist filament is one of the most common causes of stringing, especially when using PLA filament. If stringing occurs during a print job, a key step to preventing stringing in future prints is drying the filament.
3D printing filament can be dried in several household appliances.
Provided the filament is not heated below its glass transition temperature, the temperature at which it will start to weaken or crystallize, it can be dried in a conventional oven. The table below shows the ideal drying temperatures for filaments of several different materials.
| Material | Time (Hours) | Temperature (°F) | Temperature (°C) |
| PLA | 4 | 104-113 | 40-45 |
| ABS | 4 | 176-185 | 80-85 |
| Nylon | 12 | 176-194 | 80-90 |
| PETG | 4 | 140-150 | 60-65 |
| TPU | 5 | 104-122 | 40-50 |
| PC | 6 | 248-266 | 120-130 |
| ASA | 6 | 248-266 | 120-130 |
Food dehydrators can also be used to dry 3D printing filament. There are also dedicated filament dryers on the market, which, as far as we can tell, are functionally identical to food dehydrators.
2. Clean or Replace the Nozzle
Every time you make a 3D print, the filament leaves a bit of itself behind. This residue is another leading cause of stringing. The residue increases friction inside the nozzle. There are two ways to fix a dirty nozzle, cleaning, and replacement.
The exterior of a 3D printer nozzle can be cleaned with a wire brush. Most nozzles are made of either brass, aluminum, or steel so that they can survive a vigorous cleaning.
There are several ways to clean the interior of a 3D printing nozzle.
The most effective way is the use of a specialized cleaning filament. Cleaning filament is made of undisclosed white plastic. The cleaning filament is run through the extruder at either room temperature or molten.
Cleaning filament isn’t cheap. A package of a few ounces typically costs between $10 and $20 on Amazon. But if you choose to run it through your extruder at room temperature, a technique called “cold pulling,” it can be reused potentially hundreds of times.
Another way to clean a 3D printer nozzle is to soak it in acetone overnight. Acetone can dissolve PLA and a few other common filament materials.
If cleaning doesn’t solve your stringing problem, you can also replace the nozzle. Even with problem cleaning, a nozzle will not last forever. There may be internal damage you cannot directly see.
3. Use a Thinner Bowden Tube
This tip is only applicable for 3D printers that use a Bowden tube to feed filament into the extruder. A Bowden tube is a thin plastic tube that some 3D printers use to align the filament with the extruder’s intake port. This tip is not applicable for direct drive printers, which do not use Bowden tubes.
If your Bowden tube is too wide, it will not properly align the filament with the intake port. And this can cause stringing.
Most Bowden 3D printers ship with a 2 mm diameter Bowden tube and print with a 1.75 mm filament. If you are having a problem with stringing, try using a 1.9 mm Bowden tube.
4. Use the Proper Print Temperature
FDM printers have to melt the filament to work. But if you have a problem with stringing, you might have the print temperature set too high.
Filament manufacturers provide a temperature range at which their filament should be used. Stringing can be mitigated by setting the print temperature toward the lower end of the specified range. If stringing occurs, try reducing the print temperature in steps of 5 degrees celsius until you are satisfied with the results.
5. Enable and Calibrate Filament Retraction
Another key tip to minimize or eliminate stringing is to enable and properly calibrate filament retraction. When retraction is enabled, the extruder will pull back the filament when traveling between print zones. That reduces pressure on any molten plastic still in the nozzle, which in turn reduces leakage.
The option to enable retraction will probably be in the slicing program you use to generate your .stl files. Your printer may also have the option to enable retraction somewhere in its user interface.
Of course, eliminating stringing is not as simple as enabling retraction. You have to get the retraction right. The two key variables are the retraction distance and speed.
Getting the retraction distance right is a matter of trial and error. Starting with the default distance, try increasing it in small increments.
Bowden tube printers generally require longer retraction distances than direct drive printers. A distance of between 0.5 mm (0.01 inch) and 1 mm (0.03 inch) will likely be sufficient for direct drive printers. Bowden printers require a distance up to 2 mm (0.07 in).
Retraction speed determines how quickly the extruder will take the pressure off any molten plastic left in the extruder. PLA and ABS typically require a speed between 40 mm/s and 60 mm/s. Bowden printers, however, only require a speed between 30 mm/s and 50 mm/s.
6. Adjust the Print Speed
Molten plastic is not a durable material. Stings can be snapped before they harden if the extruder moves fast enough.
In your slicer program, there will be a setting to control the travel speed of the extruder(s). If you are having a problem with stringing, you should try increasing the travel speed. Depending on the printer brand you use, a travel speed between 190 mm/s (millimeters per second) and 200 mm/s is likely ideal.
7. Disable Z-Hop
Z-hop is when the printer jerks the extruder upward while moving between print areas. It makes sense in principle, as it reduces the chances of the extruder or the arm it’s mounted on smacking into a tall part of the print. But the upward jerk also increases pressure on molten plastic left in the nozzle.
The option to disable z-hop should be somewhere in the settings of your slicer program. Disabling z-hop can be considered a “last resort” if other methods of preventing stringing have failed, as doing so may increase the chances of the extruder assembly hitting your object.
8. Apply Hot Air With a Heat Gun or Hair Dryer
Remember when we said that 3D printing filament is thermoplastic? Most stringing is ultimately related to this reality. But the vulnerability to heat also allows a fairly simple solution to stringing: hot air.
Using a heat gun or a hairdryer turned up to a high temperature, blow your 3D print with hot air. It is best to do this while the part is still adhered to your printer’s build plate, but you can grip it from a corner with a pair of pliers. If the print has multiple sides, blow it from every side.
When exposed to the heated wind from your tool, most if not all filaments will instantly snap and melt into the surface of the print. Hot air treatment can also give your print a glossy finish.
9. Perform Manual Cleaning
What if you have tried blowing your 3D print with a heat gun or hairdryer and still aren’t satisfied with the results? In this case, you’ll have to continue to take the matter into your own hands. Only now, it’s time to break out the hand tools.
The two hand tools that can be used to remove strings or their remnants are razor blades and sandpaper. Most 3D printing filaments aren’t made of exceptionally tough materials; thus, they can be easily cut and sanded with razor blades and sandpaper, respectively.

Here’s how to clean things up manually:
- Use a razor blade to cut off a string as close to the main body of your print job as possible. Be careful when working around delicate sections of your object to avoid damaging or obscuring it in any way.
- Sand the nubs down with medium-grit sandpaper.
Keep in mind, thermoplastics are considerably tougher than human skin. Please exercise caution when handling razor blades to avoid injury.
10. Wipe Away With Acetone
As mentioned above, acetone can dissolve several of the most common filament materials. If you are not satisfied with the finish of your print after applying heat and manually sanding or cutting string, you can wipe down your print with acetone.
You only need a small amount to get a good finish. Apply a bit of acetone to a clean cloth, or ideally a gauze pad, and wipe any string remnants away.
What Stringing Is and Why It Occurs
“Stringing,” also called “oozing,” is a common manufacturing defect that can occur when using a fused deposition model printer. It occurs when molten filament material exits the areas where it is intended to be deposited. Stinging usually takes the form of thin hair-like fibers strung between sections of a print job.
A fused deposition model (FDM) printer is a 3D printer that works by melting and extruding thermoplastic filament. It is the most common type of commercially available 3D printer.
A thermoplastic is a plastic that must be melted to mold it into the desired shape. Most 3D printers use thermoplastic filaments.
Stringing is usually caused by molten filament leaking out of an extruder nozzle when moving between deposition zones. The nozzle dipping can also cause it into freshly deposited thermoplastic before it fully hardens.
Polylactic acid, or “PLA,” is the most likely filament material to produce stringing due to its low melting point and highly fluid consistency when molten.
How To Prevent Stringing on a 3D Print
The easiest way to avoid having to clean up stringing is to prevent it from happening in the first place. Doing so requires the proper setup of your slicer program and proper maintenance of your printer.
Most 3D printing filament materials are easy to work with simple hand tools or household chemicals. So a print job that suffers from stringing can easily be avoided once you learn the tricks.
Really, the way this is achieved is with proper setup procedures as well as some trial and error. Indeed, you’ll need to use some of these tips from time to time, but eventually, you’ll get it right.
Conclusion
The best way to clean up stinging or oozing on a 3d print is to prevent it from happening in the first place. Be sure to check all your settings, such as print temperature filament retraction, and always keep everything clean. But if stringing occurs anyway, it’s easy to fix with the right tools.
- Written by:
- Ben
- Last updated:
- 11/19/2023
About Ben
I started 3D printing since 2013 and have learned a lot since then. Because of this I want to share my knowledge of what I have learned in the past years with the community. Currently I own 2 Bambulab X1 Carbon, Prusa SL1S and a Prusa MK3S+. Hope you learn something from my blog after my years of experience in 3D printing.