Simplify3D is a great software for 3D printers that helps you slice your 3D designs before printing them. Slicing is important if you want your 3D objects to print properly, so you need to understand how to use Simplify3D and adjust the settings you want, like print resolution.
Here’s how to change your print resolution in Simplify3D:
- Determine what print resolution is needed.
- Use settings to change resolution.
- Test your new print resolution.
Having the proper print resolution in your slicing software like Simplify3D is essential for obtaining a successful 3D print. Keep reading to learn how to execute these steps to properly and efficiently change the print resolution in Simplify3D.
1. Determine What Print Resolution Is Needed
The print resolution for a 3D printer, also called layer thickness, is how precise the printer is printing on each axis. In general, the print speed and layer thickness determine the print resolution in Simplify3D.
There are two different resolutions on 3D printers: horizontal and vertical resolutions. The horizontal resolution is the resolution of the X-axis and Y-axis. When the horizontal resolution is lower, the greater detail your printed object will have. Whereas the higher the resolution number, the lower the detail printed.
The vertical resolution is the thickness or height of the printed object, also referred to as the Z-axis. The more detail you have on the Z-axis – which usually means creating thin layers – the longer the printing process takes. This is simply because there are more layers that need to be printed.
Keep in mind that some printers can print at higher resolutions than others. Regardless, the print resolution can be changed on all 3D printers through software like Simplify3D.
So, you need to determine how much detail you want to print and what resolution you want on each axis. Often, the default resolution works well, but it’ll still print if you want to try something else. Once you decide, you can change the resolution.
If you’re new to Simplify3D and want to learn more before you try to adjust your print resolution, check out the book Frederik Forquignon 3D Printing with Simplify3D (available on Amazon.com). This manual guides you through all the features of Simplify3D and how to solve the most common problems. It explains the basics of layers, print resolution, speed, and details on how to change advanced settings to make prints come out as best as possible.
2. Use Settings To Change Resolution
The print resolution is adjusted by changing the layer heights and speeds. To do this, you must go to your model’s settings in Simplify3D. Follow these steps:
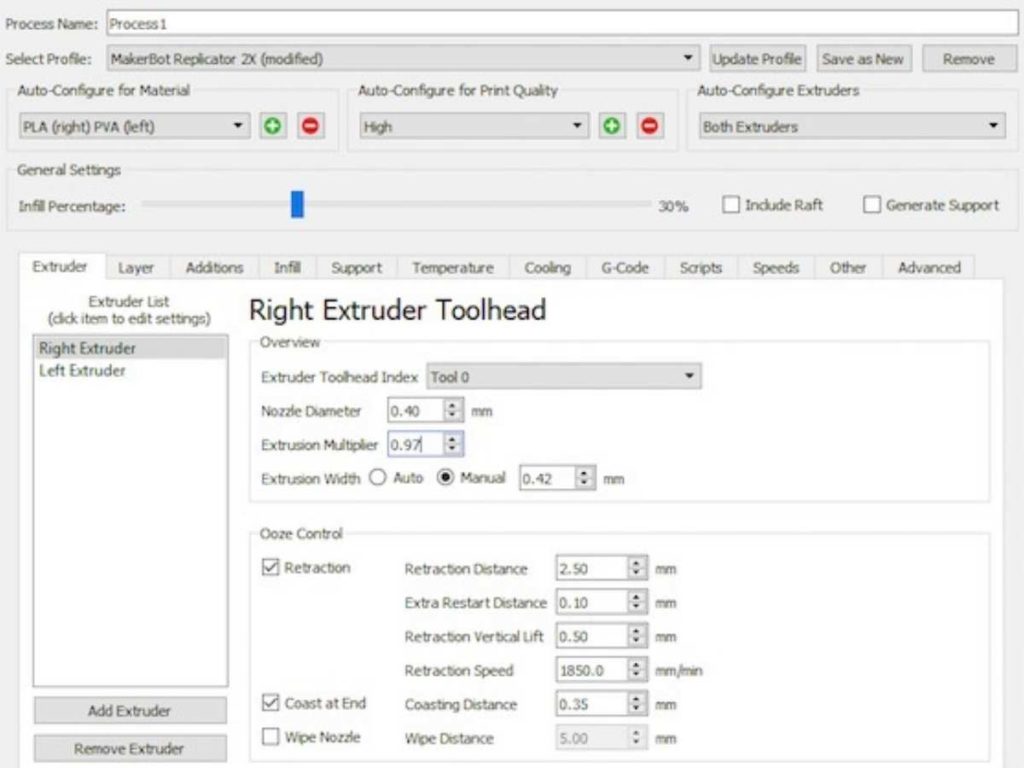
- Open the model you want to change the print resolution for and open up the settings. A button called “Edit Process Settings” will open the settings dialog for you.
- Find and select the “other” tab when the setting box pops up. In this section, you’ll see options to change the speeds, dimensional adjustments, filament properties, and bridging. In this case, the first section with the speeds is what you want to focus on.
- Adjust the speed of the XY-axis and the Z-axis. The faster each axis moves, the lower the resolution of the print becomes. By contrast, the lower the speed of each axis, the faster they move.
- Locate and select the layer tab and adjust the layer settings. You can change the height, the top and bottom layer sizes, and more, which all adjust your print resolution.
If you want an even more detailed explanation on how to adjust the print resolution in Simplify3D by optimizing your layer height and speed, I recommend checking out this YouTube video:
You can also change settings for your first layer, which affects your print resolution. You can learn more about the first layer and why important it’s to get the right resolution in this YouTube video from Fugatech 3D Printing:
3. Test Your New Print Resolution
Once you’ve changed the print resolution in Simplify3D, it’s best to test it before continuing to edit your mode to ensure it’s exactly how you want it. Otherwise, you’ll have to repeat this process and redo all your edits and designs.
If your print resolution is too low, you won’t see enough detail in your new object. Not seeing enough detail means your print speed is too fast for the layer thickness you set on that axis. To fix this, you either need to slow down the print speed or make the thickness higher so you can see the lines and detail you want.
On the other hand, you may be getting very detailed prints, but it takes a long time. You can speed up the print time by increasing your layer thickness. Higher layer thickness means fewer layers to print overall, so it takes less time. But, if you do want to keep the same number of layers, you can increase the nozzle speed to make it print faster; however, your object will be less detailed.
Also, keep in mind that really thin layers don’t print well with all nozzles. Some won’t be designed to print such small details, resulting in some undesired consequences. In particular, if a larger nozzle won’t work, print something small or very detailed. Instead, a small nozzle made to print intricacies must be used.
Final Thoughts
Knowing how to change the print resolution in Simplify3D is important because you want your 3D object to have enough detail. However, you don’t want it to have so much detail that your printing takes too long.
Here are the steps you should take to change your Simplify3D print settings:
- First, determine what resolution is necessary for your print.
- Change the layer height and speed settings as desired in “Edit Process Settings.”
- Be sure to test your new settings to verify they work well and ensure the print doesn’t take too long or lack detail.
- Written by:
- Ben
- Last updated:
- 11/22/2023
About Ben
I started 3D printing since 2013 and have learned a lot since then. Because of this I want to share my knowledge of what I have learned in the past years with the community. Currently I own 2 Bambulab X1 Carbon, Prusa SL1S and a Prusa MK3S+. Hope you learn something from my blog after my years of experience in 3D printing.