If you’re looking to 3D print your next project and can’t use an SD card to do so, there’s still a quick and straightforward way to go about it. Cura, a user-friendly 3D printing software, allows you to directly print via the software using a standard USB cable to connect your printer to your computer.
Here’s how to 3D print with Cura over USB:
- Download Ultimaker Cura.
- Connect the 3D printer to your computer.
- Prepare the device.
- Open Cura and input your printer’s parameters.
- Go to the “Monitor” tab to control your printer.
- Drag the file you want to print onto the “Prepare” tab.
- Customize the settings and preview the model.
- Click ‘Print via USB.”
Throughout printing, you’ll need to monitor your computer to ensure it’s active at all times; otherwise, the printing will stop completely regardless of how far along the process has come. Keep reading to learn more about how to execute each of these steps and get a perfectly printed result by simply using this software and a USB cable.
1. Download Ultimaker Cura
If you haven’t already, the first step to start the process is downloading Ultimaker Cura onto your computer. The software is compatible with both Windows and Mac OS and downloadable via any browser you prefer. It’s also entirely free for all users, making it one of the most accessible software you can use to 3D print.
To download Ultimaker Cura:
- Go to the Ultimaker home page and navigate to “Products Software.”
- Choose Ultimaker Cura. Here, you can download the latest version of the software, but the website also offers previous versions to download, still, should you have a specific preference.
- Click on “Download for free” for your desired version to start downloading software. This process usually is relatively quick, so you won’t be stuck waiting for hours for your software to download. Either way, be sure to choose a version recognized by your operating system, whether it be Mac OS or Windows:
- If you’re using an Apple device: Open the DMG file that appears once the process is complete, then drag and drop it into your “Applications” folder.
- If your operating system is Windows: The version adapted to this system is bigger, so it’ll take a bit of time to download onto your device. Once the process is complete, you must go through a series of pop-up windows to give permission to install the software. When the installation is complete, click on “Finish.” You’ll now be able to open the Ultimaker on your device.
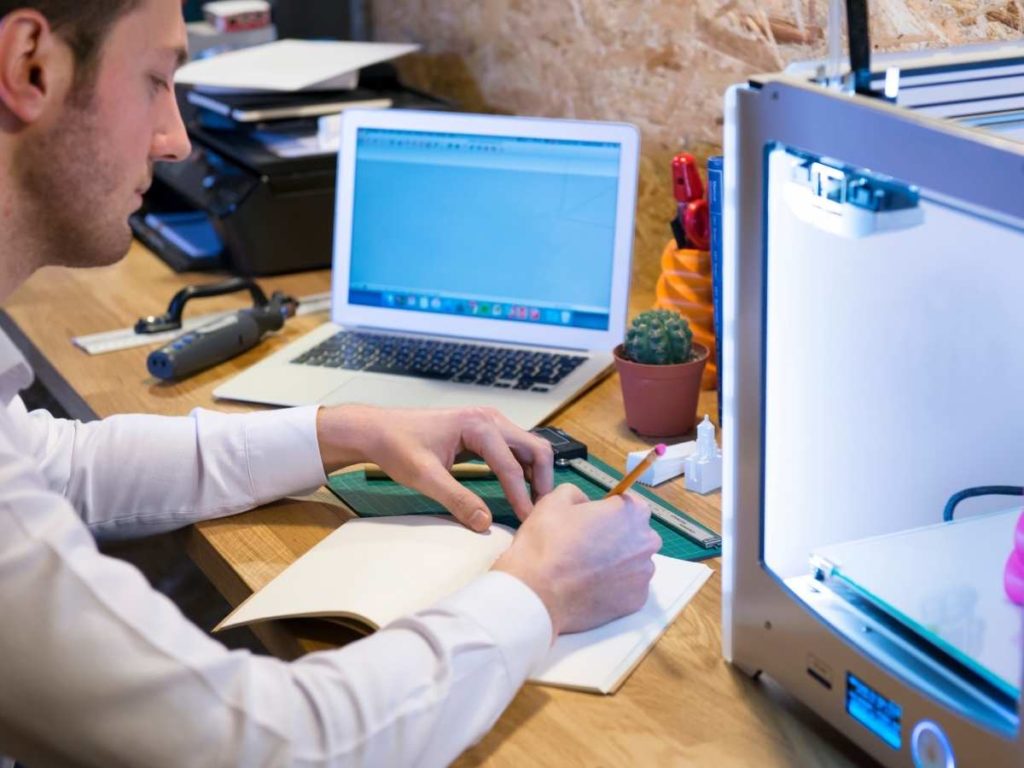
2. Connect the 3D Printer to Your Computer
Now it’s time to connect the 3D printer to your computer via a USB cable. Usually, this cable comes with the printer, and it’s ideal to use that one over an alternate connector of your choice.
At the same time, it’s preferable to use the same USB port every time, as doing so can prevent connectivity problems that may appear later on. Just make sure that this particular port is working properly; otherwise, several communication problems will arise.
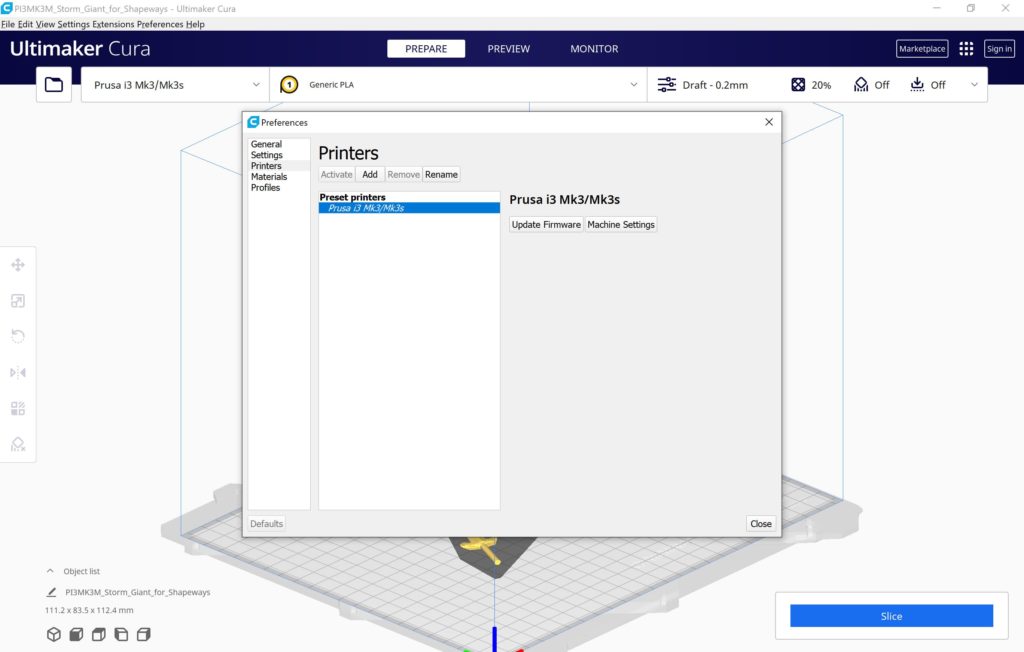
After launching the program, here’s how to add your printer to the Cura software:
- Find and click on the “Add printer” tab. The route you take from here on out will depend on whether your printer is networked or not. The process is simpler when using a network printer, as the configuration is done automatically.
- If your printer is networked: Move on to the next step below (Prepare the Device).
- If your printer isn’t networked: Continue on here to configure it.
- Locate and choose “Add a non-networked printer.” This is in the menu that appears from the Add printer tab.
- Go to the “Custom” section and click on “Custom FFF printer.” This will allow you to tap on the “Add” tab to complete the connection between the two devices. Keep in mind, you can change the name of your printer later on by navigating through the “Printer Name” menu. This feature also comes in handy when connecting more than one printer.
- Click on “Machine Settings” to add your basic preferred configurations. From here, you can change the positioning of the X, Y, and Z-axis, print volume, sizing settings, etc. You can opt to use their pre-set configurations or to customize your own.
3. Prepare the Device
Before starting to 3D print your object, keep in mind that you’ll need to keep the device active throughout the whole process. If you don’t, the print will stop mid-way. Before beginning the printing process, take the time to perform any necessary steps to ensure your device will remain active for hours.
If you’re using a laptop, such prep includes plugging it in or turning off sleep mode altogether for the duration of the print.
This is also an excellent time to verify that the USB and other connectors are plugged in completely, with no risk of sudden movements causing accidental unplugging or any other peripherals that might disrupt the process. I can’t stress the importance of this step enough, as the slightest glitch might result in the print stopping after hours of work and destroying all progress made.

4. Open Cura and Input Your Printer’s Parameters
Once you’re confident your print won’t be interrupted, it’s time to input your printer’s parameters. Go to the top left of the screen to find a tab with your profile. By moving your cursor over it, a menu will appear. Locate and click on “Add Printer.” This allows you to create a profile for your printing device.
After completing the profile, click on “Manage Printers” to input the needed parameters.
These parameters include bed size, nozzle size, filament diameter, etc. The software needs these components in order to produce the highest-quality 3D print possible. After finishing this process, when dragging in a file to print onto Cura, it will immediately recognize your printer and give you the option to print through that device over USB.
5. Go to the “Monitor” Tab To Control Your Printer
Now that your 3D printer is fully connected to the software, you can control its settings through your computer and adjust them to your liking before starting a print. Take a look at the top menu and choose the “Monitor” tab placed on the right. This will allow you to see and control your printer through Cura.
When going on the “Monitor” tab, you’ll see a menu placed on the right side of the screen. You can adjust all of your printer’s controls in this menu while monitoring the device through a camera.
Now it’s time to set your ideal extruder temperature, preheat the bed to your desired degree, as well as move and adjust the X, Y, or Z-axis. When moving the axes, you can choose the length of every movement you make.
This tab also offers you the possibility to send a G-code, which can help you send codes to your printer to automatically change several settings at once and prepare it for your desired type of print.
6. Drag the File You Want to 3D Print Onto the “Prepare” Tab
To drag the file, go back to the top menu and follow these steps:
- Locate and click on the “Prepare” tab (on the far left). When you click on it, you should be able to see a 3D illustration of your design of choice.
- Click and hold to drag the file you want to print.
- Release it inside the illustrated cube to input onto the tab. Your object will show up, and you’ll be able to view it from different angles by moving the cursor around.
- Play around with the settings and slice the image according to your preferences. This can be done by moving your cursor over the tabs placed on the menu above the screen. You’ll see that the software automatically applies generic PLA settings to your print. If you want to see or customize these settings, you can click on “Print Settings,” where you’ll be able to adjust them to your liking.
In most cases, however, going with the generic template produces high-quality results, so there’s no need to stress about inputting the right adjustments, especially if you don’t have a lot of experience with 3D printing.
For more of an in-depth look at how to slice in Cura, this video explains the process:
7. Customize the Settings and Preview Your Model
If you want to customize your print more, there are some changes you can make to the generic template that can improve the quality of your print. For example, you can change the layer height by choosing a measurement you think would work best with your design. Although a 0.2 layer height is usually the standard choice, you can increase or decrease this setting based on the result you want to produce.
Likewise, you can adjust the wall thickness, bed temperature, nozzle temperature, skirt layers, infill density, print speed, support, cooling options, and many other components that can affect the print quality. When you feel satisfied with the selected settings, you can close the tab and prepare for the process to begin.
After adjusting all of these components, on the bottom right of your screen, you’ll be able to see the predicted printing time as well as the length and weight of filament that’ll be needed for the print. You’ll also see the option “Print via USB” right below this information, but don’t click on it just yet.
Before finalizing your design, go once again to the top menu, where in the middle, you’ll see a tab called “Preview.” Upon clicking on it, you’ll be able to look at each individual layer of your design, along with real-time animation of the process. In short, the preview tab shows every aspect of how the print will happen to allow you to make any last-minute changes if needed.
8. Click “Print via USB”
Now it’s time to go back to the “Prepare” tab where you can click over “Print via USB.” Doing so will redirect you to the “Monitor” page, where you can see the preheating process happen in real-time. At this point, you won’t be able to change any of the settings as the print has already begun.
In this tab, you’ll see the project name, estimated time left, and progress percentage. The progress percentage bar will start moving right after the preheat and preparation process is completed, which can take up to a few minutes. You’ll also have the option to pause or abort the print at any given time.
After the bed and extruder are preheated, the print is ready to start. I want to reiterate that you should frequently check your computer during the printing time to ensure it’s active and running. Even the smallest disconnect can stop the whole process, and you’ll need to start all over again.
You’ll notice the moment when the process begins when the 3D printer starts moving to its start position. From this point on, all you need to do is supervise the print and be cautious not to disconnect the USB cable at any time. This is also a good time to verify that all the peripherals that can interrupt the process are still securely plugged.
Frequently check the outline of the job on your Cura interface to make sure that the process is going as planned. At the end of the estimated time, you should be able to receive a high-quality 3D print achieved by using only a USB cable.
Final Thoughts
3D printing with Cura over USB is a relatively quick and straightforward process. And once you know how to execute each step perfectly, 3D printing becomes an easier and less time-consuming activity. Although you may need to be more diligent during the process to ensure that there are no interruptions, using a USB cable to print your design is a user-friendly, accessible way to produce the results you want.
- Written by:
- Ben
- Last updated:
- 11/19/2023
About Ben
I started 3D printing since 2013 and have learned a lot since then. Because of this I want to share my knowledge of what I have learned in the past years with the community. Currently I own 2 Bambulab X1 Carbon, Prusa SL1S and a Prusa MK3S+. Hope you learn something from my blog after my years of experience in 3D printing.