Thin layer walls are crucial for certain 3D printing projects, such as creating detailed and articulate work. Unfortunately, they can be challenging to print because they must maintain structural integrity despite their small width. So, how do you print thinner walls without them collapsing or being too thick?
Here’s how to 3D print thin layer walls:
1. Check if you have a fixed nozzle.
2. Measure the wall’s thickness.
3. Adjust the perimeter and wall thickness.
4. Adjust the nozzle size.
5. Check the perimeter and infill overlap percentage.
6. Check the minimum and maximum printing width.
7. Manually adjust the wall’s thickness.
8. Change the project design.
Printing thin walls on a 3D printer can be difficult because of the nozzle, the settings, or the chosen design. Since most printers have fixed nozzles, you will most likely have to adjust the printer’s settings to get the wall thickness you desire. Follow these tips and tricks to properly print perfect thin walls.
1. Check If You Have a Fixed Nozzle
To create an amazing print, you must first understand how 3D printing works, especially when adjusting the wall’s thickness.
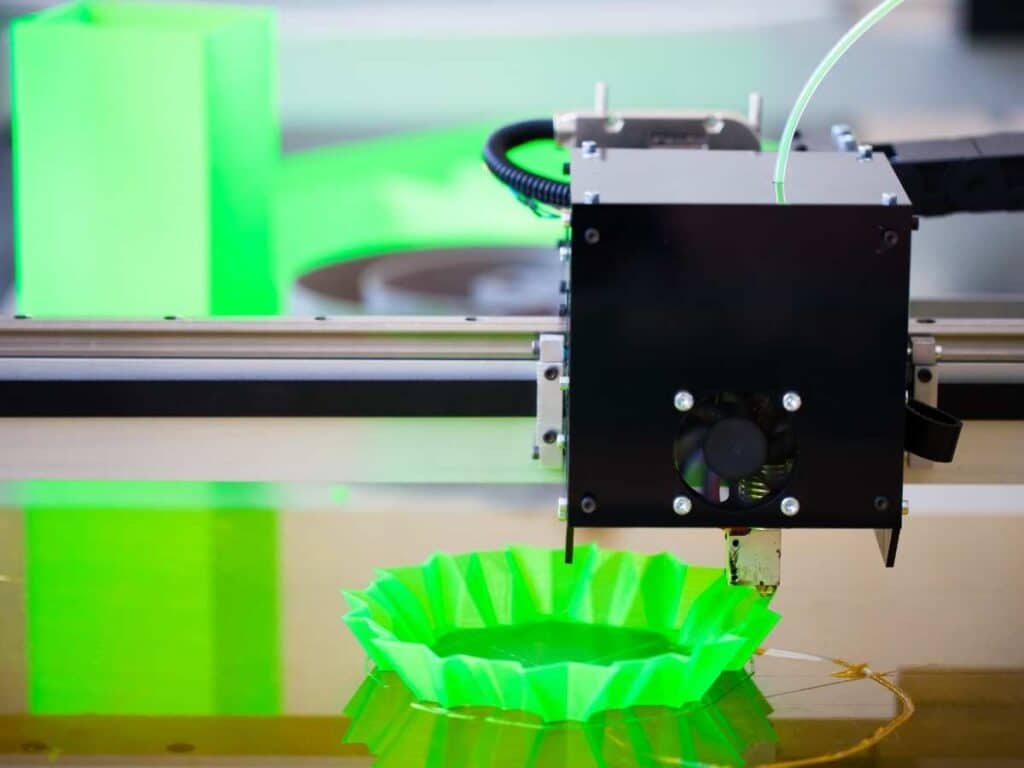
A 3D print model is made simply by printing multiple layers of plastic, which is often called the filament. Heat is applied to the filament until it eventually melts and goes through the printer’s nozzle.
Your printer’s nozzle size will partially determine the wall’s thickness. The wider the nozzle, the more filament that will process through, and the thicker the walls.
Some printers come with various nozzle sizes so you can adjust the filament and wall thickness. Or, you can purchase different nozzle sizes for your 3D printer to achieve your desired consistency.
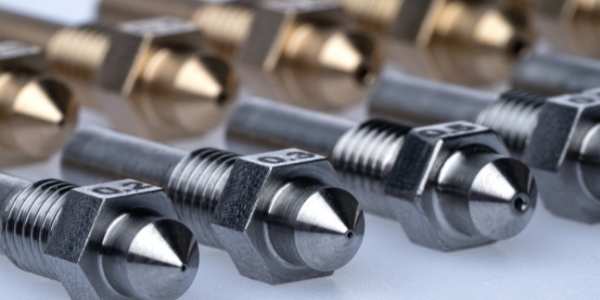
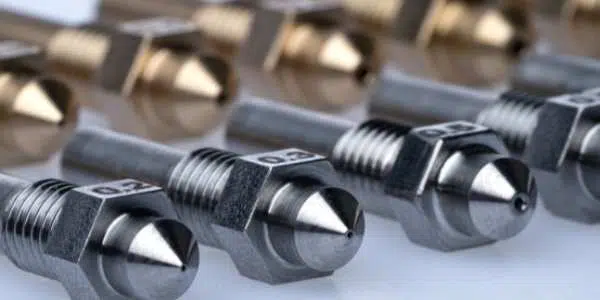
3D printer nozzles start from 0.1mm (0.004 in) and increase in size.
However, with printers that contain a fixed nozzle, you’ll have to adjust the software settings to achieve a thin-walled print.
Key Terms and Definitions To Know
If you’re new to using 3D printers, you need to know a few key terms. These terms will be used throughout this article:
- Extrusion: A 3D printing process where the filament moves selectively through a nozzle.
- Slicer: A program that converts a digital model into printing instructions for a 3D printer.
- Infill: The interior of a 3D print. You can print the infill at any density ranging from hollow to solid. (0%-100%).
- Shell: This is the exterior of a 3D print. The shells are also called the “perimeter.” You can only print shells as a solid (100%).
2. Measure The Wall’s Thickness
In addition to understanding how a 3D printer works, you’ll need to know how wall thickness is measured. Understanding this will help you make the walls an appropriate size.
The term “wall width” speaks for itself and identifies its thickness.
Wall thickness is how wide a wall is on a 3D print. It’s also the primary factor of creating a thin wall, as the line count within a wall is determined by how many sweeps the nozzle makes in building the wall.
If the nozzle is smaller, it’ll take more sweeps to create the desired thickness. That’s why smaller nozzles are best for making thin walls, and larger nozzles are best for thicker walls.
Adjusting the perimeter’s thickness could impact the overall wall thickness when creating a thin layer wall. Perimeter thickness is measured in millimeters or by the number of lines they contain.
If you change the line count, it’ll automatically adjust the height and width in millimeters.
Some software uses line counts, and some use millimeters to measure the thickness. Knowing the correlation between the two is helpful because you can use them interchangeably depending on the printer’s settings.
3. Adjust The Perimeter and Wall Thickness
The perimeter and wall thickness can and should be adjusted when making your 3D print. Adjust both relative to each other because you don’t want a thin wall with an overly thick perimeter and vice versa. If you’re making a thin layer wall, try to keep both measurements small.
Additionally, be sure to factor in the base and top layer’s thickness while making the 3D print.
Although top and base layers won’t be a significant factor in the wall’s width, you should also consider the impact these layers will have on the wall.
Adjust the base and top layers relative to the perimeter and wall thickness. Make the bottom and top layers thick enough to support the wall but not so large that it compromises its integrity.
Using the wrong settings on your printer will result in poorly constructed walls, or it might not print at all. Be sure to use the appropriate nozzle for your desired print, and check the measurements and settings when you scale down a project to ensure that the product turns out correctly.
Settings are crucial for creating a successful 3D print, and you should adjust them according to your project.
4. Adjust The Nozzle Size
The nozzle size can help you get the desired thickness of the walls, and they serve various purposes. So, it’s essential to know which size you need for your print.
Nozzle sizes can impact printing speed, wall thickness, and the quantity of what you’re trying to print.
A big printer nozzle is beneficial for printing large amounts of filament, not requiring much detail. However, if you want to print a thin wall, you’ll need to use a small nozzle.
Small nozzles generally range between 0.2 and 0.4 millimeters (0.007 and 0.02 in). These small nozzles are best if you want to create a detailed print or make thin layers and walls. They also enable you to print more quickly.
5. Check The Perimeter and Infill Overlap Percentage
Another handy trick in creating thin walls using a 3D printer is to check the values used for perimeter and infill overlap.
The overlap is the distance between the infill and the walls. If you want the printer nozzle to use fewer passes and less filament, you can lower this number in the software settings.
A lower overlap percentage means the printer will make more infrequent sweeps. It can also save time and printing material.
6. Check The Minimum and Maximum Printing Width
Minimum printing width refers to the smallest width the printer will print. This value is often relative to the printer’s nozzle. You can adjust this setting to your needs to ensure that you’re getting the smallest minimum width possible for the walls.
For instance, if you have a 0.8 mm (0.03 in) nozzle, and the minimum printing width is 50%, the prints will be at least 0.4 mm (0.02 in) wide. Of course, you could adjust that number to your liking to get the smallest width you need.
Conversely, maximum printing width refers to the largest width that the nozzle will print. Again, adjust these settings as you need according to your printing requirements.
7. Manually Adjust The Wall’s Thickness
Your 3D wall will print using a combination of layers and lines. The printer makes the top and bottom of the wall using layers and then lines to make the walls.
You’ll change the number of wall lines to adjust the wall’s thickness. The average wall thickness is between 0.8 and 1.6 millimeters (0.03 and 0.06 in), about 3-4 wall lines. To print thinner walls, you’ll want to adjust the values in the 3D printing software.
Depending on the printer software, you might be able to adjust how many wall lines you print manually. Be sure to change them relative to the wall’s top and bottom layers so that the print maintains its structural integrity.
So for thin walls, you might print 1-2 wall lines instead of 3-4.
8. Change The Project Design
It’s okay to print thin walls using a 3D printer. However, if you’ve tried the steps above and you’re still having trouble printing the barriers to your liking, consider changing the wall’s thickness.
The walls you’re attempting to build might be too thin and structurally unsound for your project.
Ensure that the walls aren’t smaller than the printer’s nozzle size. For example, if you have a 0.2 mm (0.008 in) nozzle size, you shouldn’t print something that’s only 0.1 millimeters (0.004 in) thick. You might have to rethink your design if the walls are too thin.

Tips for Printing External Thin Layer Walls
External walls are what you see on the outside of a printed model, and they can be pretty fragile. But in some cases, they’re necessary.
Check the printer’s settings as factory specifications might be preset to a specific nozzle size.
In addition, the printer’s blades might be smaller or larger than the nozzle with which you are printing them. Some 3D printers’ default settings won’t print items where the blade and nozzle sizes don’t match.
However, most printers have highly customizable settings to resolve a mismatch between blade and nozzle size. In the software’s settings, navigate to the section that describes thin walls.
Change the Filament Thickness
In some printers, you can precisely change the amount of filament that flows through a nozzle.
As stated earlier, the larger the nozzle, the more filament that comes through. However, even if you have a large nozzle, you can direct the amount of plastic that goes through the nozzle to create your desired wall’s thickness.
Changing the filament thickness is highly beneficial in creating thin walls. Because some printers don’t have various nozzle options, adjusting the software’s settings is almost like changing the nozzle.
Choose a lower amount of filament to flow through the nozzle to create a thinner wall.
You might see a section describing thin external walls, or the software might be programmed to print only the shells or perimeters. If the printer has this preset, it’ll attempt to print all exterior walls using only the perimeters.
Change the Single Extrusion Wall Setting
Shells are great for printing regular-sized walls or creating structurally sound models. However, you’ll want to change this setting for printing thin walls.
In Simplify 3D’s printer, select “Edit Process Settings” and find the Advanced tab. In this section, you should see a setting for thinner walls. In most cases, the standard specification of the “External Thin Wall Type” will be set at “Perimeters only.”
If that’s the case, change this to “Allow single extrusion walls.” Changing the setting will direct the printer to create a separate dispenser for the plastic to create a thinner wall rather than its default thickness.
Tips for Printing Internal Thin Walls
Printing thin walls on the inside serves a different purpose from printing thin external walls. Thin internal walls are in the infill, consisting of lines of varying distances depending on the setting.
If you want a structure whose lines knit closely together, you’ll want to increase the value in the software’s setting. But if you need delicate features in the infill, adjust the number of lines inside the wall.
Some printers are programmed to fill in the space between the infill and the perimeter automatically. So, depending on the software’s setting, the nozzle will sweep over an area several times to fill in the distance.
Changing this setting uses less filament, can save printing time, and give the product a cleaner finish.
It will also make the model lighter and produce far less waste.
Final Thoughts
3D printers are amazing, and they’re more accessible than ever. Whether you’re using them to create prototypes or just as a hobby, playing around with the settings can be helpful. The more you know about the machine, the more you can do with it.
For example, printing a model with thin layer walls can be challenging. But by adjusting the printer’s nozzle size, you can quickly decrease the filament used and reduce the wall’s thickness.
In addition, locating and understanding additional software settings for the 3D printer can help you print sturdy thin layers.
- Written by:
- Ben
- Last updated:
- 11/22/2023
About Ben
I started 3D printing since 2013 and have learned a lot since then. Because of this I want to share my knowledge of what I have learned in the past years with the community. Currently I own 2 Bambulab X1 Carbon, Prusa SL1S and a Prusa MK3S+. Hope you learn something from my blog after my years of experience in 3D printing.