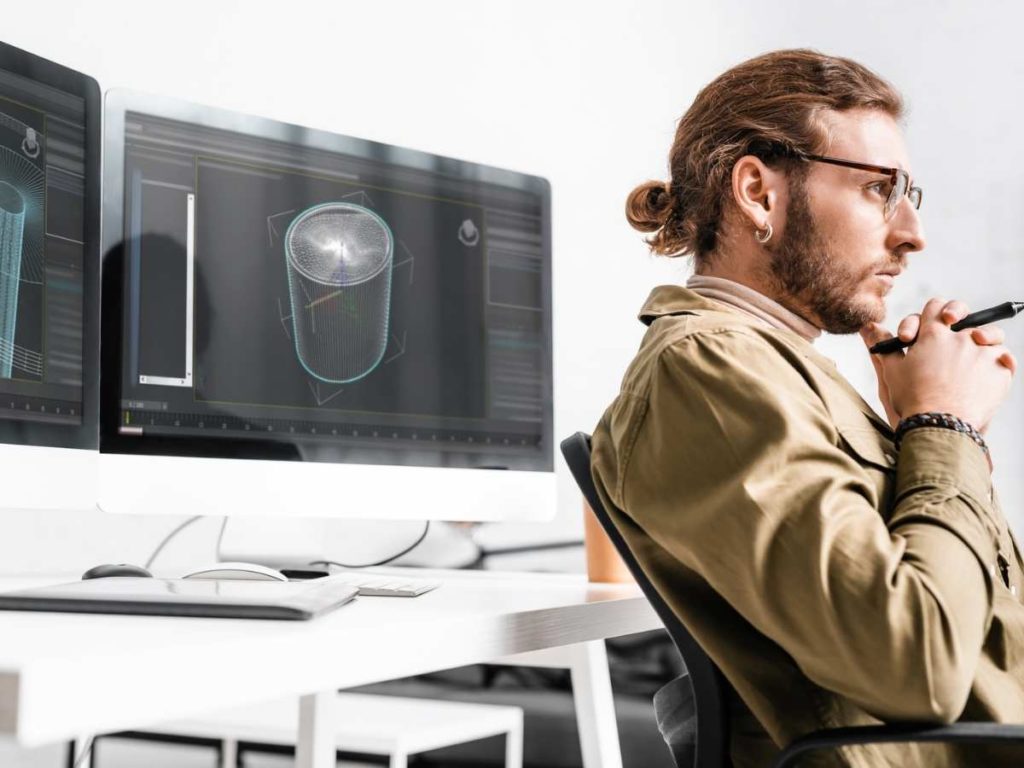
Topology refers to the structure and alignment of spaces and how a geometric shape can deform without becoming damaged. So, naturally, when you want your 3D prints to turn out well with strong perimeters and clarity, you’ll want to consider topology.
Topology does matter for 3D printing because it helps keep your design clean, making it easier to print. Many programs, like Blender, allow you to clarify and resolve your models with high polygon counts to STL. You won’t need to have perfect topology because of this.
Many people like working with topology in their print designs because it keeps everything looking nice. However, your printing software should handle the conversion to STL (which uses triangular mesh) without issue. There’s more to learn in this article, so keep reading!
What Is Topology and Why Does It Matter For 3D Printing?
Topology refers to the perimeters of your 3D printed object on all axes. Different surfaces can look the same but have different topologies since they consist of various meshes.
Topology is the structure and edge distribution of a 3D model. Topology impacts several factors on a 3D model, including how easy it is to edit. So, topology matters if you plan to make many adjustments to a 3D model you need to print.
When you move parts of the model, they can easily deform, losing some of their geometries and meshes. However, topology doesn’t quite matter as much when you go to print the object. Your printing software will print the same shapes, no matter what.
Topology is more critical during the 3D design process. You can make creating a model easy or complex, depending on how much you pay attention to your topology. When the printer creates the object, it should default to STL. This file format automatically covers a model’s surface with triangles.
Using different shapes to create the initial mesh will change to triangles when making the model an STL file, allowing you to either strengthen or weaken the continuity of your design.
So, topology is essential for you as you design your 3D model, even if your software and printer can help you adjust it automatically. Although you won’t need to worry about it when printing the object, that doesn’t mean you should ignore topology completely.
How Topology Impacts 3D Models
Topology can significantly impact the design of your 3D models. You’ll need to worry about it more if you like to create your 3D prints entirely from scratch since you’ll want to keep a clean topology as you design the model.
When the mesh surface becomes cluttered, it will deform more. You’ll end up spending more time repairing the model in those cases. With a cleaner topology, you can easily make adjustments as needed without needing to recreate parts of the model due to deformities.
It’s always good practice to make your 3D models with clean topology. Your designs will look much more professional overall, and you’re sure to get better final results with anything you create.
What Are STL Files?
STL files are the most common file format in 3D printing today. Your printing software should automatically change your 3D models into STL files, so the printer can read and create them. This file format encodes the surface of a 3D model with geometric shapes, mainly triangles.
Your slicer takes the 3D model and converts it into printing instructions in the form of STL files. No matter what topology you used to create the model, the slicer adds a mesh of triangles to the object when it becomes an STL file. That way, your printer can read the model’s G-code and print it accurately.
It’s critical to keep in mind that you can make models that look the same with different topologies. When the models convert into an STL format, they should have nearly identical triangle mesh encoded over the surface. So, when the models print, they’ll still look the same, even with different topologies.
Overall, STL files are the standard for 3D printing. You’re sure to have seen them before if you have ever worked with a 3D printer.
Triangular Mesh Topologies in 3D Printing
3D models for printing use triangular mesh for several reasons. First, triangles don’t take up a ton of memory on a computer. They also render very quickly, making splicing with triangles a lot more efficient.
Triangles also make it easier to form smoother surfaces for printing. Plus, they can fit over any surface, no matter what kind of 3D model you’re making. STL files also don’t support quads (shapes with more than three points), making triangles necessary.
Overall, it’s improbable that you’ll need to change the triangular topology to a quad one in 3D printing. Instead, you’ll often find that your programs automatically adjust the surface mesh from squares to triangles. If you like making 3D designs, you can always create a triangular topology from the start.
Why Use Best Topology Practices in 3D Printing
Using smooth and organized topology ensures that your 3D model files don’t become too large, and there are fewer edges for the computer to recreate when you use good topology.
A model with a rougher topology will take up a lot more memory on your computer’s storage, which is already limited. All of those vertices, faces, and edges within the mesh can take up a lot of valuable space and slow your computer down to a crawl.
With good topology practices, you use the least amount of vertices to create the shapes you want. There’s no benefit to using more than necessary to get the look you want.
Creating a neat-looking model also makes it easier for others to work with it. Some people make 3D models to sell or distribute online for others to print. If the topology in their work looks messy and rough, others may have trouble working with the model. So, when selling your models, you want to make them as appealing as possible.
When working on a design team, good topology is essential, too. You wouldn’t want your coworkers to struggle with using your confusing 3D designs.
Topology Optimization in 3D Printing
Some CAD software comes with topology optimization, making it easier to create smooth, organized meshes. These programs allow you to change the topology of a shape with the click of a button. This feature is most common in manufacturing, where the makeup of objects is fundamental.
Topology optimization can show you which areas of an object take on more stress. The program adjusts the topology so no one perimeter takes on too much pressure. That way, the model is less likely to break during mechanical use.
Topology optimization also makes it possible to avoid strange artifacts in the 3D model. While this is often more of a problem with 3D animation, it can still occur in 3D printing. With a lousy topology design, the model can pinch, distort, and stretch in weird places. If this happens in your 3D model, topology optimization can help you get it back under control.
You likely won’t have to worry about topology optimization nearly as much if you’re printing for fun. It’s used more frequently when you need a particular part to be strong or want nice-looking mesh that others will see.
How To Fix a 3D Model’s Topology
You can quickly fix a model’s topology in Blender. Start by finding “Object Data Properties” and go to “Remesh.” You can adjust the Voxel size to change the face surfaces on your design. From there, you can make the size smaller.
After meshing, you should notice that the topology looks much cleaner. However, you may lose some of the initial detail in the model. This method also reduces the topology face count, which should help if your computer runs slowly.
The entire possess is explained in this YouTube video if you want to follow along:
You can use this process to clean up the models you want to print. However, you may not need to since the file will automatically become an STL file with a triangular mesh for printing. It’s still generally good to clean up your 3D models if they’re incredibly messy and you plan on sending them to others.
When Doesn’t Topology Matter in 3D Printing?
Topology doesn’t matter if you’re the only person who will see the geometric mesh on the model. If the print looks good in your 3D slicer, the printer will replicate it. That said, it’s still better to make your topology clean for a more efficient experience.
Topology is essential, but it doesn’t matter when you’re just making a small and straightforward print for yourself. Still, if you want to get more serious about 3D model design, it’s better that you continue practicing making neat topology.
Suppose you aren’t sending the design to anyone else. In that case, you can quickly get away with using whatever topology you want! After the physical print comes off the printing bed, no one will be able to tell what the topology used to create it looked like.
Topology is still critical in 3D design, but you won’t always need to focus on it in your 3D prints. It depends on what you’re printing and why you’re printing it.
What Is Most Important in 3D Printing?
There are several essential elements in 3D printing, aside from topology. You’ll want to make sure that you consider all of them as you work through the printing process. That way, you get the final results you want to see.
Layer height, infill, extrusion thickness, and material are most important in 3D printing. These factors impact how durable the print is and whether it will turn out well. Adjusting these aspects will drastically affect the quality of your 3D-printed object.
As you gain more printing experience, working with these different aspects will feel more natural.
Layer Height
Layer height refers to the size of each layer in the 3D print. A thin layer height can reduce ridges and give the final object a smoother surface. However, it takes a lot longer to print thin layers, so you need to be patient if you want your print to be seamless and solid. However, with most 3D printed objects, the results of lowering layer height are very noticeable, so slowing down is worth it.
Infill
Infill is the internal shape of the material inside the print. It ensures that your perimeters stick together while creating a more solid geometry to strengthen your printed object. Your slicer will offer different infills that you can use to create the model.
Most often, you’ll find triangles or other geometric shapes inside. You’ll want to choose one that suits your design’s structure the best since it won’t appear on the outside at all.
Thickness
The thickness of your print’s walls also matters. If they’re too thin, the piece can easily warp or split. If your walls are too thick, you’ll use too much material, risk cracking, and the machine will take an incredibly long time to finish the print.
Ideally, your wall thickness should be a multiplier of your nozzle’s diameter and at least 1.5 times your layer height. These dimensions ensure that your nozzle can manage the thickness and also aids in layer adhesion.
Material
Lastly, the material will matter. Your filament forms the print, so it will significantly affect the strength and appearance of your model. You can familiarize yourself with different printing materials since they’re each suited for various types of printing projects. Some materials are also more costly than others, so consider your budget.
Final Thoughts
In short, topology does matter when creating your 3D models. If you have a messy topology, the shape deforms much easier. However, your design becomes an STL file when you print the object, automatically simplifying the topology for quicker and more accurate 3D prints.
Overall, topology is most critical when designing a model from the ground up since messy designs will result in messier prints. Cleaning up the topology is usually straightforward, and most CAD programs offer a “Remeshing” feature that will do the hard work for you.
- Written by:
- Ben
- Last updated:
- 11/16/2023
About Ben
I started 3D printing since 2013 and have learned a lot since then. Because of this I want to share my knowledge of what I have learned in the past years with the community. Currently I own 2 Bambulab X1 Carbon, Prusa SL1S and a Prusa MK3S+. Hope you learn something from my blog after my years of experience in 3D printing.