
Not all newer Macs come with ports for USB drives or SD card slots. You’ll likely need them if you want to 3D print. If you want to 3D print, you may want to know if you can use your Mac for it.
You can use a Mac for 3D printing. But first, you need to make sure the printer is compatible with your Mac. From there, you can choose a printing method that works for you! Most people prefer to use SD cards, while others use a USB connection cable or WiFi to connect with their 3D printer.
As long as you choose a software option that works with your Apple device, you can still 3D print. There are many methods to achieve an excellent final piece with your current Mac, so make sure to stick around. Everything on the topic is in this article for you!
How To 3D Print on a Mac
If you know how to 3D print on Windows already, the process is similar to printing on your Mac! First, you’ll need to have quality 3D printing software installed already. There are plenty of free options available for you to choose from, but you can purchase one if it comes with everything you need.
If your 3D printer came with a software recommendation, you should use that option. Most 3D printing software is cross-compatible today, meaning the program can work with Windows, Chromebooks, Mac, and more. You’ll want to try the recommended software before going to a third party since that’s what would work best with your printer, in most cases.
Choose Your Software
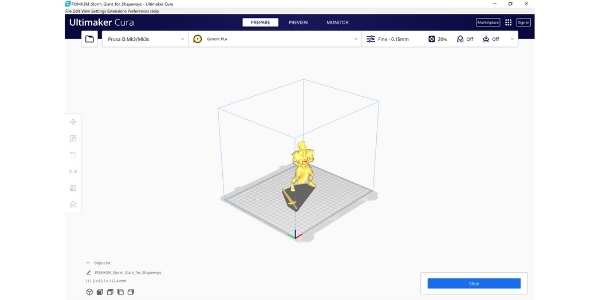
However, when the included software doesn’t work with your Mac, you’ll need to know what to do next. Some of the most popular options include:
- Blender
- Ultimaker Cura
- AstroPrint
- PrusaSlicer
Most people recommend using Cura. It comes with similar features and also allows you to make stunning prints!
Before making your first print, you’ll need to have the proper firmware installed on your Mac. What version you get depends on your Mac and the printer model you want to use.

Connect Your Device to the 3D Printer
Once you have your software of choice installed and ready to go, you’ll need to know how to connect your device with the 3D printer.
Start by opening the program. You should find an area where you can add your 3D printer to the device. Open the menu, then click on “Add a printer.” From there, you’ll want to select your 3D printer and rename it, so you can find it easier in the future.
After setting up the printer with your device, you have several options for printing. You can connect to the 3D printer wirelessly over WiFi, print through an SD card or USB drive, or connect using a USB cable.
While most people prefer to use an SD card to transfer the file for printing, your Mac might not have a slot for one.
Many printers come with a USB cable for printing. However, it may not connect with your Mac. If your Macbook uses a USB Type-C connection, you should be able to connect it with your 3D printer using the Cable Matters USB C Cable from Amazon.com. The cable comes in three different lengths, so you can choose the one that best suits the distance between your Mac and printer.
That aside, you may connect with the printer wirelessly, which is a good option for many Apple devices.
Establish a Wireless Connection
Every 3D printer will have a different method for connecting to your WiFi. You can often set this up directly on the machine using the screen there. After connecting it to the internet, you should be able to find it on your Mac when it’s also on the same WiFi connection.
Using this method comes with many advantages:
- You can send commands from the Mac to the printer.
- It’s easier to change the print settings from the Mac.
- You don’t have to transfer your print files manually.
- It’s faster to update the printer.
However, you’ll want to know that there’s a significant disadvantage to using a wireless connection. If your Mac shuts down, enters sleep mode, or starts updating, your print will stop. This problem can also cause melting and other damages to your print.
If you need the print to go through a long printing process, it’s best to use an SD card or a USB stick. However, these manual methods may not be an option for every type of Mac out there.
These are the steps to connect your Mac with your 3D printer over WiFi:
- Make sure your WiFi router, printer, and Mac are on.
- Install the software and firmware for the printer on your Mac.
- Connect both devices to the WiFi.
- Open your 3D printing software.
- Select the printer from your Mac.
- Send the files over you want to print.
Overall, the process is straightforward. If your 3D printer can’t connect to your WiFi, you still have ways to make it connect! I recommend trying the upgraded Creality WiFi Box. This version from Amazon.com is for use in 2021 and even allows you to connect your phone with the 3D printer. It’s an excellent solution for connecting your Mac to your 3D printer.
Final Thoughts
In short, you can still 3D print from a Mac. You may need to install new software or drivers to get it running, but once you do, it’s well worth it! Macs also have access to high-quality 3D design software, allowing you to create your printed objects from scratch. Cura is one of these options.
Overall, you want to check the specifications on your Mac to make sure it can connect with your 3D printer. From there, you have plenty of options to start printing! I have plenty more content on the topic on this website for you to read.
- Written by:
- Ben
- Last updated:
- 11/11/2023
About Ben
I started 3D printing since 2013 and have learned a lot since then. Because of this I want to share my knowledge of what I have learned in the past years with the community. Currently I own 2 Bambulab X1 Carbon, Prusa SL1S and a Prusa MK3S+. Hope you learn something from my blog after my years of experience in 3D printing.