Print times can be incredibly frustrating to deal with, especially if you are printing for commercial reasons. 3D printers are notorious for taking a very long time to create a piece, which can put a dent in plans or put you under a time crunch.
Here are 9 reasons your 3D prints might be taking so long:
- You’re using complicated fill patterns.
- Your print has a high fill density.
- Your prints have thicker walls.
- High resolution can slow down print time.
- Generating more supports can take longer.
- You’re heating different printing materials.
- The print head travel speed is set low.
- A better quality print takes longer to produce.
- The size of your piece can increase print time.
Read on for more explanations and tips about how you can increase your print speed.
1. You’re Using Complicated Fill Patterns
Complicated fill patterns take a lot longer to print than simple ones. Fill patterns are a way to make the center of a printed piece strong but also not solid.

Solid pieces are made of solid printing material, but they take a very long time to complete. If you lower the density and use a complicated fill pattern, you can cut down on time and make a strong piece.
However, sometimes, the fill pattern still takes a long time to print.
If there is a complicated series of hatches and lines through the center of the piece, it will take a long time to fill. Many different types of fill patterns can be used for various purposes, and they all take different times to print.
For example:
- Low strength fills for models and figurines
- ‘Standard’ 3D prints with medium strength
- Functional or practical prints with high strength
- Flexible 3D prints that need to bend
All of these require different types of fill patterns, and they take different times to print. Some are complicated hexagonal patterns, others are simple lines, but all have different print times.
Zig zag fill patterns typically are the fastest, but they offer little internal support. Grids and other connected shapes are more effective and can stop vibration while also being quicker. The more unique the form, like a hexagon, the longer the process will take, but it can help the piece’s stability.
To understand why these take so long, you need to understand fill density and how that factors into your prints.
2. Your Print Has a High Fill Density
If your print has a high fill density, it can take a lot longer to print as well. This means that you have a much denser fill pattern, and the piece is more solid.
Dense fill patterns are great if you need the object to be sturdy. Dense objects can handle impact damage more and are less likely to break if they are used.
This is important for things you are using every day or that are expected to do specific things. For example, if you have printed a piece of tubing for a device or pipe system, you need to make the density strong and handle what the tube is pushing around.
This density takes time and will extend the active printer period. The printer head has to go over every single line in the printing pattern.
If you want to lower your print time, you can reduce the density. However, it would help if you kept in mind how much you want the item to be used and how strong it needs to be.
3. Your Prints Have Thicker Walls
Thick print walls are also essential to make sturdy pieces. These make sure that your item won’t break and you can’t punch through it quickly.
Wall thickness is the actual width of the outer shell of the item you’ve printed. The wall is what the internal fill will be constructed against, and it’s essential to have a thick wall as good support.
Thick walls take longer to print. They add a different section of the piece that has to be shaped, and the fill pattern has to develop with it.
You can technically lower wall thickness to get a faster print time, but it is not recommended. You need to check the stability of your printed piece before lowering the wall thickness.
Some prints that aren’t going to be used daily (like models or display figures) can be safely made with lower wall thickness. Other things like pipes or multi-function items may need a thicker print wall.
4. Higher Resolution Can Slow Down Print Time
Using a higher resolution is another reason why your prints might be taking longer.
Resolution is a word for image quality. This is what makes an image blurry or pixelated or what makes it high definition. This same premise can be applied to 3D printed pieces.
For example, if you want to make a replica of your favorite TV or video game character, there are a lot of pieces from their costume and associated props that are small, fine details. You need a higher resolution to capture them.
Higher resolution means that these details are being printed better, and the final piece will look better overall. They can capture incredibly tiny details, like single buttons on a figure’s jacket or curl definition in hair.
The way that printers naturally try to improve resolution is by decreasing the layer height.
Decreasing the number of layers improves the resolution by making the printer produce more of them. However, more layers, especially thin ones, will dramatically increase the print time. Every new layer is another time that the print head has to go over the piece.
If you lower the layer count, you can reduce the print time. However, you will miss out on the fine details that 3D printers can make. This may cause your print to look pixelated or almost blurry.
This is also what gives many 3D-printed objects their lined look. The lines mean that the printer used a low layer count for what the thing is.
These lines can be sanded down and modified to improve the physical appearance, but that is more work you have to do later after the print has thoroughly cooled. Increasing the layer count reduces the work and makes it even easier to prep the object later.
5. Generating More Supports Can Take Longer
Your print could also be taking a long time because it needs a lot of supports.
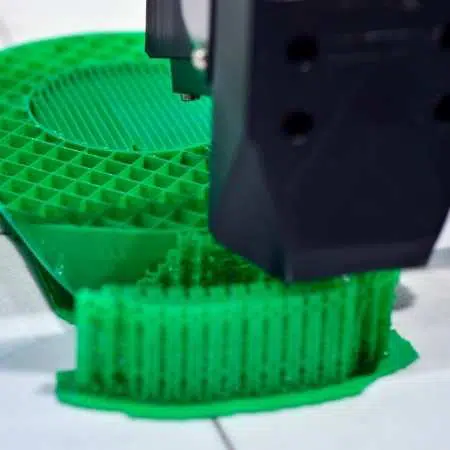
Supports are small, thin bits of printed material that suspended parts of a print are built on top of. They make sure the printer moves evenly over each layer and give the printer head a space to build on.
Let’s say you are making a model of a TV character waving. A line from the ground does not support their arms. The 3D printer needs a place to start constructing the arm from. Otherwise, the print material will fall to the ground.
Supports fix that problem. If you have an object that needs a lot of supports, this can drastically add more print time.
If a piece needs a lot of supports, it requires a lot of supports. This means that you can’t always cut down on the build time by messing around with supports. Sometimes you just have to suck it up and sink the time.
However, you can change the settings to make sure your piece is being printed with the least number of supports possible, and you can change the thickness of the supports.
This will cut down on time and lower your overall waste. Supports take a lot of extra material and can be a big waste, especially if you use an expensive filament.
Supports can also take a lot more time after the piece has been fully printed. Supports need to be carefully removed and can take a lot of time to sand traces away. Sanding can also wear down the wall thickness of your print and cause structural issues.
It’s recommended that you use a cutter or snipper to get the cleanest cuts on both your supports and filaments. A clean-cut will save you even more time and get into small places your fingers cannot.
This Flush Cutter from BLEDS on Amazon.com is a great choice and a necessary tool for anyone doing a lot of 3D printing. Using the fine tip of the cutter will reduce stress on your piece and get a cleaner cut, so you don’t have to sand as much.
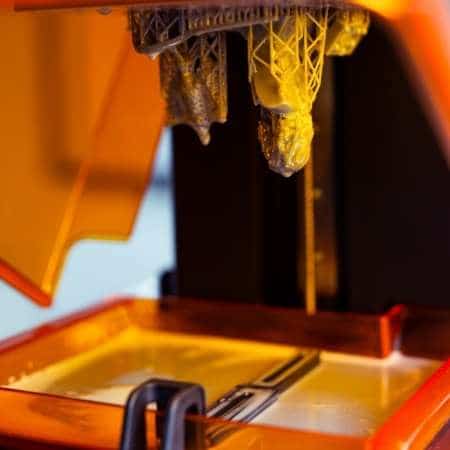
6. You’re Heating Different Printing Materials
Different printing materials take different times to heat up and move through the feeder tubes. This means that a printer may need time to prepare the fibers for extrusion properly.
If you want to work with more difficult filaments, you need to consider how long the preparation process will take. You can’t necessarily cut down on this time, but you can prepare for it, so you aren’t strapped for time.
On the other side of this, materials also need different times to cool down properly. Removing a print from the platform too soon can damage it and warp the plastic. You have to give your print time to cool before removing it.
7. The Print Head Travel Speed Is Set Low
Print head travel speed is another reason a print might be taking longer.
The print head is programmed to travel at a certain speed depending on the filament, the thickness of certain sections and avoid putting extra stress on the device. They are also very heavy, and it can be difficult for them to pick up speed.
Changing printer speed can speed up the process, but you may lose quality. Slowly increase the speed over several different prints to see if you lose quality. Look at the little details in your print and see if they are visible.
If you don’t, then you can enjoy the higher speed and cut down on print time! If you do lose quality, you should slow the speed down until you find the sweet spot.
8. A Better Quality Print Takes Longer To Produce
If you want a higher quality print, it will take more time. All of the other factors outlined above impact the print time, and it could affect the actual longevity of the piece.
If you want a huge and accurate piece, it’s going to take a while to complete. The printing process is long, and if you want it done right, you need to be patient. The layers need to be thin, and it has to have enough time to cool.
Rushing the process can ruin a piece, and it won’t turn out the way you want. There are also concerns about structural stability because a piece that hasn’t adequately cooled and has improper fill patterns can easily break.
Fill patterns need to be built carefully to make sure your piece doesn’t collapse in on itself. Fill patterns make sure your piece isn’t going to snap and break at the lowest amount of pressure. Giving the printer time to arrange them properly is crucial to creating a long-lasting piece.
In addition, speed can leave many sharp corners on your piece that will need to be sanded. They may also be in a place where you can’t remove them. Ouch!
9. The Size of Your Piece Can Increase Print Time
The size of the piece you’re printing is also going to determine the printing time. Smaller pieces take less time to print overall.
However, smaller pieces lose resolution unless you have a very fine printer tip. These can be very expensive, and in general, the larger the piece, the more accurate the resolution can be.
Larger pieces take time, more materials, and they can be very long to print. The amount of space alone can be a challenge, so you may have to turn to a part-based system to fit everything onto one printer platform.
The benefits can’t be understated, though. You can get exponentially more resolution on larger prints than smaller ones.
Not only that but using a part-based system can take the stress off your printer. Taking a larger project piece by piece means allowing your printer to cool down between parts. Not forcing it to finish a large piece in one go will make your printer last a lot longer.
- Written by:
- Ben
- Last updated:
- 11/22/2023
About Ben
I started 3D printing since 2013 and have learned a lot since then. Because of this I want to share my knowledge of what I have learned in the past years with the community. Currently I own 2 Bambulab X1 Carbon, Prusa SL1S and a Prusa MK3S+. Hope you learn something from my blog after my years of experience in 3D printing.