Due to its initial patent holder being an appalling commercial failure, 3D printing is still a fairly new technology over 40 years after it was first invented. And like many technologies, it tends to go wrong the moment you turn your back. So what should you do if you want to pause a 3D print overnight?
Here are 7 important tips for pausing a 3D print overnight:
- Use the pause function.
- Turn the printer off.
- Use glue sticks.
- Minimize dust.
- Leave it alone.
- Keep pets and children away from the printer.
- Preheat the bed.
This article will explore tips for pausing a 3D print overnight. Later it will explore some reasons your printer may stop mid-job and how to restart a 3D print after a loss of power. But first, we will clarify whether or not you can pause a 3D print overnight. Note that some of the advice in this article applies to fused deposition modeling (FDM) 3D printers only.
Can You Pause a 3D Print Overnight?
While some FDM printer models are better at pausing print jobs than others, most commercially available printers can pause print jobs almost indefinitely.
The user interfaces of most FDM printers have the option to pause a print job. Furthermore, many slicer programs have the option to program pauses into the .stl files they generate.
Unless someone tampers with the printer, the only real problem that might develop is the incomplete printed object detaching from the print bed. You can do a few things to minimize the chance of this happening, which are covered below.
Tips for Pausing a 3D Print Overnight
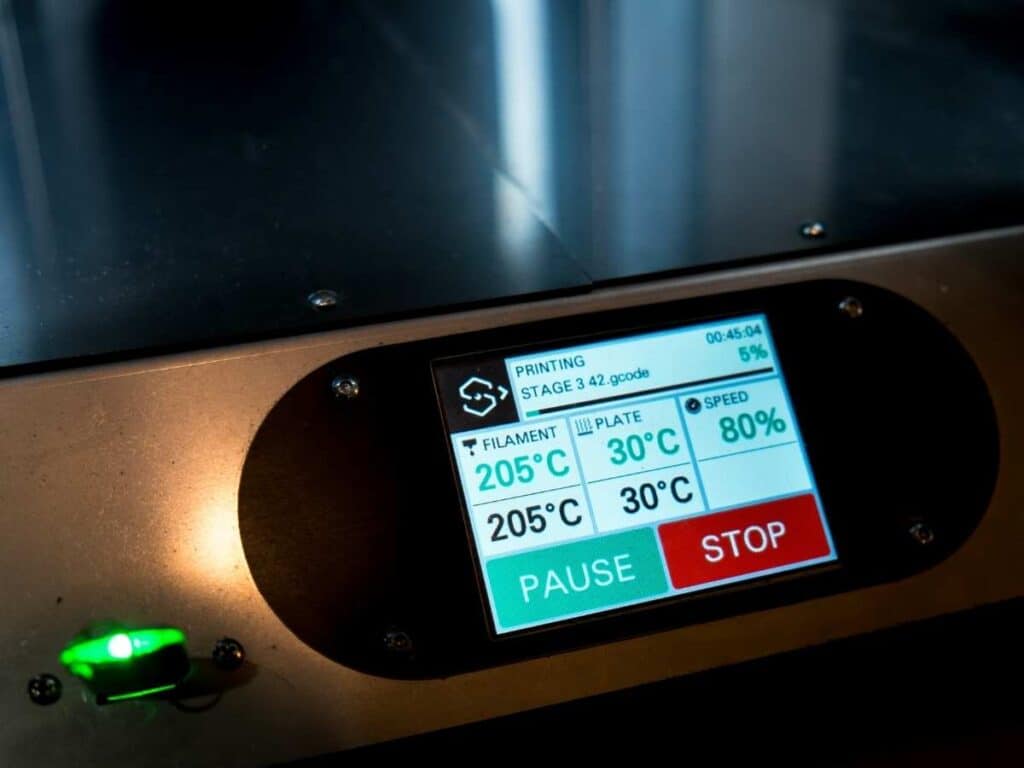
1. Use the Pause Function
As above, most commercial 3D printers have a “PAUSE” function programmed into their user interface. Your printer’s manual should cover how to pause a print job.
When a pause is initiated, an FDM printer will remember its stage and go into its standby mode. Most printers will keep the heating element under the print bed turned on unless they are turned off.
2. Turn the Printer Off
Once the print job is paused, there is no reason to leave the printer on overnight. A paused printer will still use a considerable amount of power, and there is a small chance that it could overheat and catch on fire.
When you return to your printer, whether it is the next day or several months in the future, the print job can be restarted through the user interface.
3. Use Glue Stick
If you think you might have to pause a print job, it is a good idea to apply an adhesive agent to the print bed before starting. A glue stick will help keep the incomplete print adhered to the print bed.
As the print bed cools, it will contract a bit, and the incomplete object can delaminate from the bed. The glue stick will hold it in place while still being possible to remove from the bed when the job is finished.
If your incomplete object comes unstuck from the print bed overnight, you can secure it with either a glue stick or scotch tape.
4. Minimize Dust
Minimizing dust in the room where you make your 3D prints is a basic best practice, but it is also important when pausing a print job. If dust collects on your incomplete object, specifically the exposed interior, the dust will prevent new plastic from properly adhering when the print job is renewed.
Cover your printer with a cloth or tarp if you are away for more than a few hours. Another good idea is to have an air purifier nearby to remove dust from the air.
5. Leave It Alone
Once your printer is shut down and covered up (if you choose to do so), leave it alone until you are ready to resume the print job. Don’t push around the print bed or do anything to the object. You might dislodge the incomplete object or damage the printer.
6. Keep Pets and Children Away From the Printer
Another best practice is to keep your pets and children away from your 3D printer. Children are notoriously skilled at breaking their parents’ things and relationships.
If you are leaving an incomplete print job overnight, it is best to keep it behind a closed door to prevent beings who don’t know better from messing it up.
7. Preheat the Bed
When you are ready to resume your print job, preheat the print bed first. This will preheat the incomplete object, which will help additional plastic adhere to it and improve the structural integrity of the finished object.
Reasons a 3D Printer May Stop Midjob
Even if you don’t want to stop a 3D print part way through, your printer may stop on its own. There are four reasons a 3D printer may stop on its own. Thankfully most of them can be dealt with without much effort.
- Overheating
- Filament problems
- Nozzle clog
- Power failure
Overheating
3D printers use heating coils in their extruders and print beds and have other electronic parts which produce their own waste heat. And even with cooling places placed strategically in the extruder, FDM printers can still overheat. If they overheat, 3D printers are designed to shut themselves down to avoid damaging themselves.
Extruder Motor
The most likely part to overheat is the extruder motor. It moves a lot more than the other motors in your printer, and it is near a heating element.
Normally the extruder motor should be kept cool by the extruder cooling fan. But the fan can be clogged up with dust and debris. You can prevent this with proper maintenance.
Part of regular 3D printer maintenance is cleaning out the fans. The most effective way is pressurized air from either a compressor or a can. A cotton swab dipped in rubbing alcohol will do in a pinch.
If you wish to improve your extruder’s cooling, you can add heat sinks to it. Heat sinks are typically sold in batches or as part of kits for around $20 from Amazon or 3D printer manufacturers.
Thermistor Glitch
Another possible cause for a 3D printer thermal shutoff is a faulty thermistor, a variable resistor that adapts to temperature. Your printer’s controller monitors the current in the thermistor circuit, and if it reaches a certain point, it interprets it as an overheat.
Most 3D printers have two thermistors, one in the build plate (assuming it is heated) and one in the hotend. The “hotend” is the part of the extruder that heats up to melt the filament. The firmware of most 3D printers reports a thermistor glitch as a “MINETEMP” error.
The most likely cause of a thermistor issue is a break somewhere in the circuit. Unfortunately, there is not much to prevent this other than being very careful with working around the wires.
If there is a break in the circuit, it can probably be soldered. If the thermistor itself is faulty, it has to be replaced.
Before attempting to solve a thermistor error yourself, please consult with your print’s manual or other literature on the manufacturer’s website.
Filament Problems
It would be best not to leave a 3D printer unattended because something may go wrong with the filament. Your filament could run out, grind against the frame, or snap.
Depleted Filament
One of the most common issues in 3D printing is running out of filament. It isn’t easy to gauge how much filament is left on the spool. 3D printers are equipped with sensors that will automatically stop a print when the filament is depleted, but most do not.
There is at least a way to tell how much is needed for a particular job. Your slicer program should have a box where it lists the amount of filament required.
You can estimate how much filament is left on a spool using a postage scale and some math.
- Weigh a depleted spool.
- Cut off a meter/yard of filament and weigh it.
- Weigh your partial spool
- Subtract the weight of the depleted spool from your partial spool to get the weight of the remaining filament.
- Divide the weight of the remaining filament by the weight of the meter.yard from earlier. The result should approximate the length of filament left on your spool.
Grinding Filament
You have to be careful with how you run your filament from the spool to the extruder. If the filament rubs up against the printer’s frame or other parts, it can be gradually damaged. A damaged filament can jam in the extruder and eventually snap.
Most commercially available 3D printers mount filament spools so that the filament will not rub against anything. But some build-yourself 3D printer kits might not. If you build your 3D printer, make sure to run the filament to not rub against anything.
Snapped Filament
Even if the filament doesn’t grind against anything, it can still snap. Sometimes this will be due to mechanical stress, but usually, it is because of weakness or poor quality.
The key to preserving the strength of 3D printing filament is proper storage. Most filaments are made of mildly hydrophilic (water absorbing) polymers that will gradually absorb ambient moisture from the air. Moist is weaker than properly stored dry filament and is more prone to stringing.
You should store filament in an airtight container with a desiccant (drying) agent inside for the best printing results. A common desiccant is the silica gel packs included in most sealed consumer goods. Such packs are available on Amazon for pennies per gram.
Nozzle Clog
Another reason a 3D printer may stop mid-job is a clogged nozzle. The nozzle is the (usually) metal part of the extruder that places molten plastic.
A partially clogged nozzle will have an inconsistent flow of molten filament. A clogged nozzle will have no flow of molten filament.
There are five common causes for a clogged nozzle:
- Low hot end temperature setting
- Nozzle sitting too close to the built plate
- Dust or other debris caught in the hot end
- Improperly stored filament swollen with absorbed moisture
- Poor quality filament with an inconsistent diameter
The most common cause of nozzle clogging is debris caught in the hot end. That can be avoided with proper maintenance and cleaning. A low-temperature setting can be avoided by following the manufacturer’s guidelines.
The proper nozzle starting height for your printer will be in its manufacture manual or other literature.
How To Fix a Nozzle Clog
A partially clogged nozzle can be fixed with either the “cold pull method” or cleaning filament. The “cold pull method” is where you feed filament through the extruder at room temperature. It is a “brute force” method of cleaning your printer’s nozzle.
Cleaning filament is a special type made of proprietary uncolored plastic that works to dislodge material stuck in the nozzle. Cleaning filament typically costs around $20 for a few meters of filament.
Totally clogged nozzles typically are not worth repairing. Most nozzles are made of either brass or steel and cost less than $1 to replace.
Power Failure
The local power grid could fail at any time. It is a good idea to run your printer off of a combination surge protector and a backup battery. A good backup should provide enough power to either finish a small print or give you time to pause the job properly.
What if There Is a Power Failure During a 3D Print?
Most 3D printers automatically record their progress print jobs as they go. Once power is restored, the job can be resumed as if it was paused. But if for some reason, your 3D printer fails to do so, you can resume the print job with some additional steps.
Warning: this procedure requires doing some math!
- Fix the incomplete object in place with tape.
- Measure the height of the incomplete print as precisely as possible.
- Divide the measured height by the layer thickness.
- Edit the part file in your slicer program.
- Restart the print job.
- Post-processing.
Fix the Incomplete Object in Place With Tape.
The incomplete object may delaminate from the print bed. If your 3D printer loses power during a job, you should secure it in place with some tape. We recommend either scotch or painter’s tape, as they are inexpensive and do not leave residue behind.
Be careful not to burn yourself.
Measure the Height of the Incomplete Print
The key to “resuming” your print job is to start a new partial job on top of the incomplete object. Measure the height of the incomplete object from the print bed as precisely as possible. It is best to use a decimal ruler or a pair of calipers.
Use the same measurement system as your slicer program. If your slicer uses metric, measure the incomplete print in metric.
Divide the Measured Height by the Layer Thickness
Using the black art of math, you have to determine the printer’s layer when the power failed.
In your slicer program, look for layer thickness. Divide the height of the incomplete print by the layer thickness. The result will be the last layer printed.
Use this formula:
HeightLayer Thickness= Last Layer
The result should be a whole number.
If the printer stopped partway through the last layer, you could remove the partial layer with medium-grit sandpaper.
Edit the Part File in Your Slicer Program
Now return to your slicer program. Edit the settings to begin at the layer after the last one printed. If your print stopped at layer 233, tell the slicer to start at layer 234.
Make sure the slicer is set up to print in the same place as the incomplete print and the unfinished object is still correctly aligned. Then generate your g-code and hope for the best.
“Restart” the Print Job
Enter the g-code for the “resumed” job into your printer, start the printer and cross your fingers.
Post Processing
If everything works out, your printer should print the remainder of your object on top of the incomplete object with no issue. There may be some aesthetic imperfections, stringing, or smudges, which can be removed with basic post-processing.
- Written by:
- Ben
- Last updated:
- 11/23/2023
About Ben
I started 3D printing since 2013 and have learned a lot since then. Because of this I want to share my knowledge of what I have learned in the past years with the community. Currently I own 2 Bambulab X1 Carbon, Prusa SL1S and a Prusa MK3S+. Hope you learn something from my blog after my years of experience in 3D printing.