PETG is one of the most versatile 3D printing materials; however, as anyone that has used it can attest, it’s not immune from warping. Warping can ruin a good print, making it one of the most annoying problems you have to deal with as a 3D printer. Fortunately, there are remedies to this problem.
Here are 12 tips to stop PETG plastic from warping:
- Print on a heated bed.
- Work inside an enclosed print chamber.
- Control the temperature in the printing room.
- Tweak the filament cooling system.
- Spray the print bed with hair spray.
- Use a PVA glue stick on the print bed.
- Line the print bed with sticky tape.
- Tweak the Z offset.
- Print at a slower speed.
- Make a skirt or brim in the slicer.
- Add a raft to the printing bed.
- Place mouse ears on the printing bed.
The rest of the article will go into more detail on each of the above steps. Choose the options that are best applicable to you to avoid ending up with a warped 3D print ever again. Watch out for some product recommendations (all from Amazon.com).
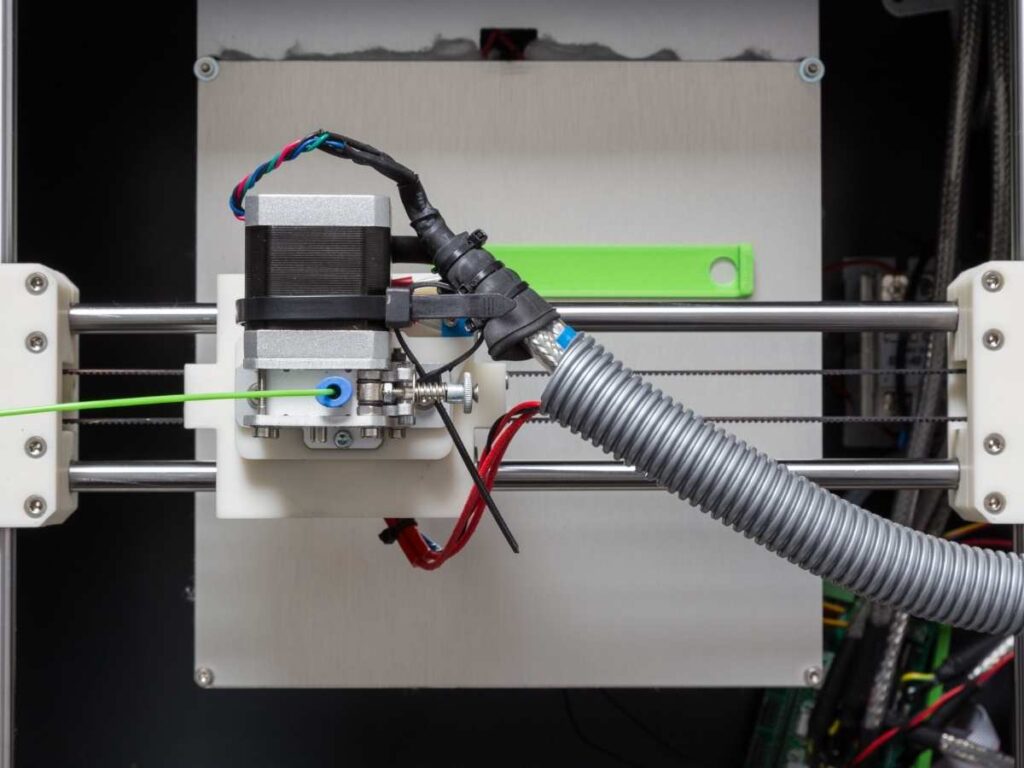
1. Print on a Heated Bed
Printing on a heated bed helps maintain uniformity in the model’s temperature. A heated build plate will also improve material adhesion to the bed, which is important to prevent PETG warping. The right temperature to use is the one recommended by your filament manufacturer.
A standard heated bed connects to your printer and remains at a specific temperature. You can find these in any 3D printing shop, and there are many models to choose from.
The RICHOOSE Official Ender 3 V2 Heated Bed and the SIMAX3D Aluminum Heated Bed are two good examples you can look at. They’re both easy to install, and you can be sure of stable performance from both. However, the SIMAX3D is more versatile, while the RICHOOSE model is for Ender 3 printers only.
Go for a print bed that’s compatible with your printer, and don’t forget to stick to the recommended print bed temperature recommended by the filament manufacturer.
2. Work Inside an Enclosed Print Chamber
Working in an enclosed print chamber ensures you can maintain a constant ambient temperature for the duration of the printing process. Print chambers are prefabricated designs made to fit directly over your printer. With the setup, the temperature around the print won’t fluctuate a great deal.
The perfect print chamber has to fit securely and without any gaps. You should only start your printing after covering the printer. With a constant temperature inside the enclosure, the risk of warping is significantly reduced if not eliminated.
You can knock together a makeshift option using packing boxes or cardboard if you don’t have an enclosed print chamber. The idea is to create a sizable enclosure that can maintain the temperature without impeding your printer’s moving parts. You can find more DIY enclosed print chambers in this article.
3. Control the Temperature in the Printing Room
You can control the temperature in the room by closing windows and doors—especially those around the printer. This approach is the best way to ensure a burst of cold air won’t suddenly hit your 3D print.
Circulating air or drafts can significantly change the temperature in the room and, by extension, your print filaments. Turn off air conditioners and fans to keep the temperature in the room constant.
An airtight room is unrealistic as you need to breathe while working, but ensuring that the printer is working in a corner where drafts can’t reach it can help you prevent warping.
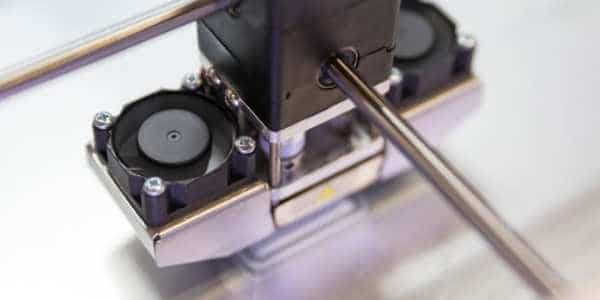
4. Tweak the Filament Cooling System
Lowering or completely turning off the cooling fans directed at your filament can help ensure even temperatures for your model, keeping it flat on the print bed.
You should consider lowering or switching off the fans for the first four layers. After you’ve established the perfect foundation, you can turn your fans back on or return them to the standard speed to complete the rest of the print.
While using this approach, you need to strike the right balance because you still need to fan to keep your filament cool to reduce stringing and ensure better bridging overall. You’ll also need the cooling system for your melted PETG to return to solid quickly enough to deliver the shape you were aiming for.

5. Spray the Print Bed With Hair Spray
Hair spray works here because it helps to establish a decent grip for most kinds of PETG. Alternatively, you can use a formula specially designed for 3D printing, such as the Aprintapro Printastick. You can apply the formula in seconds, and you don’t have to worry about any odors. Removing it is also straightforward.
Whichever option you choose, you need to ensure you apply it correctly. Hold the bottle at least six inches away from the print bed while spraying it. Move the nozzle around quickly to coat the surface of the print bed in a thin layer. The spray’s stickiness will help prevent warping and improve filament grip.
6. Use PVA Glue Stick on the Print Bed
A standard PVA glue stick also works well when looking for a material that can help your filament stick to the plate and avoid warping. A product like the Magigoo 3D Printing Adhesive is a good option here. It allows you to apply an even, thin layer across your build plate.
It also doesn’t have any color, so there’s no risk of changing your print color or contaminating parts of it.
Remember to avoid applying too much glue, or the print won’t adhere to it. You also have to clean the residue between prints using a clean damp cloth.
7. Line the Print Bed With Sticky Tape
Lining the print bed with sticky tape is another warping-prevention solution that’s easy to work with.
All you need to do is peel off sticky tape strips (painter’s tape) and apply the sticky side down over the print bed. Be sure to properly align the edges of the strips to ensure they won’t overlap and cause raised surfaces. You also need to line the entire surface to get the best results.
After printing, remove the tape and wipe off any residue using a clean damp cloth.
8. Tweak the Z Offset
The Z offset is the distance between your 3D printer bed and the hot end. You can adjust it to make sure the print bed is level.
You can do this by sliding a sheet of paper between the print bed and the hot end and then adjusting the height of the hot end until it’s now barely touching the paper. You need to ensure the right balance because the filaments will warp and stretch if it’s too high. Too close, and it’ll squish.
9. Print at a Slower Speed
Printing at a slower speed is a good way to solve some common printing problems, including warping. Open your printer’s setting and reduce the print speed to 50%. You’ll also need to reduce the nozzle temperature to 50% to ensure uniformity. Forgetting to reduce the nozzle speed will lead to new problems such as melting or warping the plastic.
10. Make a Skirt or Brim in the Slicer
A skirt is a layer of material laid around the 3D print, and a brim is a few layers of outline attached to the edge of the base. It gives your model a wider bottom area, enhancing the build surface’s grip.
If you choose to go with a brim, you can tweak your Z offset to ensure it’s touching the surface of your print bed. Create a flat layer on the print bed and then print on top of the base layer to help reduce the risk of warping.
Once printing is done, you can get rid of the brim. You can make a brim on the print bed by activating that option from your printer menu.

11. Add a Raft to the Printing Bed
A raft is a structure that can increase the size of your 3D printed model’s base. It works like a brim, but it has a wider base, covering the bottom area of the base of your 3D print. The result is also similar to what you’d get from using a brim. However, it’s easier to pull off from the 3D model.
12. Place Mouse Ears on the Printing Bed
Mouse ears are small discs you can print under your model to improve bed adhesion around its corners. These discs are typically two layers high. You should place them in your slicer’s build plate, ensuring the barest of touches. With that type of placement, removing the model after your print job is done should be easier overall.
You can draw your own mouse ears in CAD or download ready-made models from sources such as this one.
What Is PETG Plastic Warping?
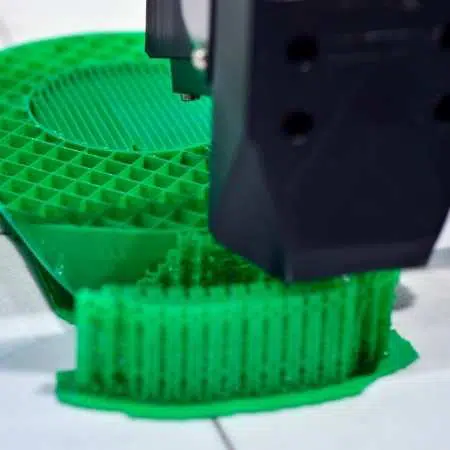
PETG plastic warping occurs when a part (or some parts) of the material) starts to curl upwards as you work. It’s a problem that’s typically caused by excessive temperature variations between multiple layers of plastic.
Such variations lead to tension within the model, and with excessive tension, the lower layer will start to lift or drag, causing a warp.
How Warping Occurs in PETG Plastic
PETG filament is a material that can melt and cool without losing its inherent mechanical properties. In 3D printing, the material is heated past its melting point. This allows it to be expelled onto a printing build plate. In the melted state, thermoplastics expand, returning to the shrunken form after cooling down and returning to a solid.
The transition from melted to solid-state triggers some movement in the expelled plastic, making it the root of 3D print warping. During expulsion, the colder layers of plastic will keep tugging at the hotter layers as they contract. If the scenario plays out when the hotter layer is under, the colder one, the 3D printed object will curl upwards instead of staying on the plate.
Warping can play out at any point in the printing process, which means it can ruin a great print job that is almost finished.
You can avoid the situation by ensuring that the entire layer of the 3D-printed model remains at the same temperature at all times. Achieving this is impossible; therefore, you have to take steps to even out the temperature as much as possible. The steps we’ve covered above are designed to help the model stay on the build surface.
Other Tips To Ensure the Best PETG Print Quality
- Set your nozzle height properly and adjust the print bed. One of the surest ways to improve your 3D print quality is to make sure the bed is leveled and the nozzle distance is properly set. To check if you’ve properly positioned the nozzle, slide a piece of paper under it. It should go underneath the nozzle without being forced to do so.
- Keep an eye on your nozzle temperature. If it’s too hot, you’ll find filament strings between the spaced parts.
- Switch building plates to generate better effects. If you want a matte finish, you should use a polycarbonate sheet or painter’s tape on the plate. For a smooth finish, go for Kapton tape or glass.
- Experiment a bit. Sometimes, the best way to get the cleanest result is to create a mock model first. Apply all or some of the tips we’ve covered here to see if you succeeded at preventing warping and getting the surface finish you intended. If the approaches adopted work, you can implement them on the main project.
- Keep your printer adequately maintained. For example, the rails have to be cleaned regularly and oiled. You also have to watch for weaknesses in the frames. Tighten any loose bolts and keep your printer’s firmware up to date.
- Handle the PETG carefully. Thermoplastics can absorb water from the air, so you need to pay attention to where they are stored. If you suspect that the filament has been exposed to excessive moisture, dry it out in the oven at low temperatures before use.
- Written by:
- Ben
- Last updated:
- 11/19/2023
About Ben
I started 3D printing since 2013 and have learned a lot since then. Because of this I want to share my knowledge of what I have learned in the past years with the community. Currently I own 2 Bambulab X1 Carbon, Prusa SL1S and a Prusa MK3S+. Hope you learn something from my blog after my years of experience in 3D printing.